Overview
Netlify DNS: Netlify offers its own DNS service specifically designed to integrate seamlessly with sites deployed on Netlify.
External DNS: With External DNS, you keep your DNS records with your existing provider or registrar (e.g. domain registrars like GoDaddy, Namecheap, etc.).
Benefits
Netlify DNS:
- Wildcard SSL certificates that automatically cover all subdomains.
- Branch deploys with custom subdomains for each branch.
- Standalone subdomain support (you can delegate just docs.example.com without bringing over example.com).
- Custom subdomains for preview URLs.
External DNS:
- Better if you have many existing DNS records, as Netlify doesn’t allow inbound DNS zone transfers.
- Simpler if you already have complex DNS configurations.
- You can keep all DNS management in one place if you prefer.
How to Configure
Netlify DNS:
Option 1: For a domain already added to your site
- Go to your site’s dashboard, then select domain management from the left sidebar.
- Next to your domain, select Options, then Set up Netlify DNS.
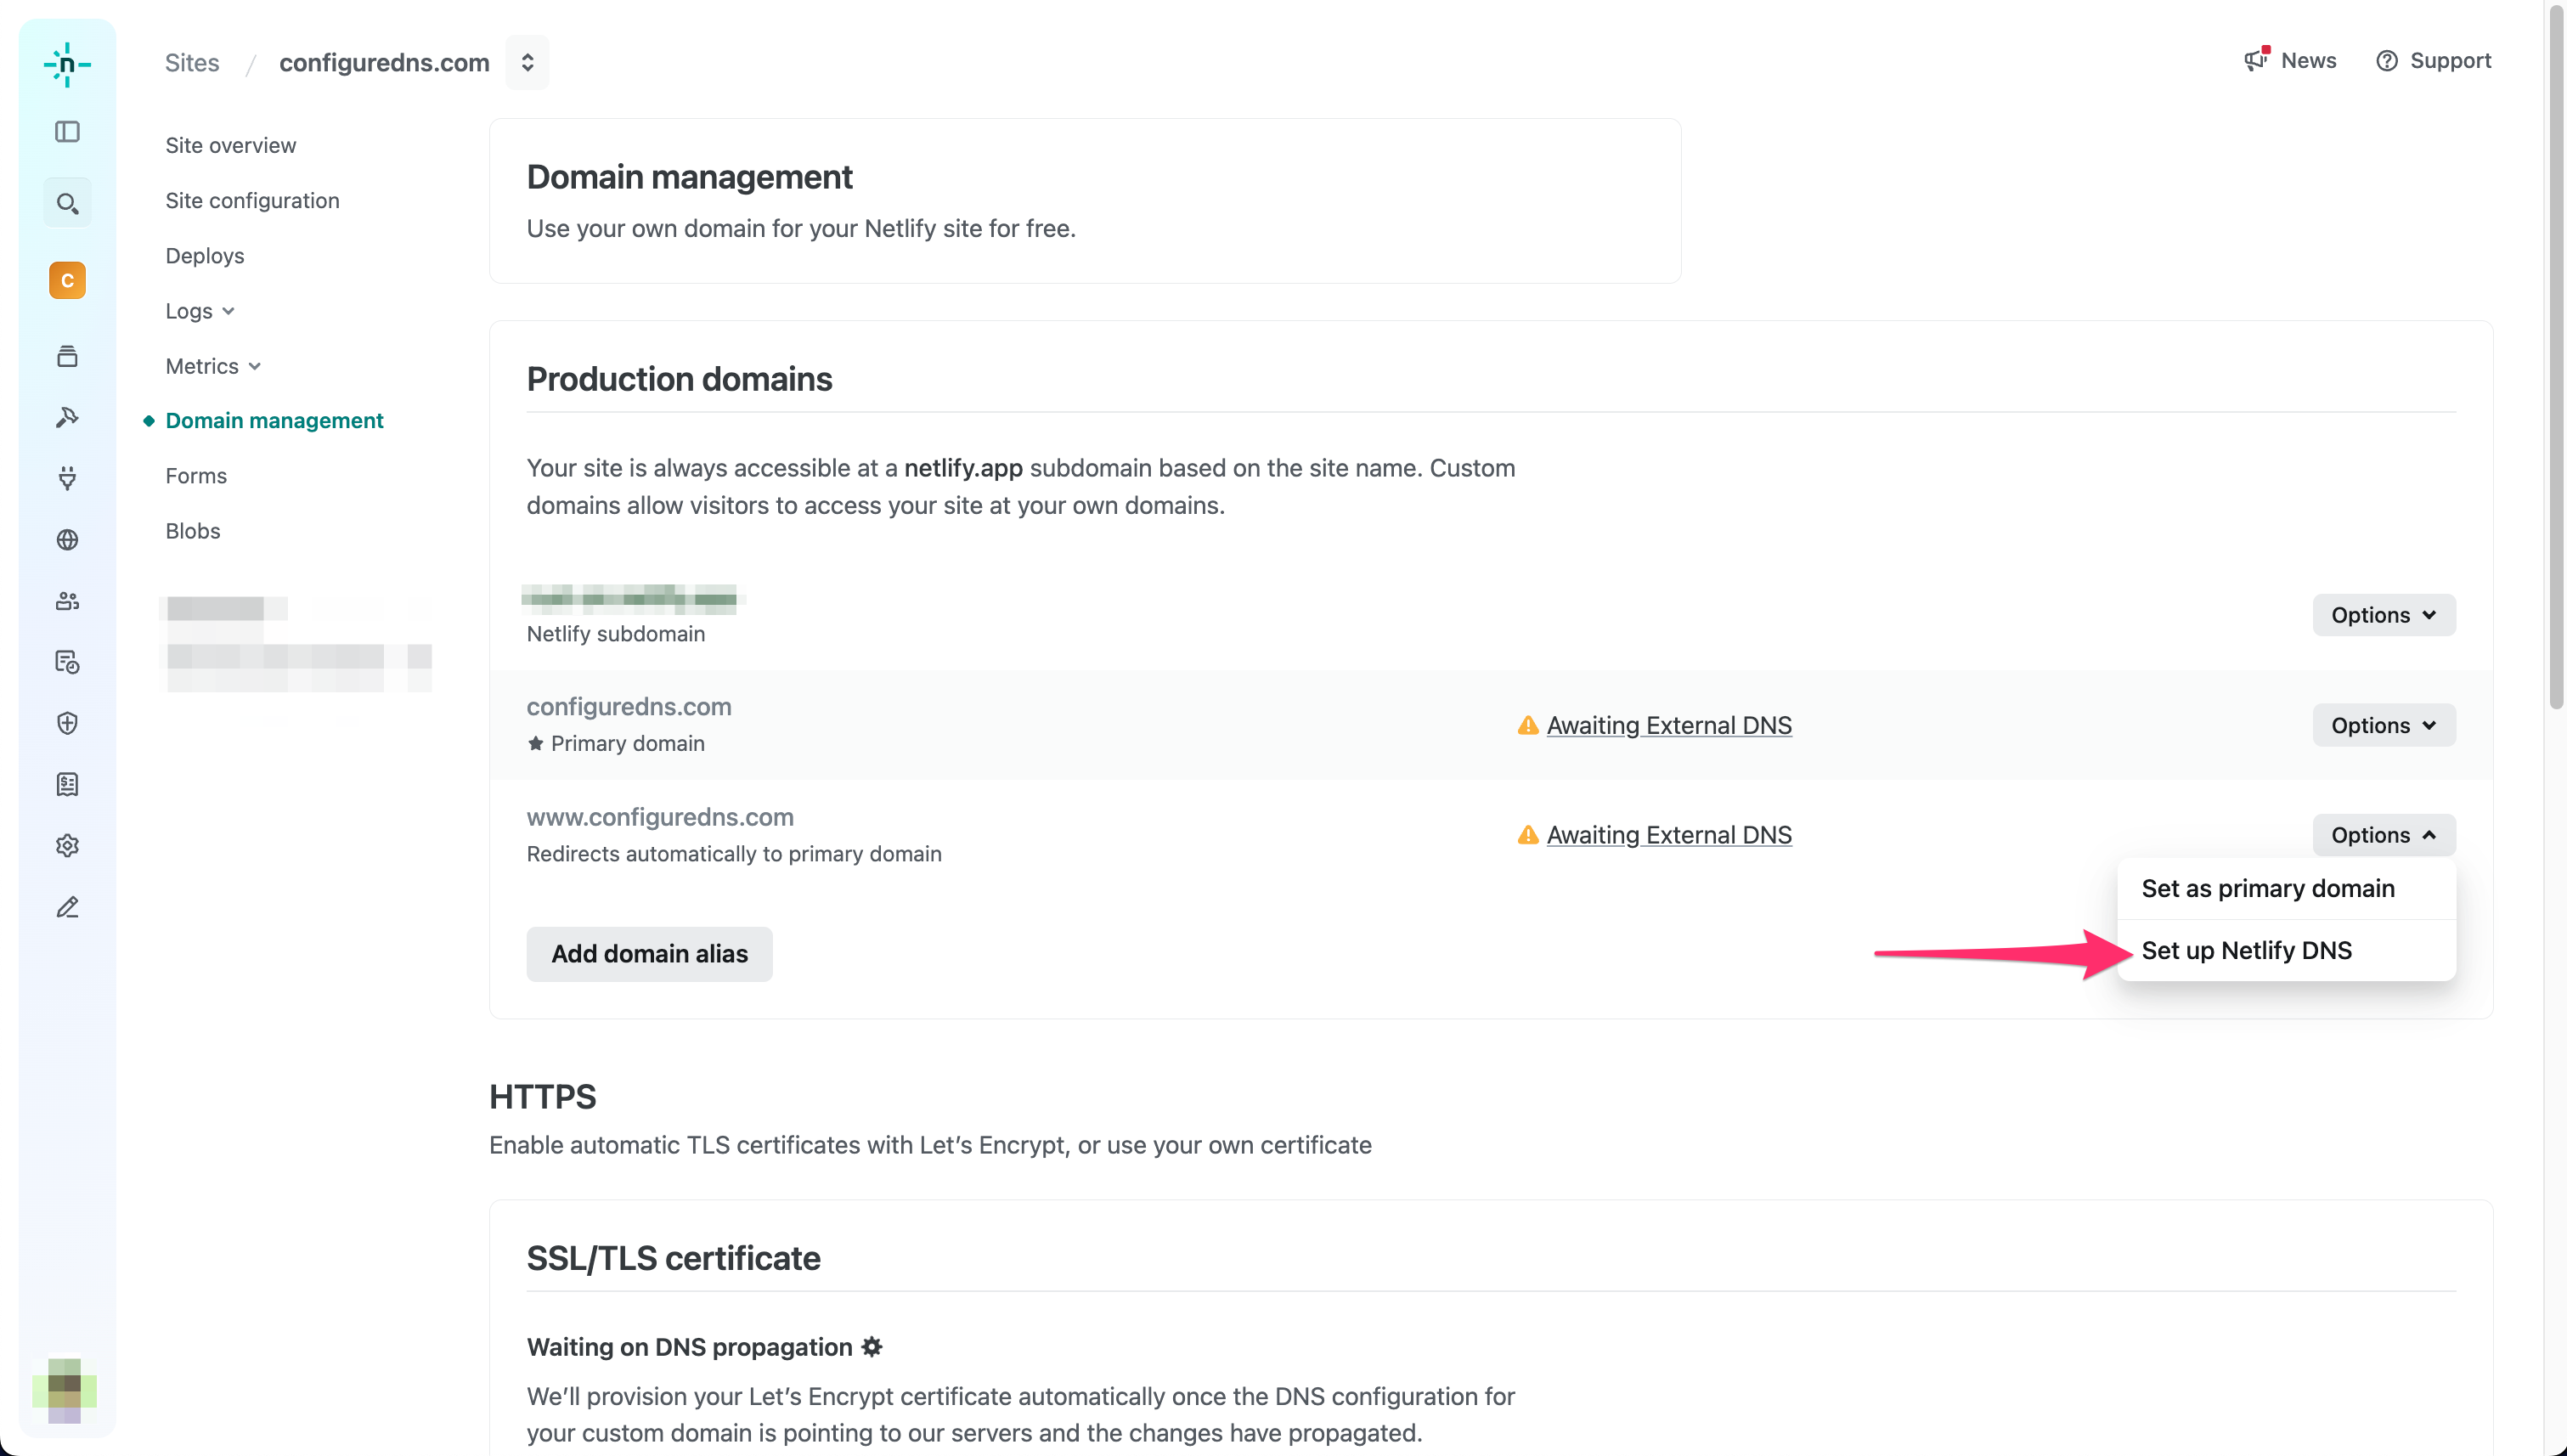
- Follow the prompts to finish setting up Netlify DNS.


- Make note of the four Netlify nameservers listed in the Name servers panel.


- Log in to your domain registrar and update the nameservers to the ones provided by Netlify.
- Wait for the changes to propagate (can take up to 24 hours).
External DNS:
Step 1: Add your domain to Netlify
- Go to your Site Overview or Site dashboard.
- Select Domain management from the left sidebar.
- Choose Add a domain, then Add a domain you already own.
- Enter your domain and follow the setup prompts.


Assign a domain to your site or app
Step 2: Configure DNS records at your provider
For a subdomain (like www.example.com):
- Create a CNAME record at your DNS provider.
- Set the host/name to your subdomain (e.g., “www”).
- Point it to your Netlify site URL (e.g., yoursite.netlify.app).
For an apex domain (like example.com):
Option 1 (Recommended) - If your DNS provider supports ALIAS, ANAME, or flattened CNAME records:
- Create an ALIAS, ANAME, or flattened CNAME record.
- Set the host to @ or leave empty (depends on provider).
- Point it to apex-loadbalancer.netlify.com.
Option 2 (Fallback) - If your provider doesn’t support those record types:
- Create an A record.
- Set the host to @ or leave empty (depends on provider).
- Point it to Netlify’s load balancer IP:
75.2.60.5
Configure external DNS for a custom domain
| Type | Name | Value |
|---|---|---|
| A | @ | 75.2.60.5 |
| CNAME | www | your-site.netlify.app |
Note that if you have sub-domains like www, app, or blog, you have to add a CNAME.
Step 3: Wait for DNS propagation
DNS changes can take up to 48 hours to propagate globally. You can check the status by selecting Awaiting External DNS next to your domain in Netlify’s Domain management section for customized instructions.
Important Notes
- You should use either External DNS or Netlify DNS, not both simultaneously. Using both can cause issues with SSL certificate provisioning.
- If switching to Netlify DNS from another provider, you’ll need to copy all existing DNS records to Netlify before changing the nameservers.
- DNS changes can take up to 48 hours to propagate globally.