Exercise to display on I2C SSD1327 grayscale OLED with Arduino Nano RP2040
Connect/CircuitPython 7.3.2.

CircuitPython Libraries is needed, visit https://circuitpython.org/libraries to download.
The default I2C pins assigned for Arduino Nano RP2040 Connect/CircuitPython are:
SDA - A4
SCL - A5
The I2C address of my no-brand SSD1327 OLED is 0x3C.
cpyNrp2040_i2c_test.py, I2C test code to I2C pins and address.
import board

i2c = board.I2C()

print("SDA :", board.SDA)
print("SCL :", board.SCL)

while not i2c.try_lock():
    pass

print([hex(x) for x in i2c.scan()])
i2c.unlock()
cpyNrp2040_ssd1327_ani.py
"""
Arduino Nano RP2040 Connect/CircuitPython
128x128 I2C ssd1327 OLED support grayscale
- with something animation.
CircuitPython lib need,
have to be copied to CircutPytho device's /lib:
- adafruit_ssd1327.mpy
- adafruit_display_text folder
- adafruit_display_shapes folder
"""
import time
import board
import displayio
import adafruit_ssd1327
import terminalio
from adafruit_display_text import label
from adafruit_display_shapes.roundrect import RoundRect
from adafruit_display_shapes.rect import Rect
import sys, os
displayio.release_displays()
# print system info
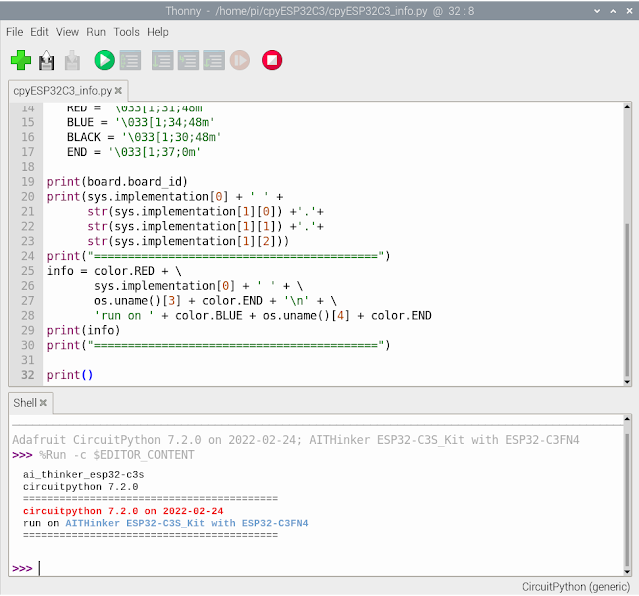
print(board.board_id)
print(sys.implementation[0] + ' ' +
str(sys.implementation[1][0]) +'.'+
str(sys.implementation[1][1]) +'.'+
str(sys.implementation[1][2]))
print("=====================================")
info = sys.implementation[0] + ' ' + \
os.uname()[3] + '\n' + \
'run on ' + os.uname()[4]
print(info)
print("=====================================")
print(adafruit_ssd1327.__name__,
adafruit_ssd1327.__version__)
# Use for I2C
i2c = board.I2C()
#display_bus = displayio.I2CDisplay(i2c, device_address=0x3D)
display_bus = displayio.I2CDisplay(i2c, device_address=0x3C)
display_width = display_height = 128
time.sleep(1)
display = adafruit_ssd1327.SSD1327(display_bus,
width=display_width,
height=display_height)
print()
print(display)
print(display.width,"x", display.height)
print()
g = displayio.Group()
color_count = 128
pattern = displayio.Bitmap(display_width,
display_height,
color_count)
palette = displayio.Palette(color_count)
t = displayio.TileGrid(pattern, pixel_shader=palette)
pattern.fill(color_count-1)
#init palette
for i in range(color_count):
component = i * 255 // (color_count - 1)
#print(component)
palette[i] = component << 16 | component << 8 | component
"""
print(i, ' - ' ,
component,":",
hex(component << 16),
hex(component << 8),
hex(component))
"""
g.append(t)
display.show(g)
time.sleep(1)
for i in range(color_count):
for z in range(i+1):
pattern[z, 0] = i
pattern[z, i] = i
pattern[0, z] = i
pattern[i, z] = i
#for y in range(i+1):
# pattern[0, y] = i
# pattern[i, y] = i
#time.sleep(0.2)
time.sleep(1)
#================================================
#reverse palette
for i in range(color_count):
component = i * 255 // (color_count - 1)
palette[color_count-1-i] = (
component << 16 | component << 8 | component)
time.sleep(3)
#re-reverse palette
for i in range(color_count):
component = i * 255 // (color_count - 1)
palette[i] = (
component << 16 | component << 8 | component)
time.sleep(1)
#================================================
#prepare to animate somethin
group_ani = displayio.Group(scale=1)
group_ani.x = 0
group_ani.y = 0
label_ani = label.Label(terminalio.FONT,
text=" hello ",
color=0xFFFFFF)
label_ani.anchor_point = (0.0, 0.0)
label_ani.anchored_position = (0, 0)
label_ani_width = label_ani.bounding_box[2]
label_ani_height = label_ani.bounding_box[3]
shape_ani = RoundRect(x=0, y=0,
width=label_ani_width,
height=label_ani_height,
r=6,
fill=0x000000,
outline=0xFFFFFF, stroke=1)
group_ani.append(shape_ani)
group_ani.append(label_ani)
g.append(group_ani)
#================================================
#prepare to somethin on fixed position
group_fix = displayio.Group(scale=2)
group_fix.x = 70
group_fix.y = 20
label_fix = label.Label(terminalio.FONT,
text=":)",
color=0xFFFFFF)
label_fix.anchor_point = (0.0, 0.0)
label_fix.anchored_position = (0, 0)
label_fix_width = label_fix.bounding_box[2]
label_fix_height = label_fix.bounding_box[3]
shape_fix = Rect(x=0, y=0,
width=label_fix_width,
height=label_fix_height,
fill=0x000000,
outline=0xFFFFFF, stroke=1)
group_fix.append(shape_fix)
group_fix.append(label_fix)
g.append(group_fix)
#=== loop of animation ===
aniXMove = +1
aniYMove = +1
aniXLim = display_width - 1 - label_ani_width
aniYLim = display_height - 1 - label_ani_height
NxAniMs = time.monotonic() + 3
while True:
time.sleep(0.05)
if time.monotonic() > NxAniMs:
NxAniMs = time.monotonic() + 1
#Move Temperate group
x = group_ani.x + aniXMove
group_ani.x = x
if aniXMove > 0:
if x >= aniXLim:
aniXMove = -1
else:
if x <= 0:
aniXMove = +1
y = group_ani.y + aniYMove
group_ani.y = y
if aniYMove > 0:
if y > aniYLim:
aniYMove = -1
else:
if y <= 0:
aniYMove = +1
#================================================
print("~ bye ~")
cpyNrp2040_ssd1327_ani2.py
"""
Arduino Nano RP2040 Connect/CircuitPython
128x128 I2C ssd1327 OLED support grayscale
- Change background bitmap by changing palette

CircuitPython lib need,
have to be copied to CircutPytho device's /lib:
- adafruit_ssd1327.mpy
- adafruit_display_text folder
- adafruit_display_shapes folder
"""

import time
import board
import displayio
import adafruit_ssd1327
import terminalio
from adafruit_display_text import label
from adafruit_display_shapes.circle import Circle

import sys, os

displayio.release_displays()

# print system info
print(board.board_id)
print(sys.implementation[0] + ' ' +
      str(sys.implementation[1][0]) +'.'+
      str(sys.implementation[1][1]) +'.'+
      str(sys.implementation[1][2]))
print("=====================================")
info = sys.implementation[0] + ' ' + \
       os.uname()[3] + '\n' + \
       'run on ' + os.uname()[4]
print(info)
print("=====================================")
print(adafruit_ssd1327.__name__,
      adafruit_ssd1327.__version__)

# Use for I2C
i2c = board.I2C()
#display_bus = displayio.I2CDisplay(i2c, device_address=0x3D)
display_bus = displayio.I2CDisplay(i2c, device_address=0x3C)

display_width = display_height = 128

time.sleep(1)
display = adafruit_ssd1327.SSD1327(display_bus,
                                   width=display_width,
                                   height=display_height)

print()
print(display)
print(display.width,"x", display.height)
print()

g = displayio.Group()

# I define the OLED in 16 grayscale,
# hardcode defined in a list (instead of by calculating),
# such that you can manual set according to your need.
grayscale = [0x00, 0x10, 0x20, 0x30,
             0x40, 0x50, 0x60, 0x70,
             0x80, 0x90, 0xA0, 0xB0,
             0xC0, 0xD0, 0xE0, 0xF0]
grayscale_count = len(grayscale)
#print([hex(g) for g in grayscale])
#print(grayscale_count)

#back ground have on color only
bg_color_count = 1
bg_bitmap = displayio.Bitmap(display_width,
                           display_height,
                           bg_color_count)
bg_palette = displayio.Palette(bg_color_count)
t = displayio.TileGrid(bg_bitmap,
                       pixel_shader=bg_palette)

bg_bitmap.fill(0)

print()
print("default bg_palette without init")
print([hex(p) for p in bg_palette])
print()

#================================================
#prepare to display grayscale
group_gray = displayio.Group(scale=1)
group_gray.x = 0
group_gray.y = 0
label_gray = label.Label(terminalio.FONT,
                        text="    ",
                        color=0xB0B0B0)
label_gray.anchor_point = (0.0, 0.0)
label_gray.anchored_position = (10, 10)
label_gray_width = label_gray.bounding_box[2]
label_gray_height = label_gray.bounding_box[3]

shape_gray = Circle(x0=0,
                    y0=0,
                    r=80,
                    fill=0xFFFFFF,
                    outline=0x000000,
                    stroke=3)

group_gray.append(shape_gray)
group_gray.append(label_gray)

#====================================

g.append(t)
g.append(group_gray)

display.show(g)

for gs in grayscale:

    bg_palette[0] = (gs << 16
                     | gs << 8
                     | gs)

    # you can try to remove any elements
    # to check the effect.
    #bg_palette[0] = (0
    #                 | gs << 8
    #                 | 0)

    #print([hex(p) for p in bg_palette])
    label_gray.text = str(hex(bg_palette[0]))
    time.sleep(0.5)

time.sleep(1)

#================================================

print("~ bye ~")