Configuring Spring MVC with XML and Java Config
Last Updated :
27 Sep, 2024
Spring MVC (Model-View-Controller) is a web framework within the Spring Framework that enables the development of web applications following the MVC design pattern. It separates application logic into three components: Model, View, and Controller, making it easier to maintain, test, and scale.
Spring MVC configuration can be done using XML, Java config, or a combination of both. This article will show how to configure Spring MVC using both XML and Java-based configuration approaches.
Configure Spring MVC with XML and Java Config
In Spring MVC, configuration is necessary to handle incoming web requests, resolve views, and manage controllers. You can configure Spring MVC using either:
- XML-based configuration (traditional approach).
- Java-based configuration (modern, annotation-driven approach).
Both methods serve the same purpose, but the choice depends on the flexibility and maintainability requirements of the project.
XML-Based Configuration
XML-based configuration is the traditional way of configuring Spring applications. In this approach, beans such as controllers, view resolvers, and other necessary components are declared in XML files. Though verbose, XML provides a clear and declarative approach, making it ideal for legacy systems.
How It Works:
- DispatcherServlet is defined in
web.xml, mapping requests to a specific URL pattern (e.g., /). - A separate XML file (often named
dispatcher-servlet.xml) contains the bean definitions for:- Controllers (
@Controller classes). - View Resolvers (such as
InternalResourceViewResolver for JSPs). - Any other Spring beans required by the application.
- The
web.xml file initializes the DispatcherServlet, which reads from the XML file to know how to handle requests.
Example:
<!-- web.xml -->
<servlet>
    <servlet-name>dispatcher</servlet-name>
    <servlet-class>org.springframework.web.servlet.DispatcherServlet</servlet-class>
    <load-on-startup>1</load-on-startup>
</servlet>

<servlet-mapping>
    <servlet-name>dispatcher</servlet-name>
    <url-pattern>/</url-pattern>
</servlet-mapping>
In this configuration, DispatcherServlet is mapped to handle all incoming requests to the root URL (/). It loads the XML configuration, where beans like controllers and view resolvers are defined.
Example XML Configuration:
<!-- spring-servlet.xml -->
<beans xmlns="http://www.springframework.org/schema/beans"
       xmlns:xsi="http://www.w3.org/2001/XMLSchema-instance"
       xmlns:context="http://www.springframework.org/schema/context"
       xmlns:mvc="http://www.springframework.org/schema/mvc"
       xsi:schemaLocation="http://www.springframework.org/schema/beans
                           http://www.springframework.org/schema/beans/spring-beans.xsd
                           http://www.springframework.org/schema/context
                           http://www.springframework.org/schema/context/spring-context.xsd
                           http://www.springframework.org/schema/mvc
                           http://www.springframework.org/schema/mvc/spring-mvc.xsd">

    <!-- Enable annotation-based configuration -->
    <mvc:annotation-driven />

    <!-- Scan the base package for annotated components like @Controller -->
    <context:component-scan base-package="com.example" />

    <!-- View Resolver for resolving JSP files -->
    <bean class="org.springframework.web.servlet.view.InternalResourceViewResolver">
        <property name="prefix" value="/WEB-INF/views/" />
        <property name="suffix" value=".jsp" />
    </bean>

</beans>
Explanation:
<mvc:annotation-driven /> enables Spring MVC's annotation-based programming model.<context:component-scan> scans the specified package for components like @Controller.InternalResourceViewResolver is used to resolve JSP views located in /WEB-INF/views/.
Java-Based Configuration
Java-based configuration is a modern approach introduced in Spring 3.0, which eliminates the need for XML files by using annotations. With @Configuration, developers can configure Spring in plain Java classes, making the setup more concise and readable.
How It Works:
@EnableWebMvc enables Spring MVC features, such as controller and request mapping.@ComponentScan is used to scan the base packages for annotated components like @Controller.@Configuration classes are used to configure components like view resolvers, data sources, and more.DispatcherServlet can be registered programmatically using WebApplicationInitializer or AbstractAnnotationConfigDispatcherServletInitializer.
Example:
@Configuration
@EnableWebMvc
@ComponentScan(basePackages = "com.example")
public class WebConfig implements WebMvcConfigurer {

    @Bean
    public ViewResolver viewResolver() {
        InternalResourceViewResolver resolver = new InternalResourceViewResolver();
        resolver.setPrefix("/WEB-INF/views/");
        resolver.setSuffix(".jsp");
        return resolver;
    }
}
In this java-based configuration,
@EnableWebMvc enables Spring MVC functionalities.@ComponentScan scans for Spring components like @Controller in the specified package.viewResolver() configures the location of JSP files and their suffix.
Implementation: Configuring Spring MVC with XML and Java Config
Step 1: Create a New Maven Project
Create a new Maven project in IntelliJ IDEA with the following configuration:
- Name:
spring-mvc-config. - Build System: Maven.
Click on the Create button.

Project Structure
After successfully creating the project, the folder structure will look like the below image:

Step 2: Define spring-servlet.xml File
This file contains the Spring beans required for the MVC configuration.
XML
<beans xmlns="http://www.springframework.org/schema/beans"
       xmlns:xsi="http://www.w3.org/2001/XMLSchema-instance"
       xmlns:context="http://www.springframework.org/schema/context"
       xmlns:mvc="http://www.springframework.org/schema/mvc"
       xsi:schemaLocation="http://www.springframework.org/schema/beans
                           http://www.springframework.org/schema/beans/spring-beans.xsd
                           http://www.springframework.org/schema/context
                           http://www.springframework.org/schema/context/spring-context.xsd
                           http://www.springframework.org/schema/mvc
                           http://www.springframework.org/schema/mvc/spring-mvc.xsd">

    <!-- Enable annotation-based configuration -->
    <mvc:annotation-driven />

    <!-- Component scanning for controllers -->
    <context:component-scan base-package="com.gfg" />

    <!-- View Resolver -->
    <bean class="org.springframework.web.servlet.view.InternalResourceViewResolver">
        <property name="prefix" value="/WEB-INF/views/" />
        <property name="suffix" value=".jsp" />
    </bean>

</beans>
Step 3: Configure web.xml
The web.xml file defines the DispatcherServlet and maps it to the specific URL pattern.
XML
<web-app xmlns="http://xmlns.jcp.org/xml/ns/javaee"
         xmlns:xsi="http://www.w3.org/2001/XMLSchema-instance"
         xsi:schemaLocation="http://xmlns.jcp.org/xml/ns/javaee http://xmlns.jcp.org/xml/ns/javaee/web-app_3_1.xsd"
         version="3.1">

    <display-name>Spring MVC Config Example</display-name>

    <!-- Dispatcher Servlet -->
    <servlet>
        <servlet-name>dispatcher</servlet-name>
        <servlet-class>org.springframework.web.servlet.DispatcherServlet</servlet-class>
        <load-on-startup>1</load-on-startup>
    </servlet>

    <servlet-mapping>
        <servlet-name>dispatcher</servlet-name>
        <url-pattern>/</url-pattern>
    </servlet-mapping>

    <!-- Welcome File -->
    <welcome-file-list>
        <welcome-file>index.jsp</welcome-file>
    </welcome-file-list>

</web-app>
Step 4: Java Config for Spring MVC
We will now create the WebConfig.java, in this class we will configure the Spring MVC using the Java-based configuration as follows:
WebConfig.java:
Java
package com.example;

import org.springframework.context.annotation.ComponentScan;
import org.springframework.context.annotation.Configuration;
import org.springframework.web.servlet.config.annotation.EnableWebMvc;
import org.springframework.web.servlet.config.annotation.ViewResolverRegistry;
import org.springframework.web.servlet.config.annotation.WebMvcConfigurer;
import org.springframework.web.servlet.view.InternalResourceViewResolver;

@Configuration
@EnableWebMvc
@ComponentScan(basePackages = "com.example")
public class WebConfig implements WebMvcConfigurer {

    @Override
    public void configureViewResolvers(ViewResolverRegistry registry) {
        InternalResourceViewResolver resolver = new InternalResourceViewResolver();
        resolver.setPrefix("/WEB-INF/views/");
        resolver.setSuffix(".jsp");
        registry.viewResolver(resolver);
    }
}
@EnableWebMvc enables Spring MVC features.@ComponentScan scans for Spring components in com.example.configureViewResolvers() configures JSP view resolution.
Step 5: Controller Implementation
Create the HomeController class and this controller handles the request and returns appropriate view.
HomeController.java:
Java
package com.example;

import org.springframework.stereotype.Controller;
import org.springframework.web.bind.annotation.GetMapping;
import org.springframework.web.servlet.ModelAndView;

@Controller
public class HomeController {

    @GetMapping("/")
    public ModelAndView home() {
        // ModelAndView object holds both the view name and data to be passed to the view
        ModelAndView mav = new ModelAndView("home");
        // Adding data ("message") to be displayed on the view
        mav.addObject("message", "Welcome to Spring MVC with Java Config and XML Config!");
        return mav;
    }
}
@Controller marks this class as a Spring MVC controller.@GetMapping("/") maps the root URL to the home() method.ModelAndView combines the view (home.jsp) and the model data (message).
Step 6: Main Class
In Main class, add the spring configuration of the class.
Java
package com.gfg;

import org.springframework.boot.SpringApplication;
import org.springframework.boot.autoconfigure.SpringBootApplication;
import org.springframework.boot.web.servlet.support.SpringBootServletInitializer;
import org.springframework.context.annotation.ImportResource;

import javax.servlet.ServletContext;
import javax.servlet.ServletException;

@SpringBootApplication
@ImportResource("classpath:/spring-servlet.xml")
public class SpringMvcApplication extends SpringBootServletInitializer {

    public static void main(String[] args) {
        SpringApplication.run(SpringMvcApplication.class, args);
    }

    @Override
    public void onStartup(ServletContext servletContext) throws ServletException {

    }
}
- The @SpringBootApplication annotation can enables the Spring Boot's auto-configuration.
- The @ImportResource annotation can be used to load the XML configuration (i.e., spring-servlet.xml).
- This class makes it possible to run the Spring MVC project using the embedded Tomcat server.
Step 7: JSP View
Create home.jsp file that will display the message sent by the controller.
home.jsp:
HTML
<%@ taglib uri="http://java.sun.com/jsp/jstl/core" prefix="c" %>
<html>
<head>
    <title>Home Page</title>
</head>
<body>
<h1>${message}</h1>
</body>
</html>
pom.xml
XML
<?xml version="1.0" encoding="UTF-8"?>
<project xmlns="http://maven.apache.org/POM/4.0.0"
         xmlns:xsi="http://www.w3.org/2001/XMLSchema-instance"
         xsi:schemaLocation="http://maven.apache.org/POM/4.0.0 http://maven.apache.org/xsd/maven-4.0.0.xsd">
    <modelVersion>4.0.0</modelVersion>

    <groupId>com.gfg</groupId>
    <artifactId>spring-mvc-config</artifactId>
    <version>1.0-SNAPSHOT</version>

    <properties>
        <maven.compiler.source>17</maven.compiler.source>
        <maven.compiler.target>17</maven.compiler.target>
        <project.build.sourceEncoding>UTF-8</project.build.sourceEncoding>
    </properties>
    <dependencies>
        <!-- Spring MVC Dependency -->
        <dependency>
            <groupId>org.springframework</groupId>
            <artifactId>spring-webmvc</artifactId>
            <version>5.3.24</version>
        </dependency>

        <!-- Servlet API (provided scope as it is provided by the server) -->
        <dependency>
            <groupId>javax.servlet</groupId>
            <artifactId>javax.servlet-api</artifactId>
            <version>4.0.1</version>
            <scope>provided</scope>
        </dependency>

        <!-- https://mvnrepository.com/artifact/jstl/jstl -->
        <dependency>
            <groupId>jstl</groupId>
            <artifactId>jstl</artifactId>
            <version>1.2</version>
        </dependency>

        <!-- Spring Boot Starter for Web (includes embedded Tomcat) -->
        <dependency>
            <groupId>org.springframework.boot</groupId>
            <artifactId>spring-boot-starter-web</artifactId>
            <version>3.1.2</version>
        </dependency>

        <!-- Other dependencies (Spring WebMVC, JSTL, etc.) -->
        <dependency>
            <groupId>org.springframework</groupId>
            <artifactId>spring-webmvc</artifactId>
            <version>5.3.24</version>
        </dependency>

    </dependencies>

    <build>
        <finalName>spring-mvc-config</finalName>
        <plugins>
            <!-- Maven Compiler Plugin -->
            <plugin>
                <groupId>org.apache.maven.plugins</groupId>
                <artifactId>maven-compiler-plugin</artifactId>
                <version>3.8.1</version>
                <configuration>
                    <source>1.8</source>
                    <target>1.8</target>
                </configuration>
            </plugin>
        </plugins>
    </build>


</project>
Step 8: Run the Application
After the project completed, it will run and start at port 8080.
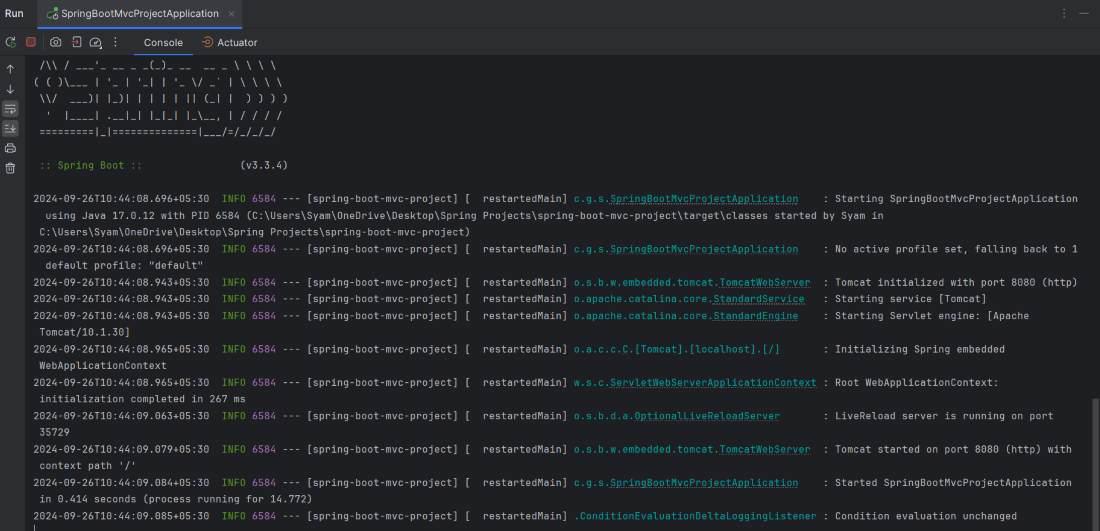
Step 9: Testing the Application
Open the below URL into the browser.
http://localhost:8080/
Output:

Conclusion
This article demonstrated how to configure a Spring MVC application using both XML and Java configuration approaches. While XML-based configuration is more verbose and often used in legacy systems, Java-based configuration provides a cleaner, more concise way to set up Spring MVC applications. You can use either approach or combine both to suit your project needs.
Similar Reads
Spring MVC using Java Based Configuration
Spring MVC framework enables the separation of modules, namely Model, View, and Controller, and seamlessly handles application integration. This enables the developer to create complex applications using plain Java classes. The model object can be passed between the view and the controller using map
3 min read
Dynamic Configuration Updates with Spring Cloud Config
In a microservices architecture, managing configuration properties across multiple services can become challenging, especially when these configurations need to be updated frequently. Spring Cloud Config provides a centralized configuration management solution, allowing you to manage external proper
6 min read
Managing Configuration for Microservices with Spring Cloud Config
Spring Cloud Config provides the centralized external configuration management system and it is designed to work well with modern microservices architectures. It is the part of larger Spring Config suite of the tools that aim to help the developers built the cloud-native applications. Spring Cloud C
4 min read
Spring @Configuration Annotation with Example
The @Configuration annotation in Spring is one of the most important annotations. It indicates that a class contains @Bean definition methods, which the Spring container can process to generate Spring Beans for use in the application. This annotation is part of the Spring Core framework. Let's under
4 min read
Using Native Configuration in Spring Cloud Config Server
Spring Cloud Config provides both server-side and client-side support for externalized configuration in distributed systems. The Config Server centralizes management of configuration properties for applications across various environments. By default, Spring Cloud Config uses Git for storage, but it
5 min read
Configuring Spring Boot Applications with Maven Profiles
In a software development environment, applications must often be configured differently for various environments such as development, testing, and production. Managing these configurations can be challenging, but Maven provides powerful features called profiles to handle this. Maven profiles allow
5 min read
Spring MVC JSTL Configuration
JavaServer Pages Tag Library (JSTL) is a set of tags that can be used for implementing some common operations such as looping, conditional formatting, and others. Here we will be discussing how to use the Maven build tool to add JSTL support to a Spring MVC application. also, you'll learn how to act
1 min read
Inject a Map from a YAML File With Spring
Spring Framework provides a powerful way to configure applications using external configuration files. YAML (YAML Ain't Markup Language) is a popular format for configuration files due to its readability and ability to represent complex data structures easily. In this article, we will explore how to
4 min read
Implementing Configuration Versioning with Spring Cloud Config
Configuration versioning is the critical aspect of maintaining and managing the configurations in the microservices architecture. It can allow the teams to track the changes, revert to previous versions and manage the configurations more efficiently, Spring Cloud Config can provide a powerful way to
5 min read
Spring MVC Application Without web.xml File
Spring MVC framework enables separation of modules namely Model, View, and Controller, and seamlessly handles the application integration. This enables the developer to create complex applications also using plain java classes. Here we will be creating and running Your First Spring MVC Application,
4 min read