Creating and Using DLL (Class Library) in C#
Last Updated :
04 Jan, 2023
A class library file is a collection of classes and namespaces in C# without any entry point method like Main. Once we create a class library file it can be used in the C# project and classes inside it can be used as required. Class Library makes it convenient to use functionalities by importing DLL inside the program rather than redefining everything. So, Let's make our own class library in C#.
Terminologies
Class Library: It is a package or file that contains different namespaces and class definitions that are used by other programs.
Steps to Create and Use DLL in Visual Studio
Step 1: Create a New Project in Visual Studio. Once You open visual studio it should open Create New Project OR You can click on the file and select the new project option. Select C# as language and then Select Class Library Option. Click Next.

Step 2: On the next screen configure your class library project name. Make sure you give a different name for the Solution. Then click next.

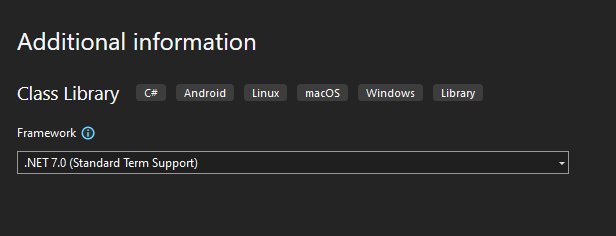
Step 3: On the next screen select the .NET version. I have selected 7.0. Then click create which will create a project.
Step 4: Once the Project is created a C# file will already be created with namespace as project name and class Class1. Let's add some code inside the class that will print something when the method sayHello() inside the class is called.

Step 5: After writing the code click on the build in the menu bar and click build geeksforgeeks.

Step 6: If everything is correct you should get build success in the output below the editor.

Step 7: Now the DLL file is created inside the project-folder/bin/Debug/net7.0 folder which can be used.
Step 8: Let's create a new project to use this DLL file. For the new project select Console App from the list and click next.

Step 9: Configure a new project with a name and give the same name for the solution as given for creating a Class library project OR just select the same folder for a solution.

Step 10: Once the project is created it should have a program.cs file opened. Type the Code inside the program.cs file. import the DLL file inside the program by putting "using geeksforgeeks" at the top. Now we can use Class1 inside our program. Call the sayHello() method by creating an object of Class1.

Step 11: Afterwards we have to add a reference of the DLL file to our project. For that in Solution Explorer select dependencies under our project name and right-click to select "Add Project reference".

Step 12: Now select our Class Library project name from the list. Click Ok. Now we can build our project.

Step 13: From the menu click build and select build "geeksforgeeksapp" or your console project name. You should see the build succeeded at the output.

Step 14: Once Build is succeeded right click on Class Library Project from Solution Explorer and select unload the project. Then click on run without debugging on the sub-menu bar at the top (play button).

Step 15: You should see a console window opened with say hello message printed.

Steps to Create DLL file with C# Compiler
Step 1: Create a new blank file inside your favorite editor and save it as a ".cs" file with the name you want for DLL. Add the Code to the file with namespace and class with any method. I have added the same method as above which prints "Hello From GeeksForGeeks".

Step 2: Open Command Prompt or Terminal where the CS file is saved. Compile the program with the CSC compiler and make sure you add the target file as a library which will generate a DLL file. If there is no error, then you should see a DLL file created inside a folder with the name as the filename.

Step 3: Now let's use this DLL. Create another file inside the same folder where DLL is located and save it as ".cs". Type your code to use the DLL. I have written the same code as above.

Step 4: Then save the file and compile it with CSC as follows. We have used /r to provide references for our DLL file.

Step 5: If no error compilation is successful and we can run our program type filename.exe to run the program. You should see the output printed.

Similar Reads
Rust - Creating a Library Rust is a multi-paradigm programming language like C++ syntax that was designed for performance and safety, especially for safe concurrency. Also, it is a compiled system programming language. In this article, we will see how to create libraries in Rust. Creating a Rust Library:Step 1: We start by c
1 min read
How Do I Create a Library in C? Libraries are a collection of code that can be used by other programs. They promote code reuse and modularity. In C, we can create our own libraries. In this article, we will learn how to create a library in C. Creating a Library in CIn C, there are multiple methods using which we can create a libra
3 min read
How to Create a Dynamic Library in C++? In C++, dynamic libraries also known as shared libraries are a powerful way to modularize your code. They allow the users to build libraries that can be loaded at runtime by multiple applications at once. This approach promotes code reuse, reduces code duplication, and simplifies maintenance of the
4 min read
How to Install a C# Class Library in Visual Studio? A C# library project is a separate project used to hold utility classes. So this might be the class that handles our database or might handle some communications with the network. In our case, we are going to create a math library that is a stand-in for some of those other cases. It is a single sour
3 min read
Encrypt and Decrypt Using Rijndael Key in C# To keep data secure and protected it is necessary to keep the data encrypted. As we know that in C# and in other languages too there are many ways for encrypting data. The Data Encryption Standard method used for encryption was not promising good security that led to the invention of a highly secure
7 min read
C# StringDictionary Class In C#, the StringDictionary class is the part of the System.Collections.Specialized namespace. It is a collection of key-value pairs where the keys are strings and values are objects. It is similar to a Hashtable. But it is specifically designed for use with string keys.Keys are always strings, and
5 min read
User-Defined Classes in MATLAB In this article, we will understand User-defined Classes in MATLAB. Object-Oriented Programming:The object-oriented program design involves: Identify the components of the system or application that you want to build.Analyzing and identifying patterns to determine what components are used repeatedly
3 min read
.NET Framework Class Library (FCL) The Framework Class Library or FCL provides the system functionality in the .NET Framework as it has various classes, data types, interfaces, etc. to perform multiple functions and build different types of applications such as desktop applications, web applications, mobile applications, etc. The Fra
3 min read
How to create a ListDictionary in C# ListDictionary() constructor is used to initialize a new empty instance of the ListDictionary class using the default comparer. ListDictionary is a specialized collection. It comes under the System.Collections.Specialized namespace. This type represents a non-generic dictionary type. It is implement
2 min read
Basics Operations of File and Directory in C# In this article, we are going to cover how to create, delete and rename directory and also how to delete and rename the file.  Creating a Directory We can create Directory using CreateDirectory() method present in the Directory class. csharp // C# program to create a directory using System; using
4 min read