Image Filtering Using Convolution in OpenCV
Last Updated :
16 Oct, 2021
Prerequisites: Basics of OpenCV, Basics of Convolution
In this article, filtering of images using convolution in OpenCV (Open Source Computer Vision) is discussed. In order to use the OpenCV library in Python, the following libraries should be installed as a prerequisite:
- Numpy library
- Matplotlib library
- OpenCV library
To install the following libraries, run the following commands in the command prompt:
 pip install opencv-python
 pip install numpy
 pip install matplotlib
2-D Convolution
The fundamental and the most basic operation in image processing is convolution. This can be achieved by using Kernels. Kernel is a matrix that is generally smaller than the image and the center of the kernel matrix coincides with the pixels.
In a 2D Convolution, the kernel matrix is a 2-dimensional, Square, A x B matrix, where both A and B are odd integers

The position of the output image is obtained by multiplying each value of the matrix with the corresponding value of the image matrix and then summing them up. Based on these operations performed, various effects like blurring and sharpening of the images can be performed.
Identity Kernel
Identity Kernel is the simplest and the most basic kernel operation that could be performed. The output image produced is exactly like the image that is given as the input. It does change the input image. It is a square matrix with the center element equal to 1. All the other elements of the matrix are 0. The code given below demonstrates the operation of Identity Kernel:
Image used :
 Python3
# Importing OpenCV and Numpy Libraries
import cv2
import numpy as np

# Reads image from the disk using cv2.imread() function
img = cv2.imread('geeksforgeeks.png')

# Apply identity kernel
# In an Identity Kernel matrix the value of the middle element is 1
# The values of all the other elements are 0
id_kernel = np.array([[0, 0, 0],
                    [0, 1, 0],
                    [0, 0, 0]])

# Filtered image is obtained using the variable flt_img
# cv2.fliter2D() is the function used
# src is the source of image(here, img)
# ddepth is destination depth. -1 will mean output image will have same depth as input image
# kernel is used for specifying the kernel operation (here, id_kernel)
flt_img = cv2.filter2D(src=img, ddepth=-1, kernel=id_kernel)

# Display the filtered image using cv2.imshow() function
# Here, output image is same as input image since we are using identity kernel
cv2.imshow('Identity', flt_img)

# cv2.waitkey(delay) function holds the screen till any key is pressed by the user
# It pauses the screen for delay milliseconds if the delay is a positive value
# It pauses the screen for a key event infinitely if the delay is 0 or negative
cv2.waitKey(0)

# cv2.destroyAllWindows() function deletes all the GUI windows from memory
cv2.destroyAllWindows()
Output :
Blurring
Blurring is defined as averaging the values of the pixel within a neighborhood. This averaging effect makes the sharp edges smooth or blur. The blurring effect is also said to have 'Low pass filter' effect because it allows only low frequencies (low rate of change of pixels) to enter through it.
Steps involved in Blurring an Image :
- Choose the size of the kernel over a pixel (p). Larger the size of the kernel, the greater the smoothening effect. This is because, large kernels produce large averaging values with respect to the neighboring pixels and thus, results in a high amount of smoothening.
- Multiply each value of the kernel with the corresponding value of the image matrix.
- Add the results of multiplications and compute the average and obtain the Resultant.
- Lastly, replace the value of pixel (p) with the results obtained.
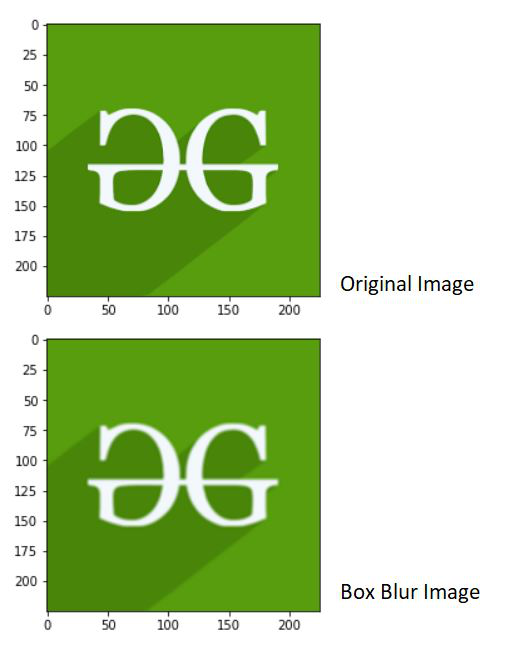
Box Blur:
This is obtained by uniformly averaging the values in the neighborhood. It is a straightforward blur. It is represented as follows:

The values should be summed up to 1. This is why we divide the matrix by 9. This is called Normalization. Following below is the code to demonstrate the Box Blurring Effect :
Python3
# Importing the OpenCV, Numpy and Mat libraries
import cv2
import numpy as np
import matplotlib.pyplot as plt

# Reading the image from the disk using cv2.imread() function
# Showing the original image using matplotlib library function plt.imshow()
img = cv2.imread('geeksforgeeks.png')
plt.imshow(img)
plt.show()

# Kernel for box blur filter
# It is a unity matrix which is divided by 9
box_blur_ker = np.array([[0.1111111, 0.1111111, 0.1111111],
                    [0.1111111, 0.1111111, 0.1111111],
                    [0.1111111, 0.1111111, 0.1111111]])

# Applying Box Blur effect
# Using the cv2.filter2D() function
# src is the source of image(here, img)
# ddepth is destination depth. -1 will mean output image will have same depth as input image
# kernel is used for specifying the kernel operation (here, box_blur_ker)
Box_blur = cv2.filter2D(src=img, ddepth=-1, kernel=box_blur_ker)

# Showing the box blur image using matplotlib library function plt.imshow()
plt.imshow(Box_blur)
plt.show()
Output :
Gaussian Blur:
This filter can be obtained by finding the weighted average of the pixel. The weights of the pixels are calculated on the basis of distance from the center of the kernel. Pixels nearer to the center of the kernel influence more on the weighted average.
The Gaussian filter requires 2 specifications - standard deviation in the X-axis and standard deviation in the Y-axis, represented as sigmaX and sigmaY respectively. If they are both set to 0, the kernel size is taken for calculating the standard deviation.
The code given below demonstrates Gaussian Blur Filter:
Python3
# Importing the OpenCV, Numpy and Matplotlib libraries
import cv2
import numpy as np
import matplotlib.pyplot as plt

# Reading the image from the disk using cv2.imread() function
# Showing the original image using matplotlib library function plt.imshow()
img = cv2.imread('geeksforgeeks.png')
plt.imshow(img)
plt.show()

# Applying Gaussian Blur Filter using cv2.GaussianBlur() function
# src is the source of image(here, img)
# ksize is the size of kernel in the form A x B (here 3 x 3)
# sigmaX is standard deviation of X axis
# sigmaY is the standard deviation of Y axis
# Since sigmaX and sigmaY is 0, the standard deviation the size of kernel
gaussian_blur = cv2.GaussianBlur(src=img, ksize=(3,3),sigmaX=0, sigmaY=0)

# Showing the Gaussian blur image using matplotlib library function plt.imshow()
plt.imshow(gaussian_blur)
plt.show()
Output :

Median Blur:
The Median Blur filtering effect is obtained when every pixel value is replaced with the median value of the image pixels in the neighborhood.
The code given below demonstrates Median Blur:
Python3
# Importing the OpenCV, Numpy and Matplotlib libraries
import cv2
import numpy as np
import matplotlib.pyplot as plt

# Reading the image from the disk using cv2.imread() function
# Showing the original image using matplotlib library function plt.imshow()
img = cv2.imread('geeksforgeeks.png')
plt.imshow(img)
plt.show()

# Applying median Blur Filter using cv2.medianBlur() function
# src is the source of image(here, img)
# ksize is the size of kernel. Should have a positive odd value
median_blur = cv2.medianBlur(src=img, ksize=9)

# Showing the Median blur image using matplotlib library function plt.imshow()
plt.imshow(median_blur)
plt.show()
Output :

Sharpening
Image sharpening helps in enhancing the edges and making them crisp. This filter helps in sharpening the edges and making the image look prominent. The features in the image look distinctive on using this filter.
We use a custom 2D kernel in order to apply this filtering technique. The following kernel can be used for sharpening the image:

The Code given below demonstrates the usage of sharpening filter:
Python3
# Importing the OpenCV, Numpy and Matplotlib libraries
import cv2
import numpy as np
import matplotlib.pyplot as plt

# Reading the image from the disk using cv2.imread() function
# Showing the original image using matplotlib library function plt.imshow()
img = cv2.imread('geeksforgeeks.png')
plt.imshow(img)
plt.show()

# Apply kernel for sharpening
sharp_kernel = np.array([[0, -1, 0],
                    [-1, 5, -1],
                    [0, -1, 0]])

# Sharpeneded image is obtained using the variable sharp_img
# cv2.fliter2D() is the function used
# src is the source of image(here, img)
# ddepth is destination depth. -1 will mean output image will have same depth as input image
# kernel is used for specifying the kernel operation (here, sharp_kernel)
sharp_img = cv2.filter2D(src=img, ddepth=-1, kernel=sharp_kernel)

# Showing the sharpened image using matplotlib library function plt.imshow()
plt.imshow(sharp_img)
plt.show()
Output :

Emboss
Forming a 3D design that pops out of the surface is called Emboss. It replaces the pixel with a shadow or a highlight.
The following kernel matrix can be used to apply to emboss filter:

The following code demonstrates the application of the embossing filter:
Python3
# Importing the OpenCV, Numpy and Matplotlib libraries
import cv2
import numpy as np
import matplotlib.pyplot as plt

# Reading the image from the disk using cv2.imread() function
# Showing the original image using matplotlib library function plt.imshow()
img = cv2.imread('geeksforgeeks.png')
plt.imshow(img)
plt.show()

# Apply kernel for embossing
emboss_kernel = np.array([[-1, 0, 0],
                    [0, 0, 0],
                    [0, 0, 1]])

# Embossed image is obtained using the variable emboss_img
# cv2.fliter2D() is the function used
# src is the source of image(here, img)
# ddepth is destination depth. -1 will mean output image will have same depth as input image
# kernel is used for specifying the kernel operation (here, emboss_kernel)
emboss_img = cv2.filter2D(src=img, ddepth=-1, kernel=emboss_kernel)

# Showing the embossed image using matplotlib library function plt.imshow()
plt.imshow(emboss_img)
plt.show()
Output :

Similar Reads
Concatenate images using OpenCV in Python To concatenate images vertically and horizontally with Python, cv2 library comes with two functions as: hconcat(): It is used as cv2.hconcat() to concatenate images horizontally. Here h means horizontal.vconcat(): It is used as cv2.vconcat() to concatenate images vertically. Here v means vertical.Im
3 min read
Erosion and Dilation of images using OpenCV in python Morphological operations are a set of operations that process images based on shapes. They apply a structuring element to an input image and generate an output image. The most basic morphological operations are two: Erosion and Dilation Basics of Erosion: Erodes away the boundaries of the foreground
2 min read
Addition and Blending of images using OpenCV in Python When we talk about images, we know its all about the matrix either binary image(0, 1), gray scale image(0-255) or RGB image(255 255 255). So additions of the image is adding the numbers of two matrices. In OpenCV, we have a command cv2.add() to add the images. Below is code for Addition of two image
2 min read
Python | Image blurring using OpenCV Image Blurring refers to making the image less clear or distinct. It is done with the help of various low pass filter kernels. Advantages of blurring: It helps in Noise removal. As noise is considered as high pass signal so by the application of low pass filter kernel we restrict noise. It helps in
2 min read
Python | Denoising of colored images using opencv Denoising of an image refers to the process of reconstruction of a signal from noisy images. Denoising is done to remove unwanted noise from image to analyze it in better form. It refers to one of the major pre-processing steps. There are four functions in opencv which is used for denoising of diffe
1 min read
Convert OpenCV image to PIL image in Python OpenCV is a huge open-source library for computer vision, machine learning, and image processing. OpenCV supports a wide variety of programming languages like Python, C++, Java, etc. It can process images and videos to identify objects, faces, or even the handwriting of a human. When it is integrate
3 min read
Feature extraction and image classification using OpenCV This article is your ultimate guide to becoming a pro at image feature extraction and classification using OpenCV and Python. We'll kick things off with an overview of how OpenCV plays a role in feature extraction, and we'll go through the setup process for the OpenCV environment. You'll get to lear
11 min read
Cropping Faces from Images using OpenCV - Python Opencv is a python library mainly used for image processing and computer vision. In this article first, we detect faces after that we crop the face from the image. Face detection is the branch of image processing that uses to detect faces. We will use a pre-trained Haar Cascade model to detect faces
3 min read
Python | Grayscaling of Images using OpenCV Grayscaling is the process of converting an image from other color spaces e.g. RGB, CMYK, HSV, etc. to shades of gray. It varies between complete black and complete white.Importance of grayscaling Dimension reduction: For example, In RGB images there are three color channels and three dimensions whi
5 min read
Kernels (Filters) in convolutional neural network Convolutional Neural Networks (CNNs) are neural networks used for processing image data. Kernels also known as filters are an important part of CNNs which helps them to extract important features from images such as edges, textures and patterns. In this article, we will see more about kernels.Table
7 min read