Spring MVC – Using @RestController for RESTful Web Services
Last Updated :
03 Sep, 2024
Spring MVC (Model-View-Controller) is a powerful framework for developing web applications in Java. A core component of Spring MVC is the @RestController annotation, which simplifies the creation of RESTful web services by handling HTTP requests and responses with minimal configuration.
Overview of Spring MVC and Spring Boot
Spring MVC is a part of the larger Spring Framework designed for building web applications. It provides a structured way to build web applications following the MVC pattern. Spring Boot, on the other hand, is an extension of Spring that simplifies the setup and development of Spring applications by providing defaults and auto-configuration options.
In this article, we will focus on how to use the @RestController annotation in Spring MVC to create RESTful web services, leveraging Spring Boot for ease of setup.
What is @RestController?
The @RestController annotation is a specialized version of the @Controller annotation in Spring MVC. It is used to create RESTful web services by automatically converting Java objects into JSON or XML responses. By combining @Controller and @ResponseBody, @RestController simplifies the development of REST APIs.
Using @RestController for RESTful Web Services
- Annotation Overview:
@RestController automatically serializes the return values of methods into JSON or XML format.- It eliminates the need to use
@ResponseBody on each method.
- Request Handling:
@RestController maps HTTP requests to methods using HTTP method-specific annotations like @GetMapping, @PostMapping, @PutMapping, and @DeleteMapping.
Prerequisites:
Before diving into using @RestController, you should have the following prerequisites in place:
Step-by-Step Implementation
Let’s walk through the creation of a simple RESTful service that returns a list of users.
Step 1: Create a Spring Boot Project
Start by creating a new Spring Boot project using Spring Initializr or your IDE. Include dependencies for Spring Web to enable RESTful services. To know more, read this article: How to Create a Spring Boot Project?
Folder Structure:
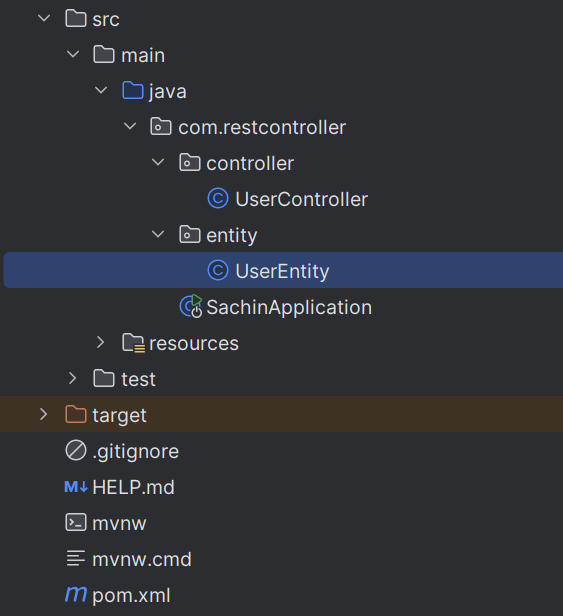 Folder Structure
Step 2: Define a User Model
Create a simple User class to represent the data structure.
Java
// UserEntity represents a user with an ID, name, and email
public class UserEntity {

    private Long id;  // Unique identifier for the user
    private String name;  // User's name
    private String email;  // User's email address

    // Default constructor
    public UserEntity() {
    }

    // Parameterized constructor
    public UserEntity(Long id, String name, String email) {
        this.id = id;
        this.name = name;
        this.email = email;
    }

    // Getter and setter for ID
    public Long getId() {
        return id;
    }

    public void setId(Long id) {
        this.id = id;
    }

    // Getter and setter for name
    public String getName() {
        return name;
    }

    public void setName(String name) {
        this.name = name;
    }

    // Getter and setter for email
    public String getEmail() {
        return email;
    }

    public void setEmail(String email) {
        this.email = email;
    }
}
UserEntity class: This class represents a user entity with properties for ID, name, and email. It includes getters and setters for these properties to allow data manipulation.
Step 3: Create a REST Controller
Now, create a UserController class that will handle HTTP requests for the User resource.
Java
package com.restcontroller.controller;

import com.restcontroller.entity.UserEntity;
import org.springframework.web.bind.annotation.GetMapping;
import org.springframework.web.bind.annotation.RequestMapping;
import org.springframework.web.bind.annotation.RestController;

import java.util.ArrayList;
import java.util.List;

// UserController handles HTTP requests related to users
@RestController
@RequestMapping("/api/users")  // Base URL for all methods in this controller
public class UserController {

    // Handles GET requests to /api/users and returns a list of users
    @GetMapping
    public List<UserEntity> getUsers() {
        List<UserEntity> users = new ArrayList<>();
        users.add(new UserEntity(1L, "Sachin", "[email protected]"));
        users.add(new UserEntity(2L, "Sagar", "[email protected]"));
        return users;  // Return the list of users as JSON response
    }
}
Explanation:
UserController class: This class is annotated with @RestController to indicate it handles RESTful requests. It uses @RequestMapping to define the base URL for all endpoints in the class.getUsers() method: This method is annotated with @GetMapping to handle GET requests at /api/users. It returns a list of UserEntity objects, which Spring Boot automatically serializes into JSON.
Step 4: Run the Application and Test the RESTful Service
Run your Spring Boot application. The RESTful service will be available at http://localhost:8080/api/users. Access this URL using a browser or API testing tool like Postman to see the JSON response.

Conclusion
The @RestController annotation in Spring MVC simplifies the development of RESTful web services by automatically handling the conversion of Java objects into JSON or XML responses. By following the steps outlined in this article, you can quickly set up a RESTful web service using Spring MVC and Spring Boot, allowing you to focus more on your business logic rather than configuration.
Similar Reads
Spring Boot - Introduction to RESTful Web Services
RESTful Web Services REST stands for REpresentational State Transfer. It was developed by Roy Thomas Fielding, one of the principal authors of the web protocol HTTP. Consequently, REST was an architectural approach designed to make the optimum use of the HTTP protocol. It uses the concepts and verbs
5 min read
Easiest Way to Create REST API using Spring Boot
Spring Boot is a powerful framework that makes it easy to create RESTful APIs. Creating a REST API using Spring Boot is one of the fastest and simplest ways to develop scalable and production-ready web services. Spring Boot simplifies REST API development by providing built-in features such as autom
10 min read
How to Call REST Services with WebClient in Spring Boot?
Representational State Transfer (REST) is an architectural style that defines a set of constraints to be used for creating web services. REST API is a way of accessing web services in a simple and flexible way without having any processing. Spring WebClient is a non-blocking and reactive web client
11 min read
Spring Boot Microservices Communication using WebClient with Example
WebClient is an interface illustrating the main entry point for performing web requests. It is also known as the reactive web client which is introduced in Spring 5. This new client is a reactive, non-blocking solution that works over the HTTP/1.1 protocol. We can also say that it is a replacement f
14 min read
How to Make a Simple RestController in Spring Boot?
A RestController in Spring Boot is a specialized controller that is used to develop RESTful web services. It is marked with the @RestController annotation, which combines @Controller and @ResponseBody. This ensures that the response is automatically converted into JSON or XML, eliminating the need f
2 min read
Spring - REST Controller
Spring Boot is built on top of the Spring and contains all the features of spring. Spring Boot is a popular framework for building microservices and RESTful APIs due to its rapid setup and minimal configuration requirements. When developing REST APIs in Spring, the @RestController annotation plays a
3 min read
Spring Security - Making Registration API RESTful
Spring Security is a robust framework that provides authentication, authorization, and other security features for Java applications. Making the registration API RESTful involves designing an API endpoint that allows users to register or sign up for the application using REST principles. This typica
5 min read
Creating REST APIs Using Spring WebFlux and MongoDB
Spring Boot is the most popular Java framework for building stand-alone Java-based applications quickly and with minimal configuration. WebFlux is a responsive operating system provided by the Spring framework for running non-blocking, asynchronous, and event-driven applications. On the other hand,
10 min read
Serve Static Resources With Spring
It's essential to know about static resources, which are the resources that do not change frequently on a web page. To serve these static resources, Spring Boot comes with an inbuilt class called ResourceHttpRequestHandler in conjunction with the ResourceHandlerRegistry class. You can keep these sta
4 min read
Returning an HTML Page From a RESTful Controller in Spring Boot
In Spring Boot applications, RESTful controllers are commonly used to handle HTTP requests and return appropriate responses. These responses are typically in JSON or XML format. However, sometimes there is a need to return HTML pages, which the server can dynamically generate. In Spring Boot, we can
3 min read