At the end of the topic you should be able to:
1. Explain the importance of platform based development
2. Use looping, delay and conditioning concepts in developing a program on Arduino environment.
The document provides a history of robotics from ancient times to modern day. Some key points include:
- The first known robot was created around 400-350 BC by Archita and was a steam-powered pigeon.
- In the 18th century, automatons like Jaquet-Droz's Writer and Musician were created using intricate mechanisms.
- In 1898, Nikola Tesla invented and demonstrated the first remote controlled vessel, pioneering remote controlled robotics.
- Alan Turing formalized the concept of the algorithm and computation with the Turing machine in 1936, laying foundations for modern computers.
- In 1960, the first industrial robot, Unimate, was introduced to perform
Augmented reality applications in manufacturing and maintenance Jeffrey Funk
These slides use concepts from my (Jeff Funk) course entitled analyzing hi-tech opportunities to show how augmented reality is becoming economically feasible for manufacturing and maintenance applications. Augmented reality adds useful information to a real-world image that is seen through head-mounted glasses or a tablet computer’s camera. Academic tests reveal that manufacturing and maintenance activities can be done more effectively when workers use augmented reality and many firms have begun using augmented reality.
Furthermore, continued improvements in display resolution and graphic processing speeds and the emergence of transparent displays will expand the use of AR. In particular, it takes several seconds for current devices to update the images that are overlaid on the real-world image, which confuses workers and slows them down. Improvements in graphic processors for tablet computers are reducing the time it takes for tablet computers to recognize and register objects and thus make the overlaid images look clear in the tablet’s display. While graphic processors in game consoles and desktop computers can easily handle this problem, graphic processors in mobile devices lag their game console and desktop computer counterparts by several years.
RF energy harvesting involves capturing wireless signals like Wi-Fi and converting them into usable electrical energy. It consists of an antenna that receives RF signals, rectification circuits that convert AC to DC, energy storage components like capacitors, and power management circuitry that regulates voltage and current delivery. RF energy harvesting shows potential to power wireless devices without batteries and supports growing applications in sensor networks and IoT. Ongoing research aims to improve efficiency, allow multi-band harvesting, further miniaturize components, and integrate the technology into more devices.
This document is a daily lesson log for an Earth and Life Science class at Tanglag National High School. It outlines the topics, learning competencies, and lesson plans for a week. The topics covered include the origin and structure of the Earth, the universe and solar system. Learning activities include lectures, videos, debates and a quiz. The objective is for students to understand concepts like the formation of the universe, properties of Earth and other planets, and factors that allow life.
The document contains examples and questions related to time and work problems. It discusses concepts like work done by individuals in a given time period, ratios of work done, and examples of calculating time taken to complete a piece of work when multiple people work together or independently. Sample problems are provided along with explanations of the solutions and calculations involved.
The document discusses digital transformation and its impact. It covers topics like drivers of digital transformation, how it is affecting industries, IT, stakeholders, and the benefits and challenges of adoption. Digital transformation is redefining industries through convergence of social, local and mobile technologies, leading to superior customer experiences. It is driving fundamental shifts in business models and cost structures across media, telecom, financial services, education, healthcare and other industries.
This document discusses various potential applications of blockchain technology across different industries. It begins with an introduction to blockchain and then provides 3 sentence summaries on how blockchain could be used in legal, supply chain management, government services, energy, food, retail, healthcare, insurance, travel/hospitality, and education. The majority of the document then focuses on potential applications of blockchain within the fast moving consumer goods (FMCG) supply chain, including improving traceability, streamlining processes with smart contracts, and enhancing sustainability and transparency. Both benefits and challenges of implementing blockchain for FMCG companies are explored.
Arduinos use serial ports for communicating with computers and other devices. The USB port of an Arduino is used for serial communication with a computer, with the added advantage that USB can also be used to power the device. USB also has the advantage of auto-configuring most of the parameters.
Analog to digital converter is one of the most important feature of micro controller. here i am explaining about basic of ADC, working and how exactly controller do it. Here i also explaining registers of ADC and attached a sample code.
This document discusses various serial communication protocols used in embedded systems including RS-232, RS-485, I2C, SPI, CAN, and USB. It provides details on the voltage levels, maximum speeds, cable lengths, and other specifications of each protocol. It explains how differential signaling and twisted pair cables allow RS-485 to communicate over longer distances and faster speeds compared to RS-232.
This document provides an overview of the Arduino Uno microcontroller board. It defines a microcontroller as a single-chip computer containing a CPU, memory, and input/output interfaces. The Arduino is an open-source electronics platform with easy-to-use hardware and software that allows anyone to develop interactive electronic projects. Key specifications of the Arduino Uno board are provided, including its microcontroller chip, memory, analog and digital pins. The process of analog to digital conversion is explained. Basic Arduino programming concepts like data types, statements, operators, and control structures are covered. The bare minimum code structure of setup() and loop() functions is described.
Introduction to Arduino Hardware and ProgrammingEmmanuel Obot
Introduction to Arduino Hardware and Programming:
Arduino is an open-source electronics platform based on easy-to-use hardware and software. It's intended for anyone making interactive projects.
Teachers and students use it to build low cost scientific instruments, to prove chemistry and physics principles, or to get started with programming and robotics. Designers and architects build interactive prototypes, musicians and artists use it for installations and to experiment with new musical instruments. Makers, of course, use it to build many of the projects exhibited at the Maker Faire. Arduino is a key tool to learn new things. Anyone - children, hobbyists, artists, programmers can use it to build an interactive device.
It is designed to measure the distance of any object by using an ultrasonic transducer. Ultrasonic means of distance measurement is a convenient method compared to traditional one using measurement scales.This kind of measurement is particularly applicable to inaccessible areas where traditional means cannot be implemented such as high temperature, pressure zones etc.
The TMS320C5x DSP architecture is based on the C25 with some enhancements. It uses a Harvard architecture with separate program and data memory buses. The CPU contains a CALU for arithmetic, PLU for logic, and ARAU for address calculations. On-chip memory includes ROM, DARAM, and SARAM. Peripherals include serial ports, timers, interrupts, and I/O. The architecture provides high performance with low power consumption and compatibility with prior C series DSPs.
RS-232 is a popular communications interface for connecting modems and data acquisition devices (i.e. GPS receivers, electronic balances, data loggers, ...) to computers.
The document discusses UART (Universal Asynchronous Receiver/Transmitter) communication. It describes how UARTs allow for asynchronous serial communication between devices using only 2 wires by converting parallel data to serial and vice versa. The UART communication process involves a transmitting UART adding start, stop and optionally parity bits to data before transmitting it serially bit-by-bit to a receiving UART which reconstructs the parallel data. It also discusses the TTL and RS-232 physical layer standards for UART.
A router is a networking device that forwards data packets between computer networks. It has multiple network interfaces and uses information in routing tables to determine the best path to direct each packet. As a packet comes in one of its lines, the router reads the address and uses its routing information to determine the next network. This allows it to effectively direct traffic through multiple interconnected networks until packets reach their destination. Router technology has evolved alongside increases in network bandwidth, allowing networks to expand while also driving down costs over time.
Port 0 of the 8051 microcontroller can be used as a bidirectional I/O port or for address/data interfacing with external memory. When used as an input port, writing a 1 to the latch causes the output MOSFETs to turn off, allowing the pin value to be read directly. When used as an output port, a pull-up resistor is needed to write a 1 since the upper MOSFET turns off. Port 1 has internal pull-up resistors so no external resistors are needed, but the external device must sink current when writing a 0. Port 2 is similar to Port 1 for I/O but can also be used for higher address bytes. Port 3 pins each have alternate functions in
The SPI (Serial Peripheral Interface) is a synchronous serial communication protocol used for communication between devices. It uses a master-slave architecture with a single master device initiating data transfer. Key features include using separate clock and data lines, operating in full duplex mode, and allowing multiple slave devices through individual chip selects. It provides a lower pin count solution than parallel buses at the cost of slower communication speeds.
This document summarizes serial data communication using the RS-232 standard. It provides an introduction to RS-232, including its history from 1962 and applications connecting devices like modems and printers. The standard defines electrical characteristics and timing for serial data transmission. Limitations include limited transmission speed and large connectors. The document examines RS-232 pins used for handshaking signals to coordinate data transfer and lists advantages like long transmission distances but also disadvantages like lower speed and need for separate transceiver chips.
This document provides an introduction to radar surveillance systems. It explains that radar uses radio waves to detect objects by emitting signals that bounce off objects and return to the receiver. The time it takes allows the radar to calculate distance. The document outlines the components of a radar system including ultrasonic sensors to collect data, an Arduino microcontroller to calculate distance, a servo motor to direct the sensor, and an LCD display to output results. It provides code snippets and diagrams of the system and discusses applications in security, traffic control, and more. In conclusion, the document discusses the advantages of radar and potential future applications like self-driving cars.
The document provides an overview of the Arduino platform, including what it is, what it is used for, and how to get started using it. Key points:
- Arduino is an open-source hardware and software platform for building interactive electronic projects through a simple programming language.
- It is used for physical computing projects, interactive installations, and rapid prototyping. Projects can include sensors and actuators.
- Getting started requires an Arduino board, USB cable, power supply, and downloading the IDE (integrated development environment) to write and upload code. Basic electrical safety knowledge is also important.
This document provides a project report on a Bluetooth controlled robot car. The project uses an Arduino Uno microcontroller, HC-05 Bluetooth module, L293D motor driver, and two DC motors to build a robot car that can be controlled remotely via a Bluetooth connected Android device running a control application. The report describes the hardware and software design and implementation, including connecting the Bluetooth module to the Arduino, sending control commands from the app to drive the motors via the motor driver, and a flowchart of the Arduino sketch logic. The total cost of components for the project was around 1315 INR. The conclusion states that the project demonstrated using Arduino and Bluetooth to remotely control devices like lights and appliances via a smartphone.
This document provides an introduction to programming the ESP8266 WiFi chip. It outlines ESP8266 basics, including an overview of the ESP-01 and ESP-12 models. It then demonstrates how to connect an ESP8266 to an Arduino and use the Blynk app and library to control an LED over WiFi. Wiring diagrams and code examples are provided to showcase setting up and programming the ESP8266 for basic WiFi functionality and Blynk integration.
on successful go through of this complete PPT, the learners can be able to understand the Raspberry PI, Raspberry Pi Interfaces(Serial, SPI,I2C) Programming, Python programming with Raspberry PI with the focus of Interfacing external gadgets
Controlling output Reading input from pins.
The NodeMCU is an open-source IoT development kit that allows users to prototype IoT products using a few lines of Lua script. It contains an ESP8266 WiFi SoC, programmable GPIO pins, 32KB RAM, 80KB DRAM, and 200KB flash memory. The NodeMCU can be programmed via C or Lua and connect to devices via WiFi or by connecting pins to sensors and actuators. It provides a low-cost way to build an interactive and programmable smart device with WiFi connectivity.
Arduino is an open-source platform used for building electronics projects. It has a microcontroller and can sense and control the physical world. The Arduino IDE is used to write programs for the Arduino board in C/C++. Programs have a setup() and loop() function. Setup() runs once at startup and loop() runs continuously. Example programs were shown to blink an LED on pin 12 every 2 seconds and print the LED state to the serial monitor. Further programs demonstrated using for loops to blink an LED 10 times per loop iteration and print the loop count.
Arduino is an open- source computer hardware and software company, project and user community that designs and manufactures microcontroller-based kits for building systems consisting of digital devices, interactive objects that can sense and control in the physical world.
Arduino is an open-source project that created microcontroller-based kits for building digital devices and interactive objects that can sense and control physical devices.
This document provides an overview of Arduino programming concepts including:
- Microcontrollers contain a CPU, memory, input/output pins and other peripherals on a single integrated circuit.
- Arduino is an open-source electronics platform with a microcontroller, pins to connect circuits, and software to program it.
- The core Arduino functions include setup(), loop(), pinMode(), digitalWrite(), digitalRead(), analogWrite(), analogRead(), and delay().
- Examples demonstrate blinking LEDs, reading input, using conditions and loops, arrays, LCD displays, and controlling servo motors.
- Arduino programming provides an accessible way to learn embedded systems and interact with circuits.
4 IOT 18ISDE712 MODULE 4 IoT Physical Devices and End Point-Aurdino Uno.pdfJayanthi Kannan MK
The document discusses the Arduino Uno microcontroller board. It provides details about the Arduino platform and describes the Arduino Uno board, which is based on the ATmega328P microcontroller. It lists the main components of the Arduino Uno board and explains the functions of pins and inputs/outputs. The document also provides an overview of the fundamentals of Arduino programming, including key functions, variables, conditions, and serial communication.
The document provides an overview of the Arduino programming language and hardware. It describes the basic structure of an Arduino program with setup() and loop() functions. It lists the main data types and functions for digital and analog input/output, time, math, random numbers, serial communication and more. It also provides information on libraries, the Arduino board pins and components, and compares Arduino to the Processing language.
This document provides an introduction to using the Arduino microcontroller. It covers connecting an Arduino board, an overview of the Arduino IDE, and introductions to digital and analog input/output and serial communication. Key topics include using pinMode(), digitalRead(), digitalWrite() to control digital pins, analogRead() to read analog sensor values, analogWrite() for pulse-width modulation to simulate analog outputs, and serial communication functions like Serial.begin(), Serial.print(), Serial.read() to send data to and from the Arduino board. Hands-on exercises are provided to have students experiment with these concepts by controlling an LED with a button, reading analog sensor values, and controlling an LED via serial input.
Gowtham Thamilarasu is a senior embedded design engineer at Sparks Automations. The document discusses Arduino and embedded systems. It includes sections on Arduino hardware, programming, digital and analog input/output, serial communication, and examples of using Arduino to control devices like LCD displays and send messages via GSM. The document provides an overview of key Arduino concepts for engineers and programmers.
I have prepared this presentation when I was studying at Western Region Campus. I along with some of my friends conducted training for junior students on Arduino. Its day-1 presentation.
This document provides an introduction to using Arduino for input/output (I/O) and serial communication. It covers connecting an Arduino board, the integrated development environment (IDE), digital and analog I/O pins, pulse width modulation for analog output, and serial communication. Exercises are included to have students control an LED using a push button for digital I/O, simulate a theremin using analog sensor input to control an LED brightness, and read keyboard input over serial to control an LED intensity.
The IoT Academy IoT Training Arduino Part 3 programmingThe IOT Academy
This document provides an overview of basic Arduino code structure and programming concepts. It explains that Arduino programs have two main sections - setup() and loop(). Setup() is used to initialize inputs and outputs, and loop() contains the repeating code. It also covers digital input/output functions, variables, conditional statements, boolean logic, and interrupts. Examples are provided for blinking LEDs, reading sensors, and creating simple programs.
This document provides an overview of Arduino programming concepts including:
- The Arduino programming language is based on C/C++ and includes libraries for interfacing with hardware.
- Examples are provided for basic blink programs, using variables, functions, control structures like if statements and loops, reading analog/digital pins, and using the serial monitor.
- Key concepts covered include variable scope, data types, naming conventions, pin modes, analog/digital reading and writing, functions, arrays, and different loop structures.
This document outlines the syllabus for a course on Internet of Things (IoT) technology taught by Dr. Syed Mustafa at HKBK College of Engineering, Bengaluru. It covers key modules including IoT physical devices and endpoints such as Arduino and Raspberry Pi. The Arduino section describes the Arduino microcontroller board and its components. It also covers Arduino programming basics like setup and loop functions, input/output functions, variables, conditional statements, and serial communication. The Raspberry Pi section provides an overview of the single-board computer and its hardware layout.
Arduino_CSE ece ppt for working and principal of arduino.pptSAURABHKUMAR892774
The document provides an introduction and overview of Arduino boards and programming. It discusses:
- The different types of Arduino boards available.
- How to get started with the Arduino IDE and programming Arduino boards.
- Examples of common sensors and actuators that can be connected to Arduino boards like LEDs, buttons, temperature sensors.
- The basic structure of Arduino programs including setup(), loop(), and common functions like digitalRead(), digitalWrite(), and pinMode().
The document provides an introduction to Arduino and physical computing using microcontrollers. It describes that Arduino boards use ATmega microcontrollers and can be programmed to sense the physical world using sensors, process data, and control physical devices using actuators. The document outlines the basic components of a microcontroller, how the Arduino programming environment works, and the basic structure and functions used in Arduino programs.
This document provides instructions for programming an Arduino microcontroller to control various components in an automated mini city project. It discusses using Arduino code to control light sensitive street lights, timed traffic lights, automated gates with a proximity sensor, and cars that drive on the city streets. The document then explains Arduino programming basics like using digital and analog input/output pins to send commands to LEDs, motors and receive input from sensors. It provides examples of code for tasks like setting up an LED, creating a traffic light sequence, using variables to customize code, and using if/else statements to add conditions and logic. The document also covers getting input from the serial monitor and printing output to display on the computer. Finally, it discusses
After the completion of this workshop, you will be able to:
1. Create and working with Arrays of numbers
2. Create simple plots
3. Plot the given function
4. Do Symbolic Computation
5. Understand SIMULINK
This Python code controls a servo motor connected to a Raspberry Pi by pulsing its control pin at 50Hz. It imports GPIO and time libraries, sets the pin mode and defines the servo pin as PWM output. It then sweeps the servo from 0 to 180 degrees in 10 steps over 10 seconds, pauses, returns to 90 degrees, pauses again and returns to 0 degrees before stopping PWM and cleaning up GPIO.
This Python code uses a Raspberry Pi to create a simple push button circuit. When the button is pressed, it triggers GPIO pin 23 which then illuminates an LED connected to GPIO pin 24. The code prints "Button Pressed..." each time the button is pressed and held for 0.2 seconds before turning the LED off again. It sets the button as an input, configures pull-up resistors, and runs in a continuous loop to detect button presses and control the LED output accordingly.
This Python code controls a buzzer connected to a Raspberry Pi by turning the buzzer on and off using GPIO pin 23. It imports the RPi and time libraries, sets the GPIO mode and pin 23 as an output, then enters a forever loop that sets the pin high to turn the buzzer on for 0.5 seconds, prints "Beep", sets the pin low to turn the buzzer off for 0.5 seconds, and prints "No Beep", repeating continuously.
At the end of the topic you should be able to:
1. Interface a sensor/s, device/s with Arduino for data acquisition and display the data.
2. Interface Actuators with Arduino to Control motion to build an application.
3. Build a mechatronic system using Arduino, sensors, actuators and modules.
The document discusses various OpenCV functions for reading, displaying and manipulating images and video from cameras. It covers loading grayscale and color images, displaying images, drawing lines and arrows on images, setting camera resolution, adding text to video frames, and mouse click events to retrieve pixel colors.
NumPy is a python library used for working with arrays.
It also has functions for working in domain of linear algebra, fourier transform, and matrices.
NumPy was created in 2005 by Travis Oliphant. It is an open source project and you can use it freely.
NumPy stands for Numerical Python.
This 12-page HTML tutorial document provides instructions for basic HTML formatting elements including headings, bold and italic text, centered text, strikethrough text, blockquotes, numbering, links, paragraphs, and contact information. The tutorial is prepared by Amarjeetsingh Thakur and explains that most websites use HTML to structure and present content.
OpenCV (Open Source Computer Vision Library) is a library of programming functions mainly aimed at real-time computer vision. Originally developed by Intel, it was later supported by Willow Garage then Itseez (which was later acquired by Intel). The library is cross-platform and free for use under the open-source BSD license.
1. Open-source IoT Platform
2. Adafruit IO is a platform designed to display, respond, and interact with our project's data.
3. Our data kept private (data feeds are private by default) and secure.
Python is a high-level, object-oriented, interpreted programming language, which has garnered worldwide attention. Stack Overflow found out that 38.8% of its users mainly use Python for their projects. According to the website’s survey, Python’s popularity surpassed that of C# in 2018 – just like it surpassed PHP in 2017. On the GitHub platform, Python surpassed Java as the second-most used programming language, with 40% more pull requests opened in 2017 than in 2016. This makes Python certification one of the most sought-after programming certifications.
Openpyxl is a Python module to deal with Excel files without involving MS Excel application software. It is used extensively in different operations from data copying to data mining and data analysis by computer operators to data analysts and data scientists. openpyxl is the most used module in python to handle excel files. If you have to read data from excel, or you want to write data or draw some charts, accessing sheets, renaming sheets, adding or deleting sheets, formatting and styling in sheets or any other task, openpyxl will do the job for you.
This document provides an overview of the Internet of Things (IoT). It defines IoT as connecting physical devices to the internet and each other. The document outlines the history and evolution of IoT from RFID tags to current connectivity of devices. It describes common IoT applications, communication protocols like Bluetooth and WiFi, and challenges around data standards. Finally, it discusses the logical design of IoT systems including functional blocks, communication models, and application programming interfaces.
1. Explaining the importance of platform based development
2. Understanding The importance of NodeMCU and demonstrate its interfacing with various devices and sensors.
Introduction to Things board (An Open Source IoT Cloud Platform)Amarjeetsingh Thakur
1. Explaining the importance of platform based development
2. Understanding the importance of Node MCU and demonstrate its interfacing with various devices and sensors.
3. Demonstration of Things board IoT platform
MQTT stands for MQ Telemetry Transport.
1. Publish/subscribe.
2. Constrained devices and low-bandwidth, high-latency or unreliable networks.
3. Minimise network bandwidth and device resource requirements whilst also attempting to ensure reliability and some degree of assurance of delivery.
4. Ideal for M2M and IoT
1. Interface a sensor/s, device/s with Arduino for data acquisition and display the data.
2. Interface Actuators with Arduino to Control motion to build an application.
3. Build a mechatronic system using Arduino, sensors, actuators and modules.
The document discusses a workshop on image processing using MATLAB. It provides an overview of MATLAB and its image processing toolbox. It describes how to read, display, and convert between different image formats in MATLAB. It also demonstrates various image processing operations like arithmetic operations, conversion between color and grayscale, image rotation, blurring and deblurring, and filling regions of interest. The document aims to introduce the basics of image processing using MATLAB.
The document discusses a workshop on image processing using MATLAB. It provides an overview of MATLAB and its image processing toolbox. It describes how to read, display, and convert between different image formats in MATLAB. It also demonstrates various image processing operations that can be performed, such as arithmetic operations, conversion between color and grayscale, image rotation, blurring and deblurring, and filling regions of interest. The document aims to introduce the basics of working with images in the MATLAB environment.
A DECISION SUPPORT SYSTEM FOR ESTIMATING COST OF SOFTWARE PROJECTS USING A HY...ijfcstjournal
One of the major challenges for software, nowadays, is software cost estimation. It refers to estimating the
cost of all activities including software development, design, supervision, maintenance and so on. Accurate
cost-estimation of software projects optimizes the internal and external processes, staff works, efforts and
the overheads to be coordinated with one another. In the management software projects, estimation must
be taken into account so that reduces costs, timing and possible risks to avoid project failure. In this paper,
a decision- support system using a combination of multi-layer artificial neural network and decision tree is
proposed to estimate the cost of software projects. In the model included into the proposed system,
normalizing factors, which is vital in evaluating efforts and costs estimation, is carried out using C4.5
decision tree. Moreover, testing and training factors are done by multi-layer artificial neural network and
the most optimal values are allocated to them. The experimental results and evaluations on Dataset
NASA60 show that the proposed system has less amount of the total average relative error compared with
COCOMO model.
This document provides information about the Fifth edition of the magazine "Sthapatya" published by the Association of Civil Engineers (Practicing) Aurangabad. It includes messages from current and past presidents of ACEP, memories and photos from past ACEP events, information on life time achievement awards given by ACEP, and a technical article on concrete maintenance, repairs and strengthening. The document highlights activities of ACEP and provides a technical educational article for members.
This presentation highlights project development using software development life cycle (SDLC) with a major focus on incorporating research in the design phase to develop innovative solution. Some case-studies are also highlighted which makes the reader to understand the different phases with practical examples.
May 2025: Top 10 Read Articles Advanced Information Technologyijait
International journal of advanced Information technology (IJAIT) is a bi monthly open access peer-reviewed journal, will act as a major forum for the presentation of innovative ideas, approaches, developments, and research projects in the area advanced information technology applications and services. It will also serve to facilitate the exchange of information between researchers and industry professionals to discuss the latest issues and advancement in the area of advanced IT. Core areas of advanced IT and multi-disciplinary and its applications will be covered during the conferences.
Third Review PPT that consists of the project d etails like abstract.Sowndarya6
CyberShieldX is an AI-driven cybersecurity SaaS web application designed to provide automated security analysis and proactive threat mitigation for business websites. As cyber threats continue to evolve, traditional security tools like OpenVAS and Nessus require manual configurations and lack real-time automation. CyberShieldX addresses these limitations by integrating AI-powered vulnerability assessment, intrusion detection, and security maintenance services. Users can analyze their websites by simply submitting a URL, after which CyberShieldX conducts an in-depth vulnerability scan using advanced security tools such as OpenVAS, Nessus, and Metasploit. The system then generates a detailed report highlighting security risks, potential exploits, and recommended fixes. Premium users receive continuous security monitoring, automatic patching, and expert assistance to fortify their digital infrastructure against emerging threats. Built on a robust cloud infrastructure using AWS, Docker, and Kubernetes, CyberShieldX ensures scalability, high availability, and efficient security enforcement. Its AI-driven approach enhances detection accuracy, minimizes false positives, and provides real-time security insights. This project will cover the system's architecture, implementation, and its advantages over existing security solutions, demonstrating how CyberShieldX revolutionizes cybersecurity by offering businesses a smarter, automated, and proactive defense mechanism against ever-evolving cyber threats.
2. What is Arduino?
• Arduino is an open- source computer
hardware and software company, project
and user community that designs and
manufactures microcontroller-based kits for
building systems consisting of digital
devices, interactive objects that can sense
and control in the physical world.
9/28/2020 2
3. How to program Arduino?
• The Arduino Integrated Development
Environment (IDE) supports
the C and C++ programming languages using
special rules of code organization.
• The Arduino IDE supplies a software library
called "Wiring" from the Wiring project, which
provides many common input and output
procedures.
9/28/2020 3
9. Technical specifications:
• Microcontroller: Microchip ATmega328P
• Operating Voltage: 5 Volt
• Input Voltage: 7 to 20 Volts
• Digital I/O Pins: 14 (of which 6 provide PWM output)
• Analog Input Pins: 6
• DC Current per I/O Pin: 20 mA
• DC Current for 3.3V Pin: 50 mA
• Flash Memory: 32 KB of which 0.5 KB used by bootloader
• SRAM: 2 KB
• EEPROM: 1 KB
• Clock Speed: 16 MHz
• Length: 68.6 mm
• Width: 53.4 mm
• Weight: 25 g
9/28/2020 9
10. Program Structure
Setup( )
{
// A function that runs once at the start of a program and is used to
set //pinMode or initialize serial communication
}
loop( )
{
// This function includes the code to be executed continuously – reading
inputs, //triggering outputs, etc.
// This function is the core of all Arduino programs and does the bulk of
the //work.
}
9/28/2020 10
11. Activity 1.1
Type : Team of 2 Duration : 15 Minutes
Use LED blink program from example
and upload it on the ARDUINO board
9/28/2020 11
12. Functions to handle digital I/O
• pinMode (pin, OUTPUT);
// make the digital pin either INPUT or OUTPUT
• digitalRead (pin);
//used to get the content on the pin which is HIGH(1)
or LOW(0)
• digitalWrite(pin, value)
//used to send HIGH(1) or LOW(0) value to a pin
9/28/2020 12
14. /*….. Program to blink the LED on pin 13 …..*/
void setup( )
{
pinMode(13, OUTPUT); //Initialize the digital pin as output
}
void loop( )
{
digitalWrite(13, HIGH); // Turn the LED ON
delay(1000); // Wait for one second
digitalWrite(13, LOW); // Turn the LED OFF
delay(1000); // Wait for one second
}
9/28/2020 14
15. Activity 1.2
Type : Team of 2 Duration : 10 Minutes
Modify the program to blink LED every 2 sec
on pin 12.
9/28/2020 15
16. Circuit for the LED
Cathode of
LED
Anode of LED
9/28/2020 16
17. /*….. Program to blink the LED every 2 second on pin12*/
void setup( )
{
pinMode(12, OUTPUT); //Initialize the digital pin as output
}
void loop( )
{
digitalWrite(12, HIGH); // Turn the LED ON
delay(2000); // Wait for a two second
digitalWrite(12, LOW); // Turn the LED OFF
delay(2000); // Wait for a two second
}
9/28/2020 17
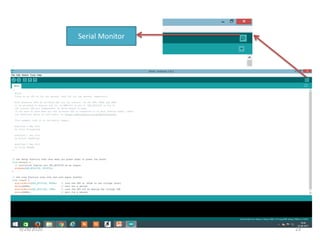
18. Activity 1.3
Type : Team of 2 Duration : 15 Minutes
Modify the program to display the LED state
every 2 sec on Serial Monitor.
9/28/2020 18
20. The word serial means "one after the other."
• What is Baud rate ?
Number of symbols transferred per sec
9/28/2020 20
21. Serial Display Functions
• Serial.begin(baud_rate)
//baud rate(characters per sec) between computer
and board is typically 9600 although you can
work with other speeds by changing settings of
COM Port
• Serial.print(value),
//value could be any data and even string
• Serial.println(value)
//print in new line
9/28/2020 21
22. Eg. Print INDIA on serial monitor
void setup( )
{
Serial.begin(9600);// 9600 is default baud rate of
serial com port of a computer
}
void loop( )
{
Serial.println(“INDIA”); // Send the value “INDIA”
}
9/28/2020 22
24. /*….. Modify the program to blink on pin12 and display the LED state every 2 sec
on Serial Monitor…..*/
void setup( )
{
pinMode(12, OUTPUT); //Initialize the digital pin as output
Serial.begin(9600);
}
void loop( )
{
digitalWrite(12, HIGH); // Turn the LED ON
Serial.println(“ON”); // Send the value “ON”
delay(2000); // Wait for a second
digitalWrite(12, LOW); // Turn the LED OFF
Serial.println(“OFF”); // Send the value “OFF”
delay(2000); // Wait for a second
}
9/28/2020 24
25. Activity 1.4
Type : Team of 2 Duration : 25 Minutes
Modify the program to blink 10 times per
loop iteration and display no. of loop
iterations on serial monitor.
9/28/2020 25
26. Looping Concept
//for loop concept
Syntax –
for(initialization ; condition; increment / decrement)
{
//code which you want to perform
}
Example : to print number from 1 to 10
for(int i=1;i<=10;i++)
{
Serial.println(i);
Serial.println(“INDIA”);
}
9/28/2020 26
27. long int Count=0;
void setup( )
{
pinMode(12, OUTPUT); //Initialize the digital pin as output
Serial.begin(9600);
Serial.println(“count of iterations running are: “);
}
void loop( )
{
for (int i=1;i<=10;i++)
{
Serial.println(i);
digitalWrite(12, HIGH);
Serial.println(“ON”);
delay(1000); // wait for a second
digitalWrite(12, LOW);
– Serial.println(“OFF”);
delay(1000); // wait for a second
}
Count++;
– Serial.print(“Iteration:”);
Serial.println(Count);
}9/28/2020 27
29. Topic Learning Outcomes
At the end of the topic the student should be able to
1. Explain the importance of platform based development
2. Use looping, delay and conditioning concepts in developing a
program on Arduino environment.
9/28/2020 29