This document provides an overview of an introductory course on Arduino prototyping. The course covers installing the Arduino integrated development environment and drivers, electrical components like resistors and LEDs, basic circuit prototyping using breadboards, and introductory Arduino programming concepts like inputs, outputs, and the setup and loop functions. It also outlines the history and purpose of the Arduino board and describes some common Arduino shields and components used in prototyping.
A ppt explaining Arduino usage and coding too. Arduino is the go-to gear for artists, hobbyists, students, and anyone with a gadgetry dream.
rose out of another formidable challenge: how to teach students to create electronics, fast.
The word “circuit” is derived from the circle. An Electrical Circuit must have a continuous LOOP from Power (Vcc) to Ground (GND).
Continuity is important to make portions of circuits are connect. Continuity is the simplest and possibly the most important setting on your multi-meter. Sometimes we call this “ringing out” a circuit.
Resistance is the measure of how much opposition to current flow is in a circuit.
Components should be removed entirely from the circuit to measure resistance. Note the settings on the multi-meter. Make sure that you are set for the appropriate range.
Current is the measure of the rate of charge flow. For Electrical Engineers – we consider this to be the movement of electrons.
In order to measure this – you must break the circuit or insert the meter in-line (series).
Use the breadboard to wire up a single LED with a 330 Ohm Resistor (Orange-Orange-Brown).
Arduino (/ɑːrˈdwiːnoʊ/) is an Italian open-source hardware and software company, project, and user community that designs and manufactures single-board microcontrollers and microcontroller kits for building digital devices. Its hardware products are licensed under a CC BY-SA license, while the software is licensed under the GNU Lesser General Public License (LGPL) or the GNU General Public License (GPL),[1] permitting the manufacture of Arduino boards and software distribution by anyone. Arduino boards are available commercially from the official website or through authorized distributors.[2]
Arduino board designs use a variety of microprocessors and controllers. The boards are equipped with sets of digital and analog input/output (I/O) pins that may be interfaced to various expansion boards ('shields') or breadboards (for prototyping) and other circuits. The boards feature serial communications interfaces, including Universal Serial Bus (USB) on some models, which are also used for loading programs. The microcontrollers can be programmed using the C and C++ programming languages (Embedded C), using a standard API which is also known as the Arduino Programming Language, inspired by the Processing language and used with a modified version of the Processing IDE. In addition to using traditional compiler toolchains, the Arduino project provides an integrated development environment (IDE) and a command line tool developed in Go.
The Arduino project began in 2005 as a tool for students at the Interaction Design Institute Ivrea, Italy,[3] aiming to provide a low-cost and easy way for novices and professionals to create devices that interact with their environment using sensors and actuators. Common examples of such devices intended for beginner hobbyists include simple robots, thermostats, and motion detectors.
The document provides an introduction to Arduino, including its history and capabilities. It was created in 2005 in Italy as an open-source hardware platform to make electronics more accessible to students and hobbyists. The Arduino board can read analog and digital input and output signals. It connects to a computer via USB and is programmed using the Arduino IDE. Common commands like digitalWrite(), analogWrite(), and pinMode() are used to control inputs, outputs, and PWM signals. The document includes examples of blinking LEDs, fading LEDs, and reading analog sensor values.
Arduino Workshop Day 1 Slides
Basics of Arduino - Introduction, Basics of Circuits, Signals & Electronics, LED Interfacing, Switch, Buzzer, LCD & Bluetooth Communication.
This document provides an introduction to Arduino and sensors. It discusses that Arduino was developed for artists and designers to prototype interactive displays using physical computing. It then describes the Arduino Uno board and lists examples of what can be taught using Arduino Uno such as introductory electronics, programming, and designing basic scientific equipment. Finally, it recommends some starter components for projects such as LEDs, LCD screens, temperature sensors, servos, and ultrasonic sensors.
IRJET- Arduino based Single Phase Fault Detection System using IoTIRJET Journal
The document discusses the benefits of exercise for mental health. Regular physical activity can help reduce anxiety and depression and improve mood and cognitive functioning. Exercise causes chemical changes in the brain that may help protect against mental illness and improve symptoms.
02 Sensors and Actuators Understand .pdfengsharaf2025
Sensors and Actuator
Understand networking theories and concepts, such as OSI model, TCP/IP protocols, and subnetting
Build logical and abstract thinking
The document provides instructions for assembling and using the Gigatron TTL microcomputer system, including a list of components, overview of electronic components, assembly instructions, and a user manual. It explains how to build both the computer and a PS/2 adapter using transistor-transistor logic integrated circuits and other basic electronic components. Instructions are included to help readers understand electronics, solder components, test the build, and use the resulting DIY microcomputer.
This document presents a mini project on an automatic temperature controlled fan. It includes an introduction, block diagram, components used, power supply details, and an introduction to the microcontroller used - PIC16F72. The system uses an LM35 temperature sensor, PIC microcontroller, DC fan driver circuit, resistors, diodes, capacitors, and voltage regulator. It regulates fan speed automatically based on temperature readings from the LM35 sensor through PWM control of the fan's driver circuit.
This document provides an overview and summary of an introductory Arduino workshop that teaches the basics of Arduino in 7 hours. The workshop covers getting started with Arduino software and components, electrical concepts like Ohm's Law, programming, serial communication, and virtual prototyping. Key topics include an introduction to the Arduino board, Fritzing software for circuit design, different sensors and components, the differences between analog and digital signals, and using Arduino pins for input and output.
chp3-Sensors, Actuators, and Microcontrollerssuser06ea42
This document discusses an Internet of Things course that covers sensors, actuators, and microcontrollers. The course introduces basic and advanced electronics concepts. It describes the SparkFun Inventor's Kit which contains components for building circuits like sensors, microcontrollers, and actuators. Students learn to interface sensors with a microcontroller and program it using the Arduino IDE. Packet Tracer software is presented as a tool for prototyping IoT systems by connecting simulated sensors and devices to a microcontroller board. Labs and activities reinforce the concepts taught in the course.
This document provides an overview of an ICT workshop on Arduino hardware platforms. It discusses the key components of a hardware project, including communication modules, microcontrollers, sensors/actuators, and power sources. It then describes the Arduino platform in more detail, including common Arduino boards, specifications of the Arduino Uno, the Arduino IDE, and how to connect Arduino to sensors and actuators. It also provides examples of temperature and other sensors that can be used in Arduino projects.
The document provides an overview of various electronics-related topics featured in Elektor Magazine's March/April 2020 issue. It highlights two LoRa radio protocol projects: the Elektor LoRa Node, a versatile and configurable long-range remote control module, and an ESP32-based doorbell that transmits notifications via Telegram. It also mentions a Meadow F7 board for .NET development, reviews of environmental sensor and oscilloscope boards, and upcoming coverage of AI and other technologies at the Embedded World exhibition.
This document describes a dark sensor circuit project. The circuit uses a light dependent resistor (LDR) and transistors to automatically switch lights on when it gets dark and off when it detects light. The components include transistors, resistors, an LED, battery, LDR, and buzzer. When the LDR senses a lack of light, its resistance increases and triggers the transistors to power the LED and buzzer. Applications include automatic street lights, security systems, and screen brightness control. Future work could explore using infrared sensors to detect human movement.
IRJET - Zigbee based Street Light Control SystemIRJET Journal
This document describes a zigbee-based street light control system that uses sensors and wireless communication to automatically control street lights. The system aims to reduce energy waste and maintenance costs by only turning lights on when motion is detected. It uses an Arduino microcontroller, PIR motion sensors, LDR light sensors, LED street lights, transistors, and zigbee modems for wireless communication between lights. When a passerby triggers a PIR sensor, it communicates with nearby lights to illuminate and ensure a safe light circle. This smart lighting system intends to efficiently control street lights based on presence detection while lowering energy consumption and costs compared to traditional static lighting systems.
The document provides an overview of Internet of Things (IoT) basics including various single board computers that can be used to build IoT projects like Raspberry Pi, Arduino, ESP8266, and ATTiny85. It also discusses sensors, displays, motors, software, and trends in IoT. The document encourages starting simple IoT projects, provides examples of home automation and weather station projects, and offers advice for quick starting including recommended suppliers and online resources.
Interface stepper motor through Arduino using LABVIEW.Ankita Tiwari
The document describes an experiment to interface a stepper motor with Arduino using LabVIEW. It involves establishing a front panel and block diagram in LabVIEW to start communication with Arduino and send new control values or a stop signal. The Arduino code checks for new values from LabVIEW, uses the value as the delay interval between motor steps to control speed, and sends the calculated motor speed to another serial port to confirm it is working. The result is the stepper motor is successfully run by interfacing Arduino with LabVIEW.
This document is a 37-page student project report on developing a water pump controller with a water level display. It includes sections on the introduction, literature review, proposed system and methodology, results and discussion, and conclusion. The project uses an Arduino board, ultrasonic sensor, LCD display, water pump, and other components to monitor and control the water level in a tank.
The document describes a circuit project using an LDR (light dependent resistor) on a breadboard that acts as a dark sensor. The circuit uses two transistors, an LED, an LDR, resistors, a battery, and a buzzer. When light falls on the LDR, the LED and buzzer turn off, and when light is blocked from the LDR, the LED glows and buzzer sounds. The document provides details on the components used, breadboard connections, circuit diagrams, and the working of the circuit.
This presentation has been made keeping in mind the students of undergraduate and postgraduate level. To keep the facts in a natural form and to display the material in more detail, the help of various books, websites and online medium has been taken. Whatever medium the material or facts have been taken from, an attempt has been made by the presenter to give their reference at the end.
In the seventh century, the rule of Sindh state was in the hands of Rai dynasty. We know the names of five kings of this dynasty- Rai Divji, Rai Singhras, Rai Sahasi, Rai Sihras II and Rai Sahasi II. During the time of Rai Sihras II, Nimruz of Persia attacked Sindh and killed him. After the return of the Persians, Rai Sahasi II became the king. After killing him, one of his Brahmin ministers named Chach took over the throne. He married the widow of Rai Sahasi and became the ruler of entire Sindh by suppressing the rebellions of the governors.
Overview of Employee in Odoo 18 - Odoo SlidesCeline George
The employee module is a core component of the HR workspace that helps the business to get the employee activities and details. This would also allow you to get the employee details by acting as a centralized system and accessing, updating, and managing all the other employee data.
How to Manage Multi Language for Invoice in Odoo 18Celine George
Odoo supports multi-language functionality for invoices, allowing you to generate invoices in your customers’ preferred languages. Multi-language support for invoices is crucial for businesses operating in global markets or dealing with customers from different linguistic backgrounds.
Completed Sunday 6/8. For Weekend 6/14 & 15th. (Fathers Day Weekend US.) These workshops are also timeless for future students TY. No admissions needed.
A 9th FREE WORKSHOP
Reiki - Yoga
“Intuition-II, The Chakras”
Your Attendance is valued.
We hit over 5k views for Spring Workshops and Updates-TY.
Thank you for attending our workshops.
If you are new, do welcome.
Grad Students: I am planning a Reiki-Yoga Master Course (As a package). I’m Fusing both together.
This will include the foundation of each practice. Our Free Workshops can be used with any Reiki Yoga training package. Traditional Reiki does host rules and ethics. Its silent and within the JP Culture/Area/Training/Word of Mouth. It allows remote healing but there’s limits As practitioners and masters, we are not allowed to share certain secrets/tools. Some content is designed only for “Masters”. Some yoga are similar like the Kriya Yoga-Church (Vowed Lessons). We will review both Reiki and Yoga (Master tools) in the Course upcoming.
S9/This Week’s Focus:
* A continuation of Intuition-2 Development. We will review the Chakra System - Our temple. A misguided, misused situation lol. This will also serve Attunement later.
Thx for tuning in. Your time investment is valued. I do select topics related to our timeline and community. For those seeking upgrades or Reiki Levels. Stay tuned for our June packages. It’s for self employed/Practitioners/Coaches…
Review & Topics:
* Reiki Is Japanese Energy Healing used Globally.
* Yoga is over 5k years old from India. It hosts many styles, teacher versions, and it’s Mainstream now vs decades ago.
* Anything of the Holistic, Wellness Department can be fused together. My origins are Alternative, Complementary Medicine. In short, I call this ND. I am also a metaphysician. I learnt during the 90s New Age Era. I forget we just hit another wavy. It’s GenZ word of Mouth, their New Age Era. WHOA, History Repeats lol. We are fusing together.
* So, most of you have experienced your Spiritual Awakening. However; The journey wont be perfect. There will be some roller coaster events. The perks are: We are in a faster Spiritual Zone than the 90s. There’s more support and information available.
(See Presentation for all sections, THX AGAIN.)
How to Manage Upselling of Subscriptions in Odoo 18Celine George
Subscriptions in Odoo 18 are designed to auto-renew indefinitely, ensuring continuous service for customers. However, businesses often need flexibility to adjust pricing or quantities based on evolving customer needs.
Analysis of Quantitative Data Parametric and non-parametric tests.pptxShrutidhara2
This presentation covers the following points--
Parametric Tests
• Testing the Significance of the Difference between Means
• Analysis of Variance (ANOVA) - One way and Two way
• Analysis of Co-variance (One-way)
Non-Parametric Tests:
• Chi-Square test
• Sign test
• Median test
• Sum of Rank test
• Mann-Whitney U-test
Moreover, it includes a comparison of parametric and non-parametric tests, a comparison of one-way ANOVA, two-way ANOVA, and one-way ANCOVA.
Energy Balances Of Oecd Countries 2011 Iea Statistics 1st Edition Oecdrazelitouali
Energy Balances Of Oecd Countries 2011 Iea Statistics 1st Edition Oecd
Energy Balances Of Oecd Countries 2011 Iea Statistics 1st Edition Oecd
Energy Balances Of Oecd Countries 2011 Iea Statistics 1st Edition Oecd
Slides from a Capitol Technology University presentation covering doctoral programs offered by the university. All programs are online, and regionally accredited. The presentation covers degree program details, tuition, financial aid and the application process.
Completed Tuesday June 10th.
An Orientation Sampler of 8 pages.
It helps to understand the text behind anything. This improves our performance and confidence.
Your training will be mixed media. Includes Rehab Intro and Meditation vods, all sold separately.
Editing our Vods & New Shop.
Retail under $30 per item. Store Fees will apply. Digital Should be low cost.
I am still editing the package. I wont be done until probably July? However; Orientation and Lecture 1 (Videos) will be available soon. Media will vary between PDF and Instruction Videos.
Thank you for attending our free workshops. Those can be used with any Reiki Yoga training package. Traditional Reiki does host rules and ethics. Its silent and within the JP Culture/Area/Training/Word of Mouth. It allows remote healing but there’s limits for practitioners and masters. We are not allowed to share certain secrets/tools. Some content is designed only for “Masters”. Some yoga are similar like the Kriya Yoga-Church (Vowed Lessons). We will review both Reiki and Yoga (Master symbols) later on. Sounds Simple but these things host Energy Power/Protection.
Imagine This package will be a supplement or upgrade for professional Reiki. You can create any style you need.
♥♥♥
•* ́ ̈ ̧.•
(Job) Tech for students: In short, high speed is essential. (Space, External Drives, virtual clouds)
Fast devices and desktops are important. Please upgrade your technology and office as needed and timely. - MIA J. Tech Dept (Timeless)
♥♥♥
•* ́ ̈ ̧.•
Copyright Disclaimer 2007-2025+: These lessons are not to be copied or revised without the
Author’s permission. These Lessons are designed Rev. Moore to instruct and guide students on the path to holistic health and wellness.
It’s about expanding your Nature Talents, gifts, even Favorite Hobbies.
♥♥♥
•* ́ ̈ ̧.•
First, Society is still stuck in the matrix. Many of the spiritual collective, say the matrix crashed. Its now collapsing. This means anything lower, darker realms, astral, and matrix are below 5D. 5D is thee trend. It’s our New Dimensional plane. However; this plane takes work ethic,
integration, and self discovery. ♥♥♥
•* ́ ̈ ̧.•
We don’t need to slave, mule, or work double shifts to fuse Reiki lol. It should blend naturally within our lifestyles. Same with Yoga. There’s no
need to use all the poses/asanas. For under a decade, my fav exercises are not asanas but Pilates. It’s all about Yoga-meditation when using Reiki. (Breaking old myths.)
Thank You for reading our Orientation Sampler. The Workshop is 14 pages on introduction. These are a joy and effortless to produce/make.
How to Manage Inventory Movement in Odoo 18 POSCeline George
Inventory management in the Odoo 18 Point of Sale system is tightly integrated with the inventory module, offering a solution to businesses to manage sales and stock in one united system.
Exploring Ocean Floor Features for Middle SchoolMarie
This 16 slide science reader is all about ocean floor features. It was made to use with middle school students.
You can download the PDF at thehomeschooldaily.com
Thanks! Marie
PEST OF WHEAT SORGHUM BAJRA and MINOR MILLETS.pptxArshad Shaikh
Wheat, sorghum, and bajra (pearl millet) are susceptible to various pests that can significantly impact crop yields. Common pests include aphids, stem borers, shoot flies, and armyworms. Aphids feed on plant sap, weakening the plants, while stem borers and shoot flies damage the stems and shoots, leading to dead hearts and reduced growth. Armyworms, on the other hand, are voracious feeders that can cause extensive defoliation and grain damage. Effective management strategies, including resistant varieties, cultural practices, and targeted pesticide applications, are essential to mitigate pest damage and ensure healthy crop production.
Available Sun June 8th, for Weekend June 14th/15th.
Timeless for Summer 25.
Our libraries do host classes for a year plus in most shops. Timelines do vary.
See also our Workshops 8, 9, and 2 Grad/Guest Updates.
Workshop 9 was uploaded early also for Weekend June 14th/15th.
Reiki Yoga Level 1 - Practitioner Studies. For our June Schedules
I luv the concept of effortless learning. My Background includes traditional & Distant Education. My Fav classes were online. A few on Campus recent years.
So, for LDMMIA I believe in Self-Help, Self-Care, Self-Serve lol. “How can my followers/readers privately attend courses?” So this season, I do want to expand our new Merch Shop. This includes digital production like no other - Wow. More Updates this Mo lol.
Merch Host: teespring.com
Sustainable Innovation with Immersive LearningLeonel Morgado
Prof. Leonel and Prof. Dennis approached educational uses, practices, and strategies of using immersion as a lens to interpret, design, and planning educational activities in a sustainable way. Rather than one-off gimmicks, the intent is to enable instructors (and institutions) to be able to include them in their regular activities, including the ability to evaluate and redesign them.
Immersion as a phenomenon enables interpreting pedagogical activities in a learning-agnostic way: you take a stance on the learning theory to follow, and leverage immersion to envision and guide your practice.
How to Manage & Create a New Department in Odoo 18 EmployeeCeline George
In Odoo 18's Employee module, organizing your workforce into departments enhances management and reporting efficiency. Departments are a crucial organizational unit within the Employee module.
1. Intro to Arduino
Zero to Prototyping
in a Flash!
Material designed by Linz Craig, Nick Poole, Prashanta Aryal,
Theo Simpson, Tai Johnson, and Eli Santistevan
2. This work is licensed under a Creative Commons Attribution-ShareAlike 3.0 United States License.
Overview of Class
Getting Started:
Installation, Applications and Materials
Electrical:
Components, Ohm's Law, Input and Output, Analog and Digital
-----------------------------
Programming:
Split into groups depending on experience
Serial Communication Basics:
Troubleshooting and Debugging
Virtual Prototyping:
Schematics and PCB Layout in Fritzing
3. This work is licensed under a Creative Commons Attribution-ShareAlike 3.0 United States License.
Arduino Board
“Strong Friend” Created in Ivrea, Italy
in 2005 by Massimo Banzi & David Cuartielles
Open Source Hardware
Processor
Coding is accessible & transferrable (C++, Processing, java)
4. This work is licensed under a Creative Commons Attribution-ShareAlike 3.0 United States License.
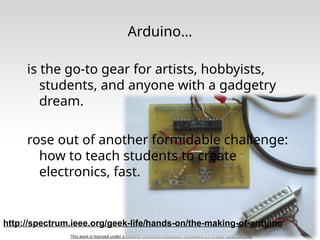
Arduino…
is the go-to gear for artists, hobbyists,
students, and anyone with a gadgetry
dream.
rose out of another formidable challenge:
how to teach students to create
electronics, fast.
http://spectrum.ieee.org/geek-life/hands-on/the-making-of-arduino
5. This work is licensed under a Creative Commons Attribution-ShareAlike 3.0 United States License.
Getting Started
• SW Installation: Arduino (v.1.0+)
Fritzing
SIK Guide
Code
Drivers (FTDI)
• Materials: SIK Guide
Analog I/O, Digital I/O,
Serial, &
Fritzing handouts
Arduino CheatSheet
6. This work is licensed under a Creative Commons Attribution-ShareAlike 3.0 United States License.
Analog
INPUTS
Digital IO
PWM(3, 5, 6, 9, 10, 11)
PWR IN USB
(to Computer)
SCLSDA
(I2C Bus)
POWER
5V / 3.3V / GND
RESET
7. This work is licensed under a Creative Commons Attribution-ShareAlike 3.0 United States License.
Analog
INPUTS
Digital IO
PWM(3, 5, 6, 9, 10, 11)
PWR IN USB
(to Computer)
SCLSDA
(I2C Bus)
POWER
5V / 3.3V / GND
RESET
8. This work is licensed under a Creative Commons Attribution-ShareAlike 3.0 United States License.
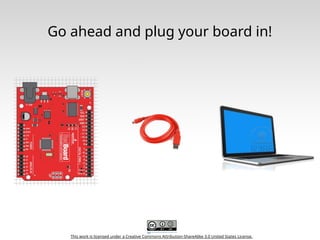
Go ahead and plug your board in!
9. This work is licensed under a Creative Commons Attribution-ShareAlike 3.0 United States License.
Arduino Shields
PCB Built Shield Inserted Shield
10. This work is licensed under a Creative Commons Attribution-ShareAlike 3.0 United States License.
Arduino Shields
Micro SD MP3 Trigger LCD
11. This work is licensed under a Creative Commons Attribution-ShareAlike 3.0 United States License.
SIK Components
Push Button Digital Input Switch - Closes
or opens circuit
Polarized, needs
resistor
Trim
potentiometer
Analog Input Variable resistor Also called a
Trimpot.
Photoresistor Analog Input Light Dependent
Resistor (LDR)
Resistance varies
with light.
Relay Digital Output Switch driven by
a small signal
Used to control
larger voltages
Temp Sensor Analog Input Temp Dependent
Resistor
Flex Sensor Analog Input Variable resistor
Soft Trimpot Analog Input Variable resistor Careful of shorts
RGB LED Dig & Analog
Output
16,777,216
different colors
Ooh... So pretty.
Name Image Type Function Notes
12. This work is licensed under a Creative Commons Attribution-ShareAlike 3.0 United States License.
SIK Components
13. This work is licensed under a Creative Commons Attribution-ShareAlike 3.0 United States License.
SIK Components
14. This work is licensed under a Creative Commons Attribution-ShareAlike 3.0 United States License.
SIK Components
15. This work is licensed under a Creative Commons Attribution-ShareAlike 3.0 United States License.
16. This work is licensed under a Creative Commons Attribution-ShareAlike 3.0 United States License.
Electricity Electronics Basic Concept
Review
• Ohms Law
• Voltage
• Current
• Resistance
• Using a Multi-meter
17. This work is licensed under a Creative Commons Attribution-ShareAlike 3.0 United States License.
Ohm’s Law
18. This work is licensed under a Creative Commons Attribution-ShareAlike 3.0 United States License.
Electrical Properties
Voltage
V
• Defined as
the amount
of potential
energy in a
circuit.
• Units: Volts (V)
Current
I
• The rate of
charge flow
in a circuit.
• Units: Amperes
(A)
Resistance
R
•
•
19. This work is licensed under a Creative Commons Attribution-ShareAlike 3.0 United States License.
Current Flow Analogy
High Current Low Current
20. This work is licensed under a Creative Commons Attribution-ShareAlike 3.0 United States License.
Water
Tower
Voltage Analogy
More Energy == Higher Voltage Less Energy == Lower Voltage
V
Water
Tower
V
21. This work is licensed under a Creative Commons Attribution-ShareAlike 3.0 United States License.
Resistance Analogy
Big Pipe == Lower Resistance Small Pipe == Higher Resistance
Water
Tower
Water
Tower
V
22. This work is licensed under a Creative Commons Attribution-ShareAlike 3.0 United States License.
Continuity – Is it a Circuit?
The word “circuit” is derived from the circle. An
Electrical Circuit must have a continuous LOOP
from Power (Vcc) to Ground (GND).
Continuity is important to make portions of circuits
are connect. Continuity is the simplest and
possibly the most important setting on your multi-
meter. Sometimes we call this “ringing out” a
circuit.
23. This work is licensed under a Creative Commons Attribution-ShareAlike 3.0 United States License.
Measuring Electricity – Voltage
Voltage is a measure of potential electrical
energy. A voltage is also called a potential
difference – it is measured between two
points in a circuit – across a device.
24. This work is licensed under a Creative Commons Attribution-ShareAlike 3.0 United States License.
Measuring Electricity -- Current
Current is the measure of the rate of charge flow.
For Electrical Engineers – we consider this to be
the movement of electrons.
In order to measure this – you must break the circuit
or insert the meter in-line (series).
25. This work is licensed under a Creative Commons Attribution-ShareAlike 3.0 United States License.
Measuring Electricity -- Resistance
Resistance is the measure of how much opposition
to current flow is in a circuit.
Components should be removed entirely from the
circuit to measure resistance. Note the settings on
the multi-meter. Make sure that you are set for the
appropriate range.
Resistance
settings
26. This work is licensed under a Creative Commons Attribution-ShareAlike 3.0 United States License.
Prototyping Circuits
Solderless Breadboard
One of the most useful tools in an engineer
or Maker’s toolkit. The three most
important things:
• A breadboard is easier than soldering
• A lot of those little holes are connected, which ones?
• Sometimes breadboards break
27. This work is licensed under a Creative Commons Attribution-ShareAlike 3.0 United States License.
What’s a Breadboard?
28. This work is licensed under a Creative Commons Attribution-ShareAlike 3.0 United States License.
Solderless Breadboard
Each row (horiz.) of 5
holes are connected.
Vertical columns –
called power bus are
connected vertically
29. This work is licensed under a Creative Commons Attribution-ShareAlike 3.0 United States License.
Using the Breadboard to built a simple
circuit
Use the breadboard
to wire up a single
LED with a 330 Ohm
Resistor (Orange-
Orange-Brown).
Note: the longer leg on the
LED is the positive leg and
the shorter leg is the
negative
30. This work is licensed under a Creative Commons Attribution-ShareAlike 3.0 United States License.
Fritzing View of Breadboard Circuit
What happens
when you break
the circuit?
What if you
wanted to add
more than one
LED?
31. This work is licensed under a Creative Commons Attribution-ShareAlike 3.0 United States License.
Adding control – let’s use the Arduino
and start programming!!!
32. This work is licensed under a Creative Commons Attribution-ShareAlike 3.0 United States License.
Concepts: INPUT vs. OUTPUT
Referenced from the perspective of the microcontroller (electrical
board).
Inputs is a signal /
information going into the
board.
Output is any signal exiting
the board.
Almost all systems that use physical computing will have
some form of output
What are some examples of Outputs?
33. This work is licensed under a Creative Commons Attribution-ShareAlike 3.0 United States License.
Concepts: INPUT vs. OUTPUT
Referenced from the perspective of the microcontroller (electrical
board).
Inputs is a signal /
information going into the
board.
Output is any signal exiting
the board.
Examples: Buttons Switches,
Light Sensors, Flex Sensors,
Humidity Sensors,
Temperature Sensors…
Examples: LEDs, DC motor,
servo motor, a piezo buzzer,
relay, an RGB LED
34. This work is licensed under a Creative Commons Attribution-ShareAlike 3.0 United States License.
Concepts: Analog vs. Digital
Microcontrollers are digital devices – ON or
OFF. Also called – discrete.
analog signals are anything that can be a full
range of values. What are some examples?
More on this later…
5 V
0 V
5 V
0 V
35. This work is licensed under a Creative Commons Attribution-ShareAlike 3.0 United States License.
Open up Arduino
Hints:
For PC Users
1.Let the installer copy
and move the files to the
appropriate locations, or
2.Create a folder under
C:Program Files (x86)
called Arduino. Move the
entire Arduino program
folder here.
For Mac Users
1. Move the Arduino
executable to the
dock for ease of
access.
2. Resist the temptation
to run these from
your desktop.
36. Arduino
Integrated Development Environment (IDE)
Two required functions /
methods / routines:
void setup()
{
// runs once
}
void loop()
{
// repeats
}
error & status messages
37. This work is licensed under a Creative Commons Attribution-ShareAlike 3.0 United States License.
Settings: Tools Serial Port
Your computer
communicates to the
Arduino microcontroller via
a serial port through a
USB-Serial adapter.
Check to make sure that
the drivers are properly
installed.
38. This work is licensed under a Creative Commons Attribution-ShareAlike 3.0 United States License.
Settings: Tools Board
Next, double-check that the proper board is selected under
the ToolsBoard menu.
39. This work is licensed under a Creative Commons Attribution-ShareAlike 3.0 United States License.
Arduino & Arduino Compatible Boards
40. This work is licensed under a Creative Commons Attribution-ShareAlike 3.0 United States License.
digitalWrite()
analogWrite()
digitalRead()
if() statements /
Boolean
analogRead()
Serial communication
This work is licensed under a Creative Commons Attribution-ShareAlike 3.0 United States License.
BIG
6
CONCEPTS
41. This work is licensed under a Creative Commons Attribution-ShareAlike 3.0 United States License.
Let’s get to coding…
Project #1 – Blink
“Hello World” of Physical Computing
Psuedo-code – how should this work?
Turn
LED ON
Wait
Turn
LED
OFF
Wait
Rinse &
Repeat
42. This work is licensed under a Creative Commons Attribution-ShareAlike 3.0 United States License.
Comments, Comments, Comments
Comments are for you – the programmer and your
friends…or anyone else human that might read
your code.
// this is for single line comments
// it’s good to put a description at the
top and before anything ‘tricky’
/* this is for multi-line comments
Like this…
And this….
*/
43. This work is licensed under a Creative Commons Attribution-ShareAlike 3.0 United States License.
comments
44. This work is licensed under a Creative Commons Attribution-ShareAlike 3.0 United States License.
Three commands to know…
pinMode(pin, INPUT/OUTPUT);
ex: pinMode(13, OUTPUT);
digitalWrite(pin, HIGH/LOW);
ex: digitalWrite(13, HIGH);
delay(time_ms);
ex: delay(2500); // delay of 2.5 sec.
// NOTE: -> commands are CASE-sensitive
45. This work is licensed under a Creative Commons Attribution-ShareAlike 3.0 United States License.
Project #1: Wiring Diagram
Move the green
wire from the
power bus to pin
13 (or any other
Digital I/O pin on
the Arduino
board.
Image created in Fritzing
46. This work is licensed under a Creative Commons Attribution-ShareAlike 3.0 United States License.
A few simple challenges
Let’s make LED#13 blink!
Challenge 1a – blink with a 200 ms
second interval.
Challenge 1b – blink to mimic a heartbeat
Challenge 1c – find the fastest blink that
the human eye can still detect…
1 ms delay? 2 ms delay? 3 ms
delay???
47. This work is licensed under a Creative Commons Attribution-ShareAlike 3.0 United States License.
Try adding other LEDs
48. This work is licensed under a Creative Commons Attribution-ShareAlike 3.0 United States License.
Programming Concepts: Variables
Variable Scope
Global
---
Function-level
49. This work is licensed under a Creative Commons Attribution-ShareAlike 3.0 United States License.
Programming Concepts: Variable
Types
Variable Types:
8 bits 16 bits 32 bits
byte
char
int
unsigned int
long
unsigned long
float
50. This work is licensed under a Creative Commons Attribution-ShareAlike 3.0 United States License.
Fading in and Fading Out
(Analog or Digital?)
A few pins on the Arduino allow for us to
modify the output to mimic an analog
signal.
This is done by a technique called:
Pulse Width Modulation (PWM)
51. This work is licensed under a Creative Commons Attribution-ShareAlike 3.0 United States License.
Concepts: Analog vs. Digital
To create an analog signal, the microcontroller
uses a technique called PWM. By varying the
duty cycle, we can mimic an “average” analog
voltage.
Pulse Width Modulation (PWM)
52. This work is licensed under a Creative Commons Attribution-ShareAlike 3.0 United States License.
analogWrite(pin, val);
pin – refers to the OUTPUT pin
(limited to pins 3, 5, 6, 9, 10,
11.) – denoted by a ~ symbol
val – 8 bit value (0 – 255).
0 => 0V | 255 => 5V
Project #2 – Fading
Introducing a new command…
53. This work is licensed under a Creative Commons Attribution-ShareAlike 3.0 United States License.
Move one of your LED pins over to Pin 9
In Arduino, open up:
File Examples 01.Basics Fade
54. This work is licensed under a Creative Commons Attribution-ShareAlike 3.0 United States License.
Fade - Code Review
55. This work is licensed under a Creative Commons Attribution-ShareAlike 3.0 United States License.
Fade - Code Review
56. This work is licensed under a Creative Commons Attribution-ShareAlike 3.0 United States License.
Project# 2 -- Fading
Challenge 2a – Change the rate of the
fading in and out. There are at least two
different ways to do this – can you
figure them out?
Challenge 2b – Use 2 (or more) LEDs – so
that one fades in as the other one fades
out.
57. This work is licensed under a Creative Commons Attribution-ShareAlike 3.0 United States License.
Color Mixing
Tri-color LED
In the SIK, this is a standard –
Common Cathode LED
This means the negative side
of the LED is all tied to Ground.
R G B
58. This work is licensed under a Creative Commons Attribution-ShareAlike 3.0 United States License.
Project 3 – RGB LED
Note: The longest
leg of the RGB
LED is the
Common
Cathode. This
goes to GND.
Use pins 5, 6, & 9
59. This work is licensed under a Creative Commons Attribution-ShareAlike 3.0 United States License.
How many unique colors can you
create?
Use Colorpicker.com or
experiment on your
own.
Pick out a few colors that
you want to try re-
creating for a lamp or
lighting display...
Play around with this
with the
analogWrite()
command.
60. This work is licensed under a Creative Commons Attribution-ShareAlike 3.0 United States License.
RGB LED Color Mixing
int redPin = 5;
int greenPin = 6;
int bluePin = 9;
void setup()
{
pinMode(redPin, OUTPUT);
pinMode(greenPin, OUTPUT);
pinMode(bluePin, OUTPUT);
}
61. This work is licensed under a Creative Commons Attribution-ShareAlike 3.0 United States License.
RGB LED Color Mixing
void loop()
{
analogWrite(redPin, 255);
analogWrite (greenPin, 255);
analogWrite (bluePin, 255);
}
62. This work is licensed under a Creative Commons Attribution-ShareAlike 3.0 United States License.
Project: Mood Lamp / Light Sculpture
63. This work is licensed under a Creative Commons Attribution-ShareAlike 3.0 United States License.
Napkin
Schematics
Emphasize the
engineering design
process with
students. We like to
skirt the line
between formal
and informal with a
tool called Napkin
Schematics.
64. This work is licensed under a Creative Commons Attribution-ShareAlike 3.0 United States License.
Napkin
Schematics
Emphasize the
engineering design
process with
students. We like to
skirt the line
between formal
and informal with a
tool called Napkin
Schematics.
65. This work is licensed under a Creative Commons Attribution-ShareAlike 3.0 United States License.
Driving Motors or other High Current
Loads
NPN Transistor (Common Emitter “Amplifier”
Circuit)
to Digital
Pin 9
66. This work is licensed under a Creative Commons Attribution-ShareAlike 3.0 United States License.
Input
Input is any signal entering an electrical system .
• Both digital and analog sensors are forms of input
• Input can also take many other forms: Keyboards,
a mouse, infrared sensors, biometric sensors, or
just plain voltage from a circuit
67. This work is licensed under a Creative Commons Attribution-ShareAlike 3.0 United States License.
Project #4 – Digital Input
In Arduino, open up:
File Examples 02.Digital Button
68. This work is licensed under a Creative Commons Attribution-ShareAlike 3.0 United States License.
Digital Sensors (a.k.a. Switches)
Pull-up Resistor (circuit)
to Digital Pin 2
69. This work is licensed under a Creative Commons Attribution-ShareAlike 3.0 United States License.
Digital Sensors (a.k.a. Switches)
Add an indicator LED to Pin 13
This is just like our
1st
circuit!
70. This work is licensed under a Creative Commons Attribution-ShareAlike 3.0 United States License.
Digital Input
• Connect digital input to your Arduino using Pins # 0 –
13 (Although pins # 0 & 1 are also used for
programming)
• Digital Input needs a pinMode command:
pinMode (pinNumber, INPUT);
Make sure to use ALL CAPS for INPUT
• To get a digital reading:
int buttonState = digitalRead
(pinNumber);
• Digital Input values are only HIGH (On) or LOW (Off)
71. This work is licensed under a Creative Commons Attribution-ShareAlike 3.0 United States License.
Digital Sensors
• Digital sensors are more straight forward than
Analog
• No matter what the sensor there are only two
settings: On and Off
• Signal is always either HIGH (On) or LOW (Off)
• Voltage signal for HIGH will be a little less than 5V
on your Uno
• Voltage signal for LOW will be 0V on most systems
72. This work is licensed under a Creative Commons Attribution-ShareAlike 3.0 United States License.
http://opensourcehardwarejunkies.com/tutorial-03-digitalread-and-
73. This work is licensed under a Creative Commons Attribution-ShareAlike 3.0 United States License.
Programming: Conditional Statements
if()
74. This work is licensed under a Creative Commons Attribution-ShareAlike 3.0 United States License.
void loop()
{
int buttonState = digitalRead(5);
if(buttonState == LOW)
{ // do something
}
else
{ // do something else
}
}
Programming: Conditional Statements
if()
DIG
INPUT
75. This work is licensed under a Creative Commons Attribution-ShareAlike 3.0 United States License.
Boolean Operators
<Boolean> Description
( ) == ( ) is equal?
( ) != ( ) is not equal?
( ) > ( ) greater than
( ) >= ( ) greater than or equal
( ) < ( ) less than
( ) <= ( ) less than or equal
76. This work is licensed under a Creative Commons Attribution-ShareAlike 3.0 United States License.
Trimpot (Potentiometer)
Variable Resistor
wiper
fixed
end
fixed
end
77. This work is licensed under a Creative Commons Attribution-ShareAlike 3.0 United States License.
Analog Sensors
3 Pin Potentiometer = var. resistor (circuit)
a.k.a. Voltage Divider Circuit
1.0 V 1.0 V
wiper
fixed
ends
78. This work is licensed under a Creative Commons Attribution-ShareAlike 3.0 United States License.
Ohms Law… (just the basics)
Actually, this is the “voltage divider”
79. This work is licensed under a Creative Commons Attribution-ShareAlike 3.0 United States License.
analogRead()
Arduino uses a 10-bit A/D Converter:
• this means that you get input values
from 0 to 1023
• 0 V 0
• 5 V 1023
Ex:
int sensorValue = analogRead(A0);
80. This work is licensed under a Creative Commons Attribution-ShareAlike 3.0 United States License.
Using Serial Communication
Method used to transfer data between two
devices.
Arduino dedicates Digital I/O pin # 0 to
receiving and Digital I/O pin #1 to transmit.
Data passes between the computer and Arduino
through the USB cable. Data is transmitted as zeros
(‘0’) and ones (‘1’) sequentially.
81. This work is licensed under a Creative Commons Attribution-ShareAlike 3.0 United States License.
Serial Monitor & analogRead()
Initializes the Serial
Communication
9600 baud data rate
prints data to serial bus
82. This work is licensed under a Creative Commons Attribution-ShareAlike 3.0 United States License.
Serial Monitor & analogRead()
Opens up a
Serial Terminal
Window
83. This work is licensed under a Creative Commons Attribution-ShareAlike 3.0 United States License.
Analog Sensors
2 Pin Analog Sensors = var. resistor
Take two sensors -- Use
the Serial Monitor and
find the range of input
values you get for each
sensor.
MaxAnalogRead = _________
MinAnalogRead = _________
84. This work is licensed under a Creative Commons Attribution-ShareAlike 3.0 United States License.
Analog Sensors
Examples:
Sensors Variables
Mic soundVolume
Photoresistor lightLevel
Potentiometer dialPosition
Temp Sensor temperature
Flex Sensor bend
Accelerometer tilt/acceleration
85. This work is licensed under a Creative Commons Attribution-ShareAlike 3.0 United States License.
Additional Serial Communication
Sending a Message
void loop ( )
{
Serial.print(“Hands on “) ;
Serial.print(“Learning ”) ;
Serial.println(“is Fun!!!”) ;
}
86. This work is licensed under a Creative Commons Attribution-ShareAlike 3.0 United States License.
87. This work is licensed under a Creative Commons Attribution-ShareAlike 3.0 United States License.
Serial Communication:
Serial Debugging
void loop()
{
int xVar = 10;
Serial.print ( “Variable xVar is “ ) ;
Serial.println ( xVar ) ;
}
88. This work is licensed under a Creative Commons Attribution-ShareAlike 3.0 United States License.
Serial Communication:
Serial Troubleshooting
void loop ( )
{
Serial.print (“Digital pin 9: “);
Serial.println (digitalRead(9));
}
89. This work is licensed under a Creative Commons Attribution-ShareAlike 3.0 United States License.
Virtual Electrical Prototyping Project
started in 2007 by the Interaction Design Lab
at the University of Applied Science Potsdam, Germany
Open Source
Prototypes: Document, Share, Teach, Manufacture
90. This work is licensed under a Creative Commons Attribution-ShareAlike 3.0 United States License.
Now that you feel comfortable putting together
circuits with your breadboard let’s talk about
how to go from the breadboard to a PCB
91. This work is licensed under a Creative Commons Attribution-ShareAlike 3.0 United States License.
Free Time
The rest of the class is dedicated to free pursuit
Experiment with the various circuits and
lessons in the SIK.
Explore the additional tutorials available on
learn.sparkfun.com
Thank you for attending our Intro to Arduino
class
92. This work is licensed under a Creative Commons Attribution-ShareAlike 3.0 United States License.
Questions?
93. This work is licensed under a Creative Commons Attribution-ShareAlike 3.0 United States License.
www.sparkfun.com
6175 Longbow Drive, Suite 200
Boulder, Colorado 80301
#37: Be sure to point out the what all of the buttons do.
#38: All connections to computers- mice, printers etc use a serial port. Gotta pick the right one.
#39: All connections to computers- mice, printers etc use a serial port. Gotta pick the right one.
#44: Review the two main parts of the sketch – void setup() and void loop()
Provide rationale for good commenting.
Emphasize the need for good / clean coding practices like indenting.
#45: Three commands to rule the world… or at least do 80% of cool Arduino projects.
#63: Here are a few examples of project ideas that you can extend this to in the class.