Introduction to Computer Science Using Python and Pygame
5 likes4,316 views

This document provides an introduction to computer science concepts like Python programming, graphics, and game development. It covers topics such as variables, operators, conditionals, loops, functions, lists, classes, and graphics using the Pygame library. The document contains code examples and exercises for students to learn programming concepts. It aims to teach Python and game programming fundamentals through hands-on examples and labs.


![It is also possible to count backwards down
towards zero.
Listing 3.5: Count down from 10 to 1
for i in range (10 ,0 , -1) :
print ( i )
If the numbers that a program needs to it-
erate through don’t form an easy pattern, it is
possible to pull numbers out of a list:
Listing 3.6: Print numbers out of a list
for i in [2 ,6 ,4 ,2 ,4 ,6 ,7 ,4]:
print ( i )
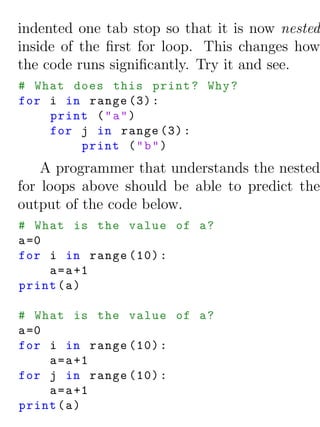
Try to predict what the code below will print.
Then enter the code and see if you are correct.
# What does this print ? Why ?
for i in range (3) :
print ( " a " )
for j in range (3) :
print ( " b " )
This next block of code is almost identical
to the one above. The second for loop has been](https://image.slidesharecdn.com/csintrobookkindle-120108035150-phpapp01/85/Introduction-to-Computer-Science-Using-Python-and-Pygame-57-320.jpg)


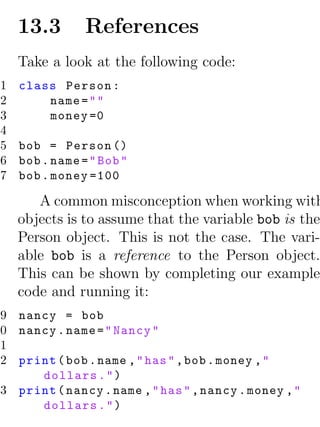
![Figure 4.1: Cartesian coordinate system
plotting graphics. The computer uses a differ-
ent coordinate system. Understanding why it is
different requires a bit of computer history.
During the early 80’s, most computer sys-
tems were text based and did not support graph-
ics. Figure 4.2 2 shows a early spreadsheet pro-
gram run on an Apple ][. When positioning text
on the screen, programmers started at the top
calling it line 1. The screen continued down for
2
Graphic from Wikimedia Commons
http://en.wikipedia.org/wiki/File:Visicalc.pn](https://image.slidesharecdn.com/csintrobookkindle-120108035150-phpapp01/85/Introduction-to-Computer-Science-Using-Python-and-Pygame-71-320.jpg)


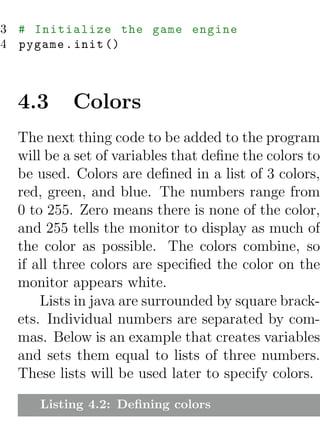
![black = [ 0 , 0 , 0]
white = [255 ,255 ,255]
blue = [ 0 , 0 ,255]
green = [ 0 ,255 , 0]
red = [255 , 0 , 0]
Using the interactive shell in IDLE, try defin-
ing these variables and printing them out. If the
five colors above aren’t the colors you are look-
ing for, you can define your own. To pick a
color, find an on-line color picker, like:
http://www.switchonthecode.com/tutorials/java
Extra: Some color pickers specify colors in
hexadecimal. You can enter hexadecimal num-
bers if you start them with 0x. For example:
white =[0 xFF , 0 xFF , 0 xFF ]
Eventually the program will need to use the
value of π when drawing arcs, so this is a good
time in our program to define a variable that
contains the value of π.
pi =3.141592653](https://image.slidesharecdn.com/csintrobookkindle-120108035150-phpapp01/85/Introduction-to-Computer-Science-Using-Python-and-Pygame-77-320.jpg)
![4.4 Open a window
So far the programs we have created only printed
text. The programs did not open any windows
like most modern programs do in Windows or
Macs. The code to open a window is not com-
plex. Below is the required code, which creates
a window sized to 400 x 400 pixels:
Listing 4.3: Opening and setting the window
size
# Set the height and width of the
screen
size =[400 ,400]
screen = pygame . display . set_mode ( size )
To set the title of the window in its title bar
and the title shown when it is minimized, use
the following line of code:
Listing 4.4: Setting the window title
pygame . display . set_caption ( " Professor
Craven ’s Cool Game " )](https://image.slidesharecdn.com/csintrobookkindle-120108035150-phpapp01/85/Introduction-to-Computer-Science-Using-Python-and-Pygame-78-320.jpg)


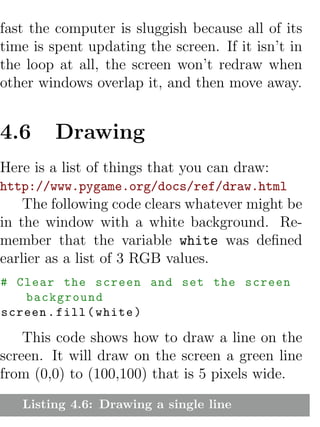
![# Draw on the screen a green line from
(0 ,0) to (100 ,100)
# that is 5 pixels wide .
pygame . draw . line ( screen , green
,[0 ,0] ,[100 ,100] ,5)
4.7 Loops and offsets
Programs can repeat things over and over. The
code below draws a line over and over. You can
do multiple lines, and even draw an entire car.
This will be discussed in greater detail later.
Simply putting a line drawing command in-
side a loop will cause multiple lines being drawn
to the screen. But if each line has the same
starting and ending coordinates, then each line
will draw on top of the other line and it will
look like only one line was drawn.
To get around this, it is necessary to off-
set the coordinates each time through the loop.
So the first time through the loop the variable](https://image.slidesharecdn.com/csintrobookkindle-120108035150-phpapp01/85/Introduction-to-Computer-Science-Using-Python-and-Pygame-82-320.jpg)
![y offset is zero. The line in the code below
is drawn from (0,10) to (100,110). The next
time through the loop y offset increased by
10. This causes the next line to be drawn to
have new coordinates of (0,20) and (100,120).
This continues each time through the loop shift-
ing the coordinates of each line down by 10 pix-
els.
Listing 4.7: Drawing a series of lines
# Draw on the screen several green
lines from (0 ,10) to (100 ,110) 5
pixels wide
# using a loop
y_offset =0
while y_offset < 100:
pygame . draw . line ( screen , red ,[0 ,10+
y_offset ] ,[100 ,110+ y_offset ] ,5)
y_offset = y_offset +10](https://image.slidesharecdn.com/csintrobookkindle-120108035150-phpapp01/85/Introduction-to-Computer-Science-Using-Python-and-Pygame-83-320.jpg)

![# Render the text . " True " means anti -
aliased text .
# Black is the color . The variable
black was defined
# above as a list of [0 ,0 ,0]
# Note : This line creates an image of
the letters ,
# but does not put it on the screen
yet .
text = font . render ( " My text " , True ,
black )
# Put the image of the text on the
screen at 250 x250
screen . blit ( text , [250 ,250])
Figure 4.6 shows a rectangle with the ori-
gin at (20,20), a width of 250 and a height of
100. When specifying a rectangle the computer
needs a list of these four numbers in the order
of (x,y,width,height).
The next line of code draws this rectangle.
The first two numbers in the list define the up-
per left corner at (20,20). The next two num-](https://image.slidesharecdn.com/csintrobookkindle-120108035150-phpapp01/85/Introduction-to-Computer-Science-Using-Python-and-Pygame-85-320.jpg)
![bers specify first the width of 250 pixels, and
then the height of 100 pixels. The two at the
end specifies a line width of 2 pixels.
Listing 4.9: Drawing a rectangle
# Draw a rectangle
pygame . draw . rect ( screen , black
,[20 ,20 ,250 ,100] ,2)
The ellipse is 250 pixels wide and 100 pixels
tall. The upper left corner of a 250x100 rect-
angle that contains it is at (20,20). Note that
nothing is actually drawn at (20,20).
Figure 4.6 shows both the ellipse and rect-
angle. With both drawn on top of each other it
is easier to see how the ellipse is specified.
Listing 4.10: Drawing an ellipse
# Draw an ellipse , using a rectangle
as the outside boundaries
pygame . draw . ellipse ( screen , black
,[20 ,20 ,250 ,100] ,2)](https://image.slidesharecdn.com/csintrobookkindle-120108035150-phpapp01/85/Introduction-to-Computer-Science-Using-Python-and-Pygame-86-320.jpg)

![Figure 4.7: Arcs
Use radians to determine what
# angle to draw .
pygame . draw . arc ( screen , black
,[20 ,220 ,250 ,200] , 0 , pi /2 , 2)
pygame . draw . arc ( screen , green
,[20 ,220 ,250 ,200] , pi /2 , pi , 2)
pygame . draw . arc ( screen , blue ,
[20 ,220 ,250 ,200] , pi ,3* pi /2 , 2)
pygame . draw . arc ( screen , red ,
[20 ,220 ,250 ,200] ,3* pi /2 , 2* pi , 2)
The next line of code draws a polygon. The
triangle shape is defined with three points at
(100,100) (0,200) and (200,200). It is possible](https://image.slidesharecdn.com/csintrobookkindle-120108035150-phpapp01/85/Introduction-to-Computer-Science-Using-Python-and-Pygame-88-320.jpg)

![polygon command
pygame . draw . polygon ( screen , black
,[[100 ,100] ,[0 ,200] ,[200 ,200]] ,5)
4.9 Flipping the screen
Very important! You must flip the display af-
ter you draw. The computer will not display
the graphics as you draw them because it would
cause the screen to flicker. This waits to display
the screen until the program has finished draw-
ing. The command below “flips” the graphics
to the screen.
Failure to include this command will mean
the program just shows a blank screen. Any
drawing code after this flip will not display.
Listing 4.13: Flipping the Pygame display
# Go ahead and update the screen with
what we ’ ve drawn .
pygame . display . flip ()](https://image.slidesharecdn.com/csintrobookkindle-120108035150-phpapp01/85/Introduction-to-Computer-Science-Using-Python-and-Pygame-90-320.jpg)


![4.11 Full Listing
This is a full listing of the program discussed
in this chapter. This program, along with other
programs, may be downloaded from:
http://cs.simpson.edu/?q=python_pygame_exampl
Listing 4.15: Simple Graphics Demo
# Sample Python / Pygame Programs
# Simpson College Computer Science
# http :// cs . simpson . edu
# Import a library of functions called
’ pygame ’
import pygame
# Initialize the game engine
pygame . init ()
# Define the colors we will use in RGB
format
black = [ 0 , 0 , 0]
white = [255 ,255 ,255]
blue = [ 0 , 0 ,255]](https://image.slidesharecdn.com/csintrobookkindle-120108035150-phpapp01/85/Introduction-to-Computer-Science-Using-Python-and-Pygame-93-320.jpg)
![15 green = [ 0 ,255 , 0]
16 red = [255 , 0 , 0]
17
18 pi =3.141592653
19
20 # Set the height and width of the
screen
21 size =[400 ,500]
22 screen = pygame . display . set_mode ( size )
23
24 pygame . display . set_caption ( " Professor
Craven ’s Cool Game " )
25
26 # Loop until the user clicks the close
button .
27 done = False
28 clock = pygame . time . Clock ()
29
30 while done == False :
31
32 # This limits the while loop to a
max of 10 times per second .
33 # Leave this out and we will use
all CPU we can .
34 clock . tick (10)
35](https://image.slidesharecdn.com/csintrobookkindle-120108035150-phpapp01/85/Introduction-to-Computer-Science-Using-Python-and-Pygame-94-320.jpg)
![for event in pygame . event . get () : #
User did something
if event . type == pygame . QUIT :
# If user clicked close
done = True # Flag that we
are done so we exit
this loop
# All drawing code happens after
the for loop and but
# inside the main while done ==
False loop .
# Clear the screen and set the
screen background
screen . fill ( white )
# Draw on the screen a green line
from (0 ,0) to (100 ,100)
# 5 pixels wide .
pygame . draw . line ( screen , green
,[0 ,0] ,[100 ,100] ,5)
# Draw on the screen several green
lines from (0 ,10) to (100 ,110)
# 5 pixels wide using a loop](https://image.slidesharecdn.com/csintrobookkindle-120108035150-phpapp01/85/Introduction-to-Computer-Science-Using-Python-and-Pygame-95-320.jpg)
![52 y_offset =0
53 while y_offset < 100:
54 pygame . draw . line ( screen , red
,[0 ,10+ y_offset ] ,[100 ,110+
y_offset ] ,5)
55 y_offset = y_offset +10
56
57 # Select the font to use . Default
font , 25 pt size .
58 font = pygame . font . Font ( None , 25)
59
60 # Render the text . " True " means
anti - aliased text .
61 # Black is the color . This creates
an image of the
62 # letters , but does not put it on
the screen
63 text = font . render ( " My text " , True ,
black )
64
65 # Put the image of the text on the
screen at 250 x250
66 screen . blit ( text , [250 ,250])
67
68 # Draw a rectangle](https://image.slidesharecdn.com/csintrobookkindle-120108035150-phpapp01/85/Introduction-to-Computer-Science-Using-Python-and-Pygame-96-320.jpg)
![pygame . draw . rect ( screen , black
,[20 ,20 ,250 ,100] ,2)
# Draw an ellipse , using a
rectangle as the outside
boundaries
pygame . draw . ellipse ( screen , black
,[20 ,20 ,250 ,100] ,2)
# Draw an arc as part of an
ellipse .
# Use radians to determine what
angle to draw .
pygame . draw . arc ( screen , black
,[20 ,220 ,250 ,200] , 0 , pi /2 , 2)
pygame . draw . arc ( screen , green
,[20 ,220 ,250 ,200] , pi /2 , pi , 2)
pygame . draw . arc ( screen , blue ,
[20 ,220 ,250 ,200] , pi ,3* pi /2 , 2)
pygame . draw . arc ( screen , red ,
[20 ,220 ,250 ,200] ,3* pi /2 , 2* pi ,
2)
# This draws a triangle using the
polygon command](https://image.slidesharecdn.com/csintrobookkindle-120108035150-phpapp01/85/Introduction-to-Computer-Science-Using-Python-and-Pygame-97-320.jpg)
![82 pygame . draw . polygon ( screen , black
,[[100 ,100] ,[0 ,200] ,[200 ,200]] ,5
83
84 # Go ahead and update the screen
with what we ’ ve drawn .
85 # This MUST happen after all the
other drawing commands .
86 pygame . display . flip ()
87
88 # Be IDLE friendly
89 pygame . quit ()](https://image.slidesharecdn.com/csintrobookkindle-120108035150-phpapp01/85/Introduction-to-Computer-Science-Using-Python-and-Pygame-98-320.jpg)


![following commands in the interactive Python
shell and see what is displayed:
type ( (2 ,3 ,4 ,5) )
type ( [2 ,3 ,4 ,5] )
6.2 Working with lists
Try these examples using IDLE’s command line.
To create a list and print it out, try the follow-
ing:
>>> x=[1,2]
>>> print (x)
[1, 2]
To print an individual element in an array:
>>> print (x[0])
1
Note that list locations start at zero! So a
list with 10 elements does not have an element](https://image.slidesharecdn.com/csintrobookkindle-120108035150-phpapp01/85/Introduction-to-Computer-Science-Using-Python-and-Pygame-113-320.jpg)
![in spot [10]. Just spots [0] through [9]. It can
be very confusing create an array of 10 items
and not be able to access item 10.
A program can assign new values to an indi-
vidual element in a list. In the case below, the
first spot at location zero (not one) is assigned
the number 22.
>>> x[0]=22
>>> print (x)
[22, 2]
Also, a program can create a “tuple”. This
data type works just like a list, but with two
exceptions. First, it is created with parenthesis
rather than square brackets. Second, it is not
possible to change the tuple once created. See
below:
>>> x=(1,2)
>>> print (x)
(1, 2)](https://image.slidesharecdn.com/csintrobookkindle-120108035150-phpapp01/85/Introduction-to-Computer-Science-Using-Python-and-Pygame-114-320.jpg)
![>>> print (x[0])
1
>>> x[0]=22
Traceback (most recent call last):
File "<pyshell#18>", line 1, in <module>
x[0]=22
TypeError: ’tuple’ object does not support
>>>
As can be seen from the output of the code
above, the assignment that could be done with
the list was not able to be done with the tuple.
An array is a list of objects. It a type of data
structure that is very important in computer
science. The “list” data type in Python is very
similar to an array data structure.
For items stored in lists, it is possible to it-
erate through each item. For example:
my_list =[101 ,20 ,10 ,50 ,60]
for item in my_list :
print ( item )
Programs can store strings in lists:](https://image.slidesharecdn.com/csintrobookkindle-120108035150-phpapp01/85/Introduction-to-Computer-Science-Using-Python-and-Pygame-115-320.jpg)
![my_list =[ " Spoon " , " Fork " , " Knife " ]
for item in my_list :
print ( item )
Lists can even contain other lists.
my_list =[ [2 ,3] , [4 ,3] , [6 ,7] ]
for item in my_list :
print ( item )
To add to a list, it is necessary to create a
blank list and then use the append function.
Listing 6.1: Creating a list of numbers from
user input
1 my_list =[] # Empty list
2 for i in range (5) :
3 userInput = int ( input ( " Enter an
integer : " ) )
4 my_list . append ( userInput )
5
6 print ( " You entered these values : " ,
my_list )
Creating a running total of an array is a
common operation. Here’s how it is done:](https://image.slidesharecdn.com/csintrobookkindle-120108035150-phpapp01/85/Introduction-to-Computer-Science-Using-Python-and-Pygame-116-320.jpg)
![Listing 6.2: Summing the values in a list
# Copy of the array to sum
myArray = [5 ,76 ,8 ,5 ,3 ,3 ,56 ,5 ,23]
# Initial sum should be zero
arrayTotal = 0
# Loop from 0 up to the number of
elements
# in the array :
for i in range ( len ( myArray ) ) :
# Add element 0 , next 1 , then 2 , etc
.
sum += myArray [ i ]
# Print the result
print ( sum )
Numbers in an array can also be changed by
using a for loop:
Listing 6.3: Doubling all the numbers in a list
# Copy of the array to modify
myArray = [5 ,76 ,8 ,5 ,3 ,3 ,56 ,5 ,23]](https://image.slidesharecdn.com/csintrobookkindle-120108035150-phpapp01/85/Introduction-to-Computer-Science-Using-Python-and-Pygame-117-320.jpg)
![4 # Loop from 0 up to the number of
elements
5 # in the array :
6 for i in range ( len ( myArray ) ) :
7 # Modify the element by doubling it
8 myArray [ i ] = myArray [ i ] * 2
9
10 # Print the result
11 print ( myArray )
6.3 Slicing strings
Lists are also strings. Run the following code
with both versions of x:
Listing 6.4: Accessing a string as a list
1 x = " This is a sample string "
2 # x ="0123456789"
3
4 print ( " x = " ,x )
5
6 # Accessing a single character
7 print ( " x [0]= " ,x [0])](https://image.slidesharecdn.com/csintrobookkindle-120108035150-phpapp01/85/Introduction-to-Computer-Science-Using-Python-and-Pygame-118-320.jpg)
![print ( " x [1]= " ,x [1])
# Accessing from the right side
print ( " x [ -1]= " ,x [ -1])
# Access 0 -5
print ( " x [:6]= " ,x [:6])
# Access 6
print ( " x [6:]= " ,x [6:])
# Access 6 -8
print ( " x [6:9]= " ,x [6:9])
Strings in Python be used with some of the
mathematical operators. Try the following code
and see what Python does:
Listing 6.5: Adding and multiplying strings
a = " Hi "
b = " There "
c="!"
print ( a + b )
print ( a + b + c )
print (3* a )
print ( a *3)
print (( a *2) +( b *2) )](https://image.slidesharecdn.com/csintrobookkindle-120108035150-phpapp01/85/Introduction-to-Computer-Science-Using-Python-and-Pygame-119-320.jpg)
![It is possible to get a length of a string. It is
also possible to do this with any type of array.
Listing 6.6: Getting the length of a string or
list
1 a = " Hi There "
2 b =[3 ,4 ,5 ,6 ,76 ,4 ,3 ,3]
3 print ( len ( a ) )
4 print ( len ( a + b ) )
Since a string is an array, a program can
iterate through each character element just like
an array:
for character in b :
print ( character )
Start, have students finish:
months = "
JanFebMarAprMayJunJulAugSepOctNovDec
"
n = int ( input ( " Enter a month number : " ) )
pos =( n -1) *3](https://image.slidesharecdn.com/csintrobookkindle-120108035150-phpapp01/85/Introduction-to-Computer-Science-Using-Python-and-Pygame-120-320.jpg)
![monthAbv = months [ pos : pos +3]
print ( monthAbv )
6.4 Secret Codes
This code prints out every letter of a string in-
dividually:
plain = " This is a test . ABC abc "
for c in plain :
print (c , end = " " )
This next set of code converts each of the
letters in the prior example to its ordinal value.
The numbers follow the ASCII chart. For more
information about ASCII see:
http://en.wikipedia.org/wiki/ASCII
plain = " This is a test . ABC abc "
for c in plain :](https://image.slidesharecdn.com/csintrobookkindle-120108035150-phpapp01/85/Introduction-to-Computer-Science-Using-Python-and-Pygame-121-320.jpg)


![6.6 Review
1. List the 4 types of data we’ve covered, and
give an example of each:
2. What does this code print out?
my_list =[5 ,2 ,6 ,8 ,101]
for my_item in my_list :
print ( my_item )
3. What does this code print out?
for i in range (5) :
print ( i )
4. What does this code print out?
word = " Simpson "
for letter in word :
print ( letter )
5. What does this code print out?
my_text = " The quick brown fox
jumped over the lazy dogs . "](https://image.slidesharecdn.com/csintrobookkindle-120108035150-phpapp01/85/Introduction-to-Computer-Science-Using-Python-and-Pygame-124-320.jpg)
![print ( " The 3 rd spot is : " +
my_text [3])
print ( " The -1 spot is : " + my_text
[ -1])
6. What does the following program print
out?
s = " 0123456789 "
print ( s [1])
print ( s [:3])
print ( s [3:])
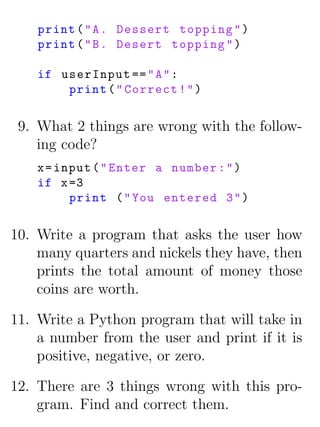
7. Write code that will take a string from the
user. Print the length of the string. Print
first letter of the string.
8. Write a Python program that asks the
user for the radius of a circle and prints
the area. (a = πr2 )
9. Write a “for” loop that will print “I will
not chew gum in class” one hundred times.](https://image.slidesharecdn.com/csintrobookkindle-120108035150-phpapp01/85/Introduction-to-Computer-Science-Using-Python-and-Pygame-125-320.jpg)
![10. Write a for loop that prints the numbers
1 to 5:
11. Write a for loop that prints all even num-
bers from 2 to 1000:
12. Explain each of the parameters in the func-
tion call below:
pygame . draw . line ( screen , green
,[0 ,0] ,[100 ,100] ,5)
13. What does this line of code do? Where
should it be placed?
pygame . display . flip ()
14. Give an example of a “comment” in code:
15. What does this program print?
x = " 34 "
print ( x +1)](https://image.slidesharecdn.com/csintrobookkindle-120108035150-phpapp01/85/Introduction-to-Computer-Science-Using-Python-and-Pygame-126-320.jpg)


![Listing 7.3: Picking a random item out of a
list
my_list =[ " rock " ," paper " ," scissors " ]
random_index = random . randrange (3)
print ( my_list [ random_index ])
7.2 The random function
All of the prior code generates integer numbers.
If a floating point number is desired, a program-
mer may use the random function.
The code below generates a random number
from 0 to 1 such as 0.4355991106620656.
Listing 7.4: Random floating point number
from 0 to 1
my_number = random . random ()
With some simple math, this number can be
adjusted. For example, the code below gener-
ates a random floating point number between
10 and 15:](https://image.slidesharecdn.com/csintrobookkindle-120108035150-phpapp01/85/Introduction-to-Computer-Science-Using-Python-and-Pygame-131-320.jpg)


![http://cs.simpson.edu/?q=python_pygame_exam
Code that is copy/pasted from this site will
generate indentation errors if it is run. The best
way to get the blank template file is to download
the zip file on the page and then pull out the
source code.
The first step in animation is to get an ob-
ject to animate. A simple rectangle will suffice.
This code should be placed after clearing the
screen, and before flipping it.
pygame . draw . rect ( screen , white
,[50 ,50 ,50 ,50])
This code will draw the rectangle each time
through the loop at exactly (50,50). Until this
number changes, the square will not move.
The way to have a value that changes is to
use a variable. The code below is a first step
towards that:
rect_x = 50
pygame . draw . rect ( screen , white ,[ rect_x
,50 ,50 ,50])](https://image.slidesharecdn.com/csintrobookkindle-120108035150-phpapp01/85/Introduction-to-Computer-Science-Using-Python-and-Pygame-134-320.jpg)
![To move the rectangle to the right, x can be
increased by one each frame. This code is close,
but it does quite do it:
rect_x = 50
pygame . draw . rect ( screen , white ,[ rect_x
,50 ,50 ,50])
rect_x += 1
The problem with the above code is that
rect x is reset back to 50 each time through
the loop. To fix this problem, move the initial-
ization of rect x to 50 up outside of the loop.
This next section of code will successfully slide
the rectangle to the right.
# Starting position of the rectangle
rect_x = 50
# -------- Main Program Loop
-----------
while done == False :
for event in pygame . event . get () : #
User did something
if event . type == pygame . QUIT : # If
user clicked close](https://image.slidesharecdn.com/csintrobookkindle-120108035150-phpapp01/85/Introduction-to-Computer-Science-Using-Python-and-Pygame-135-320.jpg)
![done = True # Flag that we are
done so we exit this loop
# Set the screen background
screen . fill ( black )
pygame . draw . rect ( screen , white ,[
rect_x ,50 ,50 ,50])
rect_x += 1
To move the box faster, increase the amount
rect x is increased by:
rect_x += 5
Having both the x and y position increase
causes the square to move down and to the
right:
# Starting position of the rectangle
rect_x = 50
rect_y = 50
# -------- Main Program Loop
-----------
while done == False :
for event in pygame . event . get () :](https://image.slidesharecdn.com/csintrobookkindle-120108035150-phpapp01/85/Introduction-to-Computer-Science-Using-Python-and-Pygame-136-320.jpg)
![if event . type == pygame . QUIT :
done = True
# Set the screen background
screen . fill ( black )
# Draw the rectangle
pygame . draw . rect ( screen , white ,[
rect_x , rect_y ,50 ,50])
# Move the rectangle starting point
rect_x += 5
rect_y += 5
The direction and speed of the boxes move-
ment can be stored in a vector. This makes it
easy for the direction and speed of a moving ob-
ject to be changed. The next bit of code shows
using variables to store the x and y change of
(5, 5).
# Speed and direction of rectangle
rect_change_x = 5
rect_change_y = 5
# -------- Main Program Loop](https://image.slidesharecdn.com/csintrobookkindle-120108035150-phpapp01/85/Introduction-to-Computer-Science-Using-Python-and-Pygame-137-320.jpg)
![-----------
while done == False :
for event in pygame . event . get () : #
User did something
if event . type == pygame . QUIT : # If
user clicked close
done = True # Flag that we are
done so we exit this loop
# Set the screen background
screen . fill ( black )
# Draw the rectangle
pygame . draw . rect ( screen , white ,[
rect_x , rect_y ,50 ,50])
# Move the rectangle starting point
rect_x += rect_change_x
rect_y += rect_change_y
Once the box hits the edge of the screen
it will keep going. Nothing makes the rectan-
gle bounce off the edge of the screen. To re-
verse the direction so the ball travels towards
the right, rect change y needs to change from](https://image.slidesharecdn.com/csintrobookkindle-120108035150-phpapp01/85/Introduction-to-Computer-Science-Using-Python-and-Pygame-138-320.jpg)

![Several drawing commands can be used to
animate more complex shapes. The code below
draws a red rectangle inside the white rectan-
gle. The red rectangle is offset 10 pixels in the
x,y directions from the upper left corner of the
white rectangle. It also is 20 pixels smaller in
both dimensions, resulting in 10 pixes of white
surrounding the red rectangle.
# Draw a red rectangle inside the
white one
pygame . draw . rect ( screen , red ,[ rect_x
+10 , rect_y +10 ,30 ,30])
8.2 Animating Snow
8.2.1 Code explanation
To start working with chapter, start with the
a base pygame program that opens up a blank
screen. Source for pygame base template.py
can be found here:](https://image.slidesharecdn.com/csintrobookkindle-120108035150-phpapp01/85/Introduction-to-Computer-Science-Using-Python-and-Pygame-140-320.jpg)
![http://cs.simpson.edu/?q=python_pygame_exampl
It is possible to create stars, snow, or rain
by using random numbers. The simplist way to
try start is to use a for loop to draw circles in
random x,y positions. Try the following code
inside of the main while loop.
for i in range (50) :
x = random . randrange (0 ,400)
y = random . randrange (0 ,400)
pygame . draw . circle ( screen , white ,[ x , y
] ,2)
Running the program demonstrates a prob-
lem. Each time through the loop, we draw the
stars in new random locations. The program
draws stars in new locations 20 times per sec-
ond!
To keep the stars in the same location, it is
necessary to keep a list of where they are. The
program can use a python list to do this. This
should be done before the main loop, otherwise
the program will add 50 new stars to the list
every 1/20th of a second.](https://image.slidesharecdn.com/csintrobookkindle-120108035150-phpapp01/85/Introduction-to-Computer-Science-Using-Python-and-Pygame-141-320.jpg)
![for i in range (50) :
x = random . randrange (0 ,400)
y = random . randrange (0 ,400)
star_list . append ([ x , y ])
Once the star locations have been added,
they can be accessed like a normal list. The
following code would print the x and y coordi-
nates of the first location:
print ( star_list [0] )
This would print the y value of the first lo-
cation because a coordinate is a list, and the y
value is in the second location:
print ( star_list [0][1] )
Inside of the main while loop, a program
may use a for loop to draw each of the items
in the star list. Remember, len(star list)
will return the number of elements in the star
list.
# Process each star in the list
for i in range ( len ( star_list ) ) :
# Draw the star](https://image.slidesharecdn.com/csintrobookkindle-120108035150-phpapp01/85/Introduction-to-Computer-Science-Using-Python-and-Pygame-142-320.jpg)
![pygame . draw . circle ( screen , white ,
star_list [ i ] ,2)
If the program is to have all the objects in
the array move down, like snow, then adding
the following line in the for loop created above
will cause the y coordinate to increase:
# Move the star down one pixel
star_list [ i ][1]+=1
This moves the snow downwards, but once
off the screen nothing new appears. By adding
the code below, the snow will reset to the top
of the screen in a random location:
# If the star has moved off the
bottom of the screen
if star_list [ i ][1] > 400:
# Reset it just above the top
y = random . randrange ( -50 , -10)
star_list [ i ][1]= y
# Give it a new x position
x = random . randrange (0 ,400)
star_list [ i ][0]= x](https://image.slidesharecdn.com/csintrobookkindle-120108035150-phpapp01/85/Introduction-to-Computer-Science-Using-Python-and-Pygame-143-320.jpg)
![8.2.2 Full listing
Listing 8.1: Animating Snow
1 # Sample Python / Pygame Programs
2 # Simpson College Computer Science
3 # http :// cs . simpson . edu
4
5 # Import a library of functions called
’ pygame ’
6 import pygame
7 import random
8
9 # Initialize the game engine
10 pygame . init ()
11
12 black = [ 0 , 0 , 0]
13 white = [255 ,255 ,255]
14
15 # Set the height and width of the
screen
16 size =[400 ,400]
17 screen = pygame . display . set_mode ( size )
18 pygame . display . set_caption ( " Snow
Animation " )
19](https://image.slidesharecdn.com/csintrobookkindle-120108035150-phpapp01/85/Introduction-to-Computer-Science-Using-Python-and-Pygame-144-320.jpg)
![# Create an empty array
star_list =[]
# Loop 50 times and add a star in a
random x , y position
for i in range (50) :
x = random . randrange (0 ,400)
y = random . randrange (0 ,400)
star_list . append ([ x , y ])
clock = pygame . time . Clock ()
# Loop until the user clicks the close
button .
done = False
while done == False :
for event in pygame . event . get () : #
User did something
if event . type == pygame . QUIT :
# If user clicked close
done = True # Flag that we
are done so we exit
this loop
# Set the screen background](https://image.slidesharecdn.com/csintrobookkindle-120108035150-phpapp01/85/Introduction-to-Computer-Science-Using-Python-and-Pygame-145-320.jpg)
![40 screen . fill ( black )
41
42 # Process each star in the list
43 for i in range ( len ( star_list ) ) :
44 # Draw the star
45 pygame . draw . circle ( screen ,
white , star_list [ i ] ,2)
46
47 # Move the star down one pixel
48 star_list [ i ][1]+=1
49
50 # If the star has moved off the
bottom of the screen
51 if star_list [ i ][1] > 400:
52 # Reset it just above the top
53 y = random . randrange ( -50 , -10)
54 star_list [ i ][1]= y
55 # Give it a new x position
56 x = random . randrange (0 ,400)
57 star_list [ i ][0]= x
58
59 # Go ahead and update the screen
with what we ’ ve drawn .
60 pygame . display . flip ()
61 clock . tick (20)
62](https://image.slidesharecdn.com/csintrobookkindle-120108035150-phpapp01/85/Introduction-to-Computer-Science-Using-Python-and-Pygame-146-320.jpg)

![ing the blueobject.position variable. Array
location [0] holds x, [1] holds y, and [2] holds
the z location.
Rather than the change x and change y vari-
ables used in the 2D examples in this changer,
this Blender example uses blueObject["x change"
and blueObject["x change"].
The if statements check to see if the blue
object has reached the borders of the screen and
the direction needs to reverse. Unlike pixels
used in the 2D games, locations of objects may
be floating point. To position an item between 5
and 6, setting its location to 5.5 is permissable.
Extending this to allow interaction with a
joystick is easy and will by shown later in the
book.
Listing 8.2: Example Blender Python Pro-
gram
import bge
# Get a reference to the blue object](https://image.slidesharecdn.com/csintrobookkindle-120108035150-phpapp01/85/Introduction-to-Computer-Science-Using-Python-and-Pygame-149-320.jpg)
![4 cont = bge . logic . g e t C u r r e n t C o n t r o l l e r
()
5 blueObject = cont . owner
6
7 # Print the x , y coordinates where the
blue object is
8 print ( blueObject . position [0] ,
blueObject . position [1] )
9
10 # Change x , y coordinates according to
x_change and
11 # y_change . x_change and y_change are
game properties
12 # associated with the blue object .
13 blueObject . position [0]+= blueObject [ "
x_change " ]
14 blueObject . position [1]+= blueObject [ "
y_change " ]
15
16 # Check to see of the object has gone
to the edge .
17 # If so reverse direction . Do so with
all 4 edges .
18 if blueObject . position [0] > 6 and
blueObject [ " x_change " ] > 0:
19 blueObject [ " x_change " ] *= -1](https://image.slidesharecdn.com/csintrobookkindle-120108035150-phpapp01/85/Introduction-to-Computer-Science-Using-Python-and-Pygame-150-320.jpg)
![if blueObject . position [0] < -6 and
blueObject [ " x_change " ] < 0:
blueObject [ " x_change " ] *= -1
if blueObject . position [1] > 6 and
blueObject [ " y_change " ] > 0:
blueObject [ " y_change " ] *= -1
if blueObject . position [1] < -6 and
blueObject [ " y_change " ] < 0:
blueObject [ " y_change " ] *= -1
Blender may be downloaded from:
http://www.blender.org/
Video of the examples and source files may be
downloaded from:
http://cs.simpson.edu/?q=blender_game_engine](https://image.slidesharecdn.com/csintrobookkindle-120108035150-phpapp01/85/Introduction-to-Computer-Science-Using-Python-and-Pygame-151-320.jpg)


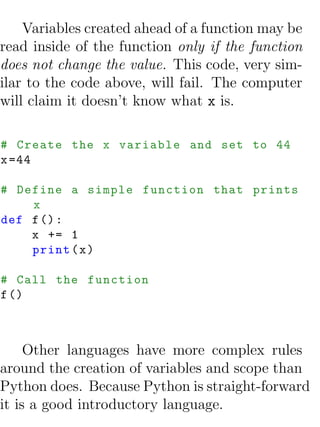


![• Block 8
for i in range (5) :
for j in range (5) :
print ( " * " , end = " " )
print ()
• Block 9
# What is the mistake here ?
array =[5 ,8 ,10 ,4 ,5]
i =0
for i in array :
i = i + array [ i ]
print ( array )
• Block 10
for i in range (5) :
x =0
for j in range (5) :
x +=1
print ( x )
• Block 11](https://image.slidesharecdn.com/csintrobookkindle-120108035150-phpapp01/85/Introduction-to-Computer-Science-Using-Python-and-Pygame-167-320.jpg)

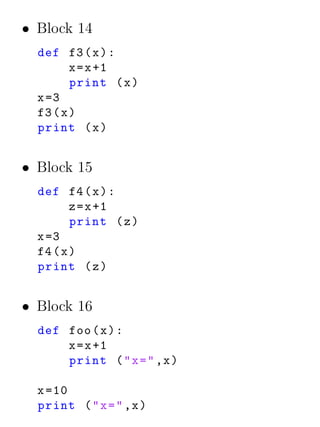

![x =10
print ( " x = " ,x )
foo ()
print ( " x = " ,x )
• Block 19
def a ( x ) :
print ( " a " ,x )
x = x +1
print ( " a " ,x )
x =1
print ( " main " ,x )
a(x)
print ( " main " ,x )
def b ( y ) :
print ( " b " ,y [1])
y [1]= y [1]+1
print ( " b " ,y [1])
y =[123 ,5]
print ( " main " ,y [1])
b(y)](https://image.slidesharecdn.com/csintrobookkindle-120108035150-phpapp01/85/Introduction-to-Computer-Science-Using-Python-and-Pygame-171-320.jpg)
![print ( " main " ,y [1])
def c ( y ) :
print ( " c " ,y [1])
y =[101 ,102]
print ( " c " ,y [1])
y =[123 ,5]
print ( " main " ,y [1])
c(y)
print ( " main " ,y [1])
9.5.2 Correcting code
1. Correct the following code:
def sum (a ,b , c ) :
print ( a + b + c )
print ( sum (10 ,11 ,12) )
2. Correct the following code:
def increase ( x ) :
return x +1](https://image.slidesharecdn.com/csintrobookkindle-120108035150-phpapp01/85/Introduction-to-Computer-Science-Using-Python-and-Pygame-172-320.jpg)
![x =10
print ( " X is " ,x , " I will now
increase x . " )
increase ( x )
print ( " X is now " ,x )
3. Correct the following code:
def print_hello :
print ( " Hello " )
print_hello ()
4. Correct the following code:
def count_to_ten () :
for i in range [10]:
print ( i )
count_to_ten ()
5. Correct the following code:
def sum_list ( list ) :
for i in list :](https://image.slidesharecdn.com/csintrobookkindle-120108035150-phpapp01/85/Introduction-to-Computer-Science-Using-Python-and-Pygame-173-320.jpg)
![sum = i
return sum
list =[45 ,2 ,10 , -5 ,100]
print ( sum_list ( list ) )
6. Correct the following code:
def reverse ( text ) :
result = " "
text_length = len ( text )
for i in range ( text_length ) :
result = result + text [ i * -1]
return result
text = " Programming is the coolest
thing ever . "
print ( reverse ( text ) )
7. Correct the following code:
def get_user_choice () :
while True :
command = input ( " Command : "
)](https://image.slidesharecdn.com/csintrobookkindle-120108035150-phpapp01/85/Introduction-to-Computer-Science-Using-Python-and-Pygame-174-320.jpg)


![pings, and the mouse, and multiple game con-
trollers. Code for these examples named move -
mouse.py, move keyboard.py, and move game -
controller.py may be obtained from:
http://cs.simpson.edu/?q=python_pygame_exam
To begin with, it is necessary to have an
object that can be moved around the screen.
The best way to do this is to have a function
that takes in an x and y coordinate, then draws
an object at that location. It is also necessary to
pass a reference to the screen that the function
should draw the object onto. The following code
draws a green rectangle with a black circle in the
middle of it.
def draw_item ( screen ,x , y ) :
pygame . draw . rect ( screen , green ,[0+ x
,0+ y ,30 ,10] ,0)
pygame . draw . circle ( screen , black
,[15+ x ,5+ y ] ,7 ,0)](https://image.slidesharecdn.com/csintrobookkindle-120108035150-phpapp01/85/Introduction-to-Computer-Science-Using-Python-and-Pygame-188-320.jpg)
![11.2 Mouse
Moving an object with the mouse is easy. It
takes one line of code to get a list with the co-
ordinates of the mouse.
pos = pygame . mouse . get_pos ()
The variable pos is a list of two numbers.
The x coordinate is in position 0 of array and
the y coordinate is in the position 1. These can
easily be fetched out and passed to the function
that draws the item:
Listing 11.1: Controlling an object via the
mouse
pos = pygame . mouse . get_pos ()
x = pos [0]
y = pos [1]
draw_item ( screen ,x , y )](https://image.slidesharecdn.com/csintrobookkindle-120108035150-phpapp01/85/Introduction-to-Computer-Science-Using-Python-and-Pygame-189-320.jpg)


![Loading the image should be done before the
main program loop. While it would be possible
to load it in the main program loop, this would
cause the program to fetch the image from the
disk 20 or so times per second. This is com-
pletely unnecessary. It is only necessary to do
it once at program start-up.
To display the image, a program uses the
blit() command. This “blits” the bits to the
screen. This command is called with the im-
age, and the upper left coordinate of where the
image starts. This command should be done
inside the loop so the image gets drawn each
frame. See below:
screen . blit ( background_image , [0 ,0])
12.3 Moving an Image
To create an image that can move around the
screen with the mouse, it is loaded with the](https://image.slidesharecdn.com/csintrobookkindle-120108035150-phpapp01/85/Introduction-to-Computer-Science-Using-Python-and-Pygame-200-320.jpg)
![same type of command as before:
player_image = pygame . image . load ( "
player . png " ) . convert ()
Inside the main program loop, the mouse
coordinates are retrieved, and passed to as the
coordinates to draw the image:
# Get the current mouse position . This
returns the position
# as a list of two numbers .
player_position = pygame . mouse . get_pos
()
x = player_position [0]
y = player_position [1]
# Copy image to screen :
screen . blit ( player_image , [x , y ])
This demonstrates a problem. The image is
a red X, with a white background. So when the
image is drawn the program shows:](https://image.slidesharecdn.com/csintrobookkindle-120108035150-phpapp01/85/Introduction-to-Computer-Science-Using-Python-and-Pygame-201-320.jpg)


![This sound can be played when the user hits
the mouse button with the following code:
for event in pygame . event . get () :
if event . type == pygame . QUIT :
done = True
if event . type == pygame .
MOUSEBUTTONDOWN :
click_sound . play ()
Pygame does not play all wav files. If VLC
Media Player can’t play it, neither can Pygame.
12.5 Full Listing
import pygame
# Define some colors
white =[255 ,255 ,255]
black =[0 ,0 ,0]
# Call this function so the Pygame
library can initialize itself
pygame . init ()](https://image.slidesharecdn.com/csintrobookkindle-120108035150-phpapp01/85/Introduction-to-Computer-Science-Using-Python-and-Pygame-204-320.jpg)
![# Create an 800 x600 sized screen
screen = pygame . display . set_mode ([800 ,
600])
# This sets the name of the window
pygame . display . set_caption ( ’ CMSC 150
is cool ’)
# Create a surface we can draw on
background = pygame . Surface ( screen .
get_size () )
# Fill the screen with a black
background
background . fill ( black )
clock = pygame . time . Clock ()
# Before the loop , load the sounds :
click_sound = pygame . mixer . Sound ( "
click . wav " )
# Set positions of graphics
background_position =[0 ,0]](https://image.slidesharecdn.com/csintrobookkindle-120108035150-phpapp01/85/Introduction-to-Computer-Science-Using-Python-and-Pygame-205-320.jpg)

![player_position = pygame . mouse .
get_pos ()
x = player_position [0]
y = player_position [1]
# Copy image to screen :
screen . blit ( player_image , [x , y ])
pygame . display . flip ()
pygame . quit ()
12.6 Review
What do the following Python programs print?
1. def f () :
return 10
x = f ()
print ( x )
2. def f ( x ) :
x = x +10
return x](https://image.slidesharecdn.com/csintrobookkindle-120108035150-phpapp01/85/Introduction-to-Computer-Science-Using-Python-and-Pygame-207-320.jpg)

![x =20
y =5
print ( f (y , x ) )
6. def f ( x ) :
return x *2
def g ( x ) :
return x -2
def h ( x ) :
return x +10
print ( f (5) + g ( f (5) ) + h ( g (10) )
)
print ( h ( g ( f (10) ) ) )
7. x = len ( [2 ,3 ,[5 ,6] ,[7 ,9]]
print ( x )
8. Write a function that prints “Hello”.
9. Call the function in the prior problem.](https://image.slidesharecdn.com/csintrobookkindle-120108035150-phpapp01/85/Introduction-to-Computer-Science-Using-Python-and-Pygame-209-320.jpg)


![Ball
x:int
y:int
change_x:int
change_y:int
size:int
color:[int,int,int]
move():void
draw(screen):void
1 class Ball () :
2 # --- Class Attributes ---
3 # Ball position
4 x =0
5 y =0
6
7 # Ball ’s vector
8 change_x =0
9 change_y =0
10
11 # Ball size
12 size =10
13
14 # Ball color
15 color =[255 ,255 ,255]
16](https://image.slidesharecdn.com/csintrobookkindle-120108035150-phpapp01/85/Introduction-to-Computer-Science-Using-Python-and-Pygame-224-320.jpg)
![# --- Class Methods ---
def move ( self ) :
x += change_x
y += change_y
def draw ( self , screen ) :
pygame . draw . circle ( screen ,
self . color , [ self .x , self . y
] , self . size )
Below is the code that would go ahead of
the main program loop to create a ball and set
its attributes:
theBall = Ball ()
theBall . x = 100
theBall . y = 100
theBall . change_x = 2
theBall . change_y = 1
theBall . color = [255 ,0 ,0]
This code would go inside the main loop to
move and draw the ball:
theBall . move ()
theBall . draw ( screen )](https://image.slidesharecdn.com/csintrobookkindle-120108035150-phpapp01/85/Introduction-to-Computer-Science-Using-Python-and-Pygame-225-320.jpg)


![It is important to call the parent class con-
structor in Sprite to allow sprites to initialize.
This is done on line 21.
# Create an image of the block
, and fill it with a color .
# This could also be an image
loaded from the disk .
self . image = pygame . Surface ([
width , height ])
self . image . fill ( color )
This code actually creates the image that
will eventually appear on the screen. Line 25
creates a blank image. Line 26 fills it with
black. If the program needs something other
than a black square, these are the lines of code
to modify.
For example, look at the code below:
self . image = pygame . Surface ([
width , height ])
self . image . fill ( white )
self . image . set_colorkey ( white )](https://image.slidesharecdn.com/csintrobookkindle-120108035150-phpapp01/85/Introduction-to-Computer-Science-Using-Python-and-Pygame-249-320.jpg)
![25 pygame . draw . ellipse ( self . image
, color ,[0 ,0 , width , height ])
If this code was substituted in instead, then
everything would be in the form of ellipses. Line
25 draws the ellipse, and like 26 makes white a
transparent color .
22 self . image = pygame . image . load
( " player . png " ) . convert ()
23 self . image . set_colorkey ( white )
If instead a bitmapped graphic is desired,
substituting the lines of code in above will load
a graphic and set white to the transparent back-
ground color. In this case, the dimensions of the
sprite will automatically be set to the graphic
dimensions, and it would no longer be necessary
to pass them in.
22
23 # Fetch the rectangle object
that has the dimensions of
the
24 # image](https://image.slidesharecdn.com/csintrobookkindle-120108035150-phpapp01/85/Introduction-to-Computer-Science-Using-Python-and-Pygame-250-320.jpg)
![34 screen_height =400
35 screen = pygame . display . set_mode ([
screen_width , screen_height ])
This code initializes pygame and creates a
window for the game. There is nothing new
here from other pygame programs.
36
37 # This is a list of ’ sprites . ’ Each
block in the program is
38 # added to this list .
39 # The list is managed by a class
called ’ RenderPlain . ’
40 block_list = pygame . sprite . RenderPlain
()
41
42 # This is a list of every sprite .
43 # All blocks and the player block as
well .
44 all_sprites_list = pygame . sprite .
RenderPlain ()
A major advantage of working with sprites is
the ability to work with items in a list. Rather
than check each individual object to see if there](https://image.slidesharecdn.com/csintrobookkindle-120108035150-phpapp01/85/Introduction-to-Computer-Science-Using-Python-and-Pygame-252-320.jpg)


![76 # Clear the screen
77 screen . fill ( white )
This is a standard program loop. Line 73
initializes the score to 0.
78
79 # Get the current mouse position .
This returns the position
80 # as a list of two numbers .
81 pos = pygame . mouse . get_pos ()
82
83 # Fetch the x and y out of the
list ,
84 # just like we ’d fetch letters out
of a string .
85 # Set the player object to the
mouse location
86 player . rect . x = pos [0]
87 player . rect . y = pos [1]
Line 86 fetches the mouse position similar to
other Pygame programs discussed before. The
important new part is contained in lines 91-
92 where the rectangle containing the sprite is
moved to a new location. Remember this rect](https://image.slidesharecdn.com/csintrobookkindle-120108035150-phpapp01/85/Introduction-to-Computer-Science-Using-Python-and-Pygame-256-320.jpg)


![Listing 16.1: Read in a file from disk and put
it in an array
# Read in a file from disk and put it
in an array .
file = open ( " e x a m p l e _ s o r t e d _ n a m e s . txt "
)
name_list = []
for line in file :
line = line . strip ()
name_list . append ( line )
file . close ()
This combines the new pattern of how to
read a file, along with the previously learned
pattern of how to create and empty list and ap-
pend to it as new data comes in. To verify the
file was read in correctly a programmer could
print the length of the array:
print ( " There were " , len ( name_list ) ,"
names in the file . " )](https://image.slidesharecdn.com/csintrobookkindle-120108035150-phpapp01/85/Introduction-to-Computer-Science-Using-Python-and-Pygame-275-320.jpg)
![Or the programmer could pring the entire con-
tents of the array:
for line in name_list :
print ( name )
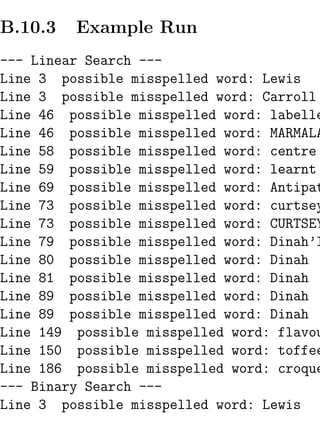
16.3 Linear Search
If a program has a set of data in the array, how
can it go about finding a specific element? This
can be done one of two ways. The first method
is to use a linear search. This starts at the first
element, and keeps comparing elements until it
finds the desired element or runs out of elements
to check.
Listing 16.2: Linear search
1 # Linear search
2 i =0
3 while i < len ( name_list ) and name_list
[ i ] != " Morgiana the Shrew " :
4 i += 1](https://image.slidesharecdn.com/csintrobookkindle-120108035150-phpapp01/85/Introduction-to-Computer-Science-Using-Python-and-Pygame-276-320.jpg)


![A binary search requires significantly fewer
guesses. Worst case, it can guess a number be-
tween 1 and 128 in 7 guesses. One more guess
raises the limit to 256. 9 guesses can get a num-
ber between 1 and 512. With just 32 guesses,
a person can get a number between 1 and 4.2
billion.
Code to do a binary search is more complex
than a linear search:
Listing 16.3: Binary search
1 # Binary search
2 desired_element = " Morgiana the Shrew "
;
3 lower_bound = 0
4 upper_bound = len ( name_list ) -1
5 found = False
6 while lower_bound < upper_bound and
found == False :
7 middle_pos = ( int ) (( lower_bound +
upper_bound ) / 2)
8 if name_list [ middle_pos ] <
desired_element :
9 lower_bound = middle_pos +1](https://image.slidesharecdn.com/csintrobookkindle-120108035150-phpapp01/85/Introduction-to-Computer-Science-Using-Python-and-Pygame-284-320.jpg)
![elif name_list [ middle_pos ] >
desired_element :
upper_bound = middle_pos
else :
found = True
if found :
print ( " The name is at position " ,
middle_pos )
else :
print ( " The name was not in the
list . " )
Since lists start at element zero, line 3 sets
the lower bound to zero. Line 4 sets the upper
bound to the length of the list minus one. So
for a list of 100 elements the lower bound will
be 0 and the upper bound 99.
The Boolean variable on line 5 will be used
to let the while loop know that the element has
been found.
Line 6 checks to see if the element has been
found, or if we’ve run out of elements. If we’ve
run out of elements the lower bound will end up](https://image.slidesharecdn.com/csintrobookkindle-120108035150-phpapp01/85/Introduction-to-Computer-Science-Using-Python-and-Pygame-285-320.jpg)


![for each row. Call the variable in this for
loop row.
17.2 Populating the Grid
8. Create a two-dimensional array. Creating
a two-dimensional array in Python is, un-
fortunately, not as easy as it is in some
other languages. There are some libraries
that can be downloaded for Python that
make it easy, but for this example they
will not be used. To create a two-dimensional
array and set an example, use the code be-
low.
Listing 17.1: Create a 10x10 array of numb
1 # --- Create grid of numbers
2 # Create an empty list
3 grid = []
4 # Loop for each row](https://image.slidesharecdn.com/csintrobookkindle-120108035150-phpapp01/85/Introduction-to-Computer-Science-Using-Python-and-Pygame-293-320.jpg)
![5 for row in range (10) :
6 # For each row , create a list
that will
7 # represent an entire row
8 grid . append ([])
9 # Loop for each column
10 for column in range (10) :
11 # Add a the number zero
to the current row
12 grid [ row ]. append (0)
Place this code somewhere ahead of your
main program loop.
9. Set an example location in the array to 1.
Two dimensional arrays are usually rep-
resented addressed by first their row, and
then the column. This is called a row-
major storage. Most languages use row-
major storage, with the excetption of For-
tran and MATLAB. Fortran and MAT-
LAB use column-major storage.
# Set row 1 , column 5 to zero](https://image.slidesharecdn.com/csintrobookkindle-120108035150-phpapp01/85/Introduction-to-Computer-Science-Using-Python-and-Pygame-294-320.jpg)
![grid [1][5] = 1
Place this code somewhere ahead of your
main program loop.
10. Select the color of the rectangle based on
the value of a variable named color. Do
this by first finding the line of code where
the rectangle is drawn. Ahead of it, create
a variable named color and set it equal
to white. Then replace the white color in
the rectangle declaration with the color
variable.
11. Select the color based on the value in the
grid. After setting color to white, place
an if statement that looks at the value
in grid[row][column] and changes the
color to green if the grid value is equal to
1.
12. Print “click” to the screen if the user clicks
the mouse button. See bitmapped graphics.](https://image.slidesharecdn.com/csintrobookkindle-120108035150-phpapp01/85/Introduction-to-Computer-Science-Using-Python-and-Pygame-295-320.jpg)

![17.3 Final Program
Listing 17.2: Creating an array backed grid
import pygame
# Define some colors
black = ( 0, 0, 0)
white = ( 255 , 255 , 255)
green = ( 0 , 255 , 0)
red = ( 255 , 0, 0)
width =20
height =20
margin =5
# --- Create grid of numbers
# Create an empty list
grid = []
# Loop for each row
for row in range (10) :
# For each row , create a list that
will
# represent an entire row
grid . append ([])](https://image.slidesharecdn.com/csintrobookkindle-120108035150-phpapp01/85/Introduction-to-Computer-Science-Using-Python-and-Pygame-297-320.jpg)
![21 # Loop for each column
22 for column in range (10) :
23 # Add a number to the current
row
24 grid [ row ]. append (0)
25
26 # Set row 1 , column 5 to zero
27 grid [1][5] = 1
28
29 pygame . init ()
30
31 screen_size =[255 ,255]
32 screen = pygame . display . set_mode (
screen_size )
33
34 pygame . display . set_caption ( " My Game " )
35
36 # Loop until the user clicks the close
button .
37 done = False
38
39 # Used to manage how fast the screen
updates
40 clock = pygame . time . Clock ()
41
42 # -------- Main Program Loop](https://image.slidesharecdn.com/csintrobookkindle-120108035150-phpapp01/85/Introduction-to-Computer-Science-Using-Python-and-Pygame-298-320.jpg)
![-----------
while done == False :
for event in pygame . event . get () : #
User did something
if event . type == pygame . QUIT :
# If user clicked close
done = True # Flag that we
are done so we exit
this loop
if event . type == pygame .
MOUSEBUTTONDOWN :
pos = pygame . mouse . get_pos
()
column_clicked = pos [0]//(
width + margin )
row_clicked = pos [1]//(
height + margin )
print ( " Row : " , row_clicked , "
Column : " , column_clicked
)
grid [ row_clicked ][
column_clicked ] = 1
# Set the screen background
screen . fill ( black )](https://image.slidesharecdn.com/csintrobookkindle-120108035150-phpapp01/85/Introduction-to-Computer-Science-Using-Python-and-Pygame-299-320.jpg)
![57 for row in range (10) :
58 for column in range (10) :
59 if grid [ row ][ column ] == 0:
60 color = white
61 else :
62 color = green
63 pygame . draw . rect ( screen ,
color ,[ margin +( width +
margin ) * column , margin +(
height + margin ) * row ,
width , height ])
64
65 # Limit to 20 frames per second
66 clock . tick (20)
67
68 # Go ahead and update the screen
with what we ’ ve drawn .
69 pygame . display . flip ()
70
71 # Be IDLE friendly . If you forget this
line , the program will ’ hang ’
72 # on exit .
73 pygame . quit ()](https://image.slidesharecdn.com/csintrobookkindle-120108035150-phpapp01/85/Introduction-to-Computer-Science-Using-Python-and-Pygame-300-320.jpg)

![order to begin with. Some sort a list quickly if
the list is in a completely random order. Other
lists sort fast, but take more memory.
To see common sorting algorithms in action,
visit the website:
http://www.sorting-algorithms.com/
18.1 Swapping Values
Before learning any algorithm, it is necessary to
learn how to swap values in an array.
Swapping two values is a common operation
in many sorting algorithms. For example, sup-
pose a program has a list that looks like the
following:
list = [15 ,57 ,14 ,33 ,72 ,79 ,26 ,56 ,42 ,40]
The developer wants to swap positions 0 and 2,
which contain the numbers 15 and 14 respec-
tively.](https://image.slidesharecdn.com/csintrobookkindle-120108035150-phpapp01/85/Introduction-to-Computer-Science-Using-Python-and-Pygame-302-320.jpg)
![15 57 14 22 72 79 26 56 42 40
14 57 15 22 72 79 26 56 42 40
A first attempt at writing this code might look
something like this:
list [0] = list [2]
list [2] = list [0]
Graphically, this is what would happen:
15 57 14 22 72 79 26 56 42 40
list[0] = list[2] 14 57 14 22 72 79 26 56 42 40
list[2] = list[0] 14 57 14 22 72 79 26 56 42 40
This clearly does not work. The first assignment
list[0] = list[2] causes the value 15 that
exists in position 0 to be overwritten with the
14 in position 2 and irretrievably lost. The next
line with list[2] = list[0] just copies the 14](https://image.slidesharecdn.com/csintrobookkindle-120108035150-phpapp01/85/Introduction-to-Computer-Science-Using-Python-and-Pygame-303-320.jpg)
![back to cell 2 which already has a 14.
To fix this problem, swapping values in an
array should be done in three steps. It is nec-
essary to create a temporary variable to hold a
value during the swap operation. The code to
do the swap looks like the following:
Listing 18.1: Swapping two values in an array
1 temp = list [0]
2 list [0] = list [2]
3 list [2] = temp
The first line copies the value of position 0
into the temp variable. This allows the code to
write over position 0 with the value in position
2 without data being lost. The final line takes
the old value of position 0, currently held in the
temp variable, and places it in position 2.](https://image.slidesharecdn.com/csintrobookkindle-120108035150-phpapp01/85/Introduction-to-Computer-Science-Using-Python-and-Pygame-304-320.jpg)


![The code for a selection sort involves two
nested loops. The outside loop tracks the cur-
rent position that the code wants to swap the
smallest value into. The inside loop starts at
the current location and scans to the right in
search of the smallest value. When it finds the
smallest value, the swap takes place.
Listing 18.2: Selection sort
# The selection sort
def selection_sort ( list ) :
# Loop through the entire array
for curPos in range ( len ( list ) ) :
# Find the position that has the
smallest number
# Start with the current position
minPos = curPos
# Scan left
for scanPos in range ( curPos +1 ,
len ( list ) ) :
# Is this position smallest ?
if list [ scanPos ] < list [
minPos ]:
# It is , mark this position as](https://image.slidesharecdn.com/csintrobookkindle-120108035150-phpapp01/85/Introduction-to-Computer-Science-Using-Python-and-Pygame-307-320.jpg)
![the smallest
13 minPos = scanPos
14
15 # Swap the two values
16 temp = list [ minPos ]
17 list [ minPos ] = list [ curPos ]
18 list [ curPos ] = temp
The outside loop will always run n times.
The inside loop will run n/2 times. This will
be the case regardless if the list is in order or
not. The loops efficiency may be improved by
checking if minPos and curPos are equal before
line 16. If those variables are equal, there is no
need to do the three lines of swap code.
In order to test the selection sort code above,
the following code may be used. The first func-
tion will print out the list. The next code will
create a list of random numbers, print it, sort
it, and then print it again.
19 def print_list ( list ) :
20 for item in list :
21 print ( " %3 d " % item , end = " " )](https://image.slidesharecdn.com/csintrobookkindle-120108035150-phpapp01/85/Introduction-to-Computer-Science-Using-Python-and-Pygame-308-320.jpg)
![print ()
# Create a list of random numbers
list = []
for i in range (10) :
list . append ( random . randrange (100) )
# Try out the sort
print_list ( list )
selection_sort ( list )
print_list ( list )
18.3 Insertion Sort
The insertion sort is similar to the selection sort
in how the outer loop works. The insertion sort
starts and the left of the array and works to
the right. The difference is that the insertion
sort does not select the smallest element and
put it into place, the insertion sort selects the
next element to the right of what was already
sorted. Then it slides up each larger selement](https://image.slidesharecdn.com/csintrobookkindle-120108035150-phpapp01/85/Introduction-to-Computer-Science-Using-Python-and-Pygame-309-320.jpg)


![def insertion_sort ( list ) :
# Start at the second element ( pos
1) .
# Use this element to insert into
the
# list .
for keyPos in range (1 , len ( list ) ) :
# Get the value of the element
to insert
keyValue = list [ keyPos ]
# Scan to the left
scanPos = keyPos - 1
# Loop each element , moving
them up until
# we reach the position the
while ( scanPos >=0) and ( list [
scanPos ] > keyValue ) :
list [ scanPos +1] = list [
scanPos ]
scanPos = scanPos - 1
# Everything ’s been moved out
of the way , insert
# the key into the correct
location
list [ scanPos +1] = keyValue](https://image.slidesharecdn.com/csintrobookkindle-120108035150-phpapp01/85/Introduction-to-Computer-Science-Using-Python-and-Pygame-313-320.jpg)
![18.4 Review
1. Write code to swap the values 25 and 40.
list = [55 , 41 , 52 , 68 , 45 , 27 ,
40 , 25 , 37 , 26]
2. Write code to swap the values 2 and 27.
list = [27 , 32 , 18 , 2 , 11 , 57 ,
14 , 38 , 19 , 91]
3. Why does the following code not work?
list = [70 , 32 , 98 , 88 , 92 , 36 ,
81 , 83 , 87 , 66]
temp = list [0]
list [1] = list [0]
list [0] = temp
4. Show how the following list of numbers is
97 74 8 98
sorted, using the selection sort:
5. Show how the following list of numbers is
74 62 18 47
sorted, using the selection sort:](https://image.slidesharecdn.com/csintrobookkindle-120108035150-phpapp01/85/Introduction-to-Computer-Science-Using-Python-and-Pygame-314-320.jpg)


![Line 1 imports the sys library which is used
on line 16 to print the type of error that has
occured.
1 import sys
2
3 # Multiple errors
4 try :
5 f = open ( ’ myfile . txt ’)
6 s = f . readline ()
7 i = int ( s . strip () )
8 x = 101/ i
9 except IOError :
10 print ( " I / O error " )
11 except ValueError :
12 print ( " Could not convert data to
an integer . " )
13 except ZeroDivisionError :
14 print ( " Division by zero error " )
15 except :
16 print ( " Unexpected error : " , sys .
exc_info () [0])
A list of built-in exceptions is available from
this web address:
http://docs.python.org/library/exceptions.h](https://image.slidesharecdn.com/csintrobookkindle-120108035150-phpapp01/85/Introduction-to-Computer-Science-Using-Python-and-Pygame-324-320.jpg)

![print ( " There is no high score yet .
")
print ( sys . exc_info () [0])
# Get the score from the current game
current_score =0
try :
# Ask the user for his / her score
current_score = int ( input ( " What
is your score ? " ) )
except :
# Error , can ’t turn what they
typed into a number
print ( " I don ’t understand what you
typed . " )
# See if we have a new high score
if current_score > high_score :
print ( " Yea ! New high score ! " )
# We do ! Save to disk
try :
# Write the file to disk
f = open ( ’ high_score . txt ’ , ’w ’)
f . write ( str ( current_score ) )
f . close ()](https://image.slidesharecdn.com/csintrobookkindle-120108035150-phpapp01/85/Introduction-to-Computer-Science-Using-Python-and-Pygame-326-320.jpg)


![Tails: 10
Part 3
Enter 5 numbers:
Enter a number: 4
Enter a number: 8
Enter a number: 2
Enter a number: 3
Enter a number: 5
You entered: [4, 8, 2, 3, 5]
The average of those numbers is: 4.4
That same list with 1 added to each numb
B.4.2 Tips: Part 1
• Generate the output for part one using
two nested for loops.
• Create a separate variable to store num-
bers that will be printed.
This code in part 1 is necessary to help under-
stand nested loops, which are used in all but the](https://image.slidesharecdn.com/csintrobookkindle-120108035150-phpapp01/85/Introduction-to-Computer-Science-Using-Python-and-Pygame-348-320.jpg)


![3. Write a function called find that will take
a list of numbers, list, along with one other
number, key. Have it search the list for
the key. Each time your function finds
the key, print the position of the key.
Calling the function like this:
list =[36 , 36 , 79 , 96 , 36 , 91 , 77 ,
33 , 19 , 3 , 34 , 70 , 12 , 12 ,
54 , 98 , 86 , 11 , 17 , 17]
find ( list ,12)
find ( list ,91)
find ( list ,80)
It should print out:
Found 12 at position 12
Found 12 at position 13
Found 91 at position 5
4. Write one program that has the following:
• Functions:](https://image.slidesharecdn.com/csintrobookkindle-120108035150-phpapp01/85/Introduction-to-Computer-Science-Using-Python-and-Pygame-356-320.jpg)


![B.8.2 Desired Output
When run with the class specifications for this
lab along with the example code above, the pro-
gram should produce the following output:
Room: Snow Room
Game Object: Bed
...is at: [0, 0]
Game Object: Table
...is at: [1, 4]
Pet type: Puppy
Name: Spot
State: Standing
...is at: [5, 4]
Food type: Apple Pie
Health: 2
Happiness: 10
...is at: [5, 5]](https://image.slidesharecdn.com/csintrobookkindle-120108035150-phpapp01/85/Introduction-to-Computer-Science-Using-Python-and-Pygame-362-320.jpg)

![classes. Each of these should be set to an
empty list by default.
6. Create a method for adding a room to the
world. This should append the room to
the list of rooms in the world.
7. Create a method for adding an object to a
room in the appropriate class. This meth-
ods should append both the object and
position to the appropriate lists. Append
each position as a two element list, such
as [x,y].
8. Create print method in the Room class
that prints the room name.
9. Add to the prior method a for loop that
will call the print method of each object
in the room.
10. Add a print method to the GameObject
class to print the object time.](https://image.slidesharecdn.com/csintrobookkindle-120108035150-phpapp01/85/Introduction-to-Computer-Science-Using-Python-and-Pygame-364-320.jpg)


![B.10.2 Steps to complete:
1. Create a file named lab 11 lastname.py
2. It is necessary to split apart the words in
the story so that they may be checked in-
dividually. It is also necessary to remove
extra punctuation and white-space. Un-
fortunately, there is not any good way of
doing this with what has been taught so
far. The code to do this is short, but a
full explanation is beyond the scope of this
class.
import re
# This function takes in a line
of text and returns
# a list of words in the line .
def split_line ( line ) :
return re . findall ( ’[A - Za - z
]+(?: ’[ A - Za - z ]+) ? ’ , line )
This code uses a regular expression to split
the text apart. Regular expressions are](https://image.slidesharecdn.com/csintrobookkindle-120108035150-phpapp01/85/Introduction-to-Computer-Science-Using-Python-and-Pygame-369-320.jpg)


More Related Content
What's hot (16)
Viewers also liked (9)


Similar to Introduction to Computer Science Using Python and Pygame (20)


Recently uploaded (20)


Introduction to Computer Science Using Python and Pygame
- 1. Introduction to Computer Science Using Python and Pygame Paul Vincent Craven Computer Science Department, Simpson Indianola, Iowa http://cs.simpson.edu c Draft date May 17, 2011
- 3. Contents Contents 2 0.1 Forward . . . . . . . . . . . . . . 6 1 Python Calculator 7 1.1 Introduction . . . . . . . . . . . . 7 1.2 Installing and Starting Python . . 8 1.3 Printing . . . . . . . . . . . . . . 11 1.4 Assignment Operators . . . . . . 13 1.5 Variables . . . . . . . . . . . . . . 17 1.6 Operators . . . . . . . . . . . . . 18 1.7 Review . . . . . . . . . . . . . . . 25
- 4. 2 If Statements 29 2.1 Basic Comparisons . . . . . . . . 30 2.2 Using And/Or . . . . . . . . . . . 32 2.3 Boolean Variables . . . . . . . . . 34 2.4 Else and Else If . . . . . . . . . . 37 2.5 Text Comparisons . . . . . . . . . 39 3 Looping 41 3.1 For loops . . . . . . . . . . . . . . 41 3.2 While loops . . . . . . . . . . . . 47 3.2.1 Common problems with while l 3.3 Review Questions . . . . . . . . . 53 4 Introduction to Graphics 57 4.1 Computer coordinate systems . . 58 4.2 Pygame Library . . . . . . . . . . 62 4.3 Colors . . . . . . . . . . . . . . . 64 4.4 Open a window . . . . . . . . . . 66 4.5 Interacting with the user . . . . . 67 4.6 Drawing . . . . . . . . . . . . . . 69 4.7 Loops and offsets . . . . . . . . . 70 4.8 Text . . . . . . . . . . . . . . . . 72
- 5. 4.9 Flipping the screen . . . . . . . . 78 4.10 Ending the program . . . . . . . 79 4.11 Full Listing . . . . . . . . . . . . 81 5 Back to Looping 87 5.1 Basic Review . . . . . . . . . . . 87 5.2 Advanced looping problems . . . 90 6 Introduction to Lists 99 6.1 Data Types . . . . . . . . . . . . 99 6.2 Working with lists . . . . . . . . 101 6.3 Slicing strings . . . . . . . . . . . 106 6.4 Secret Codes . . . . . . . . . . . . 109 6.5 Associative arrays . . . . . . . . . 111 6.6 Review . . . . . . . . . . . . . . . 112 7 Random Numbers 117 7.1 The randrange function . . . . . . 117 7.2 The random function . . . . . . . 119 8 Introduction to Animation 121 8.1 The bouncing rectangle . . . . . . 121
- 6. 8.2 Animating Snow . . . . . . . . . 128 8.2.1 Code explanation . . . . . 128 8.2.2 Full listing . . . . . . . . . 132 8.3 3D Animation . . . . . . . . . . . 135 9 Functions 141 9.1 Introduction to functions . . . . . 141 9.2 Variable scope . . . . . . . . . . . 147 9.3 Pass-by-copy . . . . . . . . . . . 150 9.4 Functions calling functions . . . . 152 9.5 Review . . . . . . . . . . . . . . . 153 9.5.1 Predicting output . . . . . 153 9.5.2 Correcting code . . . . . . 160 9.5.3 Writing code . . . . . . . 164 10 Excel Macro Demonstration 167 11 Controllers and Graphics 175 11.1 Introduction . . . . . . . . . . . . 175 11.2 Mouse . . . . . . . . . . . . . . . 177 11.3 Keyboard . . . . . . . . . . . . . 178 11.4 Game Controller . . . . . . . . . 181
- 7. 12 Bitmapped Graphics and Sound 185 12.1 Introduction . . . . . . . . . . . . 185 12.2 Setting a Background Image . . . 186 12.3 Moving an Image . . . . . . . . . 188 12.4 Sounds . . . . . . . . . . . . . . . 191 12.5 Full Listing . . . . . . . . . . . . 192 12.6 Review . . . . . . . . . . . . . . . 195 13 Introduction to Classes 199 13.1 Defining and Creating Simple Classes199 13.1.1 Review . . . . . . . . . . . 206 13.2 Methods . . . . . . . . . . . . . . 208 13.2.1 Example: Ball class . . . . 211 13.3 References . . . . . . . . . . . . . 214 13.3.1 Functions and References . 216 13.3.2 Review . . . . . . . . . . . 218 13.4 Constructors . . . . . . . . . . . . 218 13.4.1 Review . . . . . . . . . . . 223 13.5 Inheritance . . . . . . . . . . . . 224 13.5.1 Review . . . . . . . . . . . 229
- 8. 14 Introduction to Sprites 233 14.1 Basic Sprites and Collisions . . . 234 14.2 Moving Sprites . . . . . . . . . . 247 15 Libraries and Modules 251 15.1 Creating your own module/library file: 15.2 Namespace: . . . . . . . . . . . . 255 15.3 Third Party Libraries . . . . . . . 257 15.4 Review . . . . . . . . . . . . . . . 258 16 Searching 259 16.1 Reading From a File . . . . . . . 259 16.2 Reading Into an Array . . . . . . 262 16.3 Linear Search . . . . . . . . . . . 264 16.3.1 Review . . . . . . . . . . . 266 16.4 Binary Search . . . . . . . . . . . 268 16.4.1 Review . . . . . . . . . . . 275 17 Array-Backed Grids 277 17.1 Drawing the Grid . . . . . . . . . 278 17.2 Populating the Grid . . . . . . . 281 17.3 Final Program . . . . . . . . . . . 285
- 9. 18 Sorting 289 18.1 Swapping Values . . . . . . . . . 290 18.2 Selection Sort . . . . . . . . . . . 293 18.3 Insertion Sort . . . . . . . . . . . 297 18.4 Review . . . . . . . . . . . . . . . 302 19 Exceptions 305 19.1 Introduction to exceptions . . . . 305 19.2 Exception handling . . . . . . . . 308 19.3 Example: Saving high score . . . 313 19.4 Exception generating . . . . . . . 315 19.5 Proper exception use . . . . . . . 316 Appendices 319 A Examples 319 A.1 Example: High Score . . . . . . . 320 B Labs 323 B.1 Lab: Calculator . . . . . . . . . . 324 B.1.1 Lab 01 a . . . . . . . . . . 325 B.1.2 Lab 01 b . . . . . . . . . . 325
- 10. B.1.3 Lab 01 c . . . . . . . . . . 326 B.2 Lab: Create-a-Quiz . . . . . . . . 327 B.2.1 Description . . . . . . . . 327 B.2.2 Example Run . . . . . . . 328 B.3 Lab: Create-a-Picture . . . . . . 331 B.3.1 Description . . . . . . . . 331 B.3.2 Example Runs . . . . . . . 333 B.4 Lab: Looping . . . . . . . . . . . 335 B.4.1 Requirements . . . . . . . 335 B.4.2 Tips: Part 1 . . . . . . . . 336 B.4.3 Tips: Part 2 . . . . . . . . 337 B.4.4 Tips: Part 3 . . . . . . . . 338 B.5 Lab: Animation . . . . . . . . . . 339 B.5.1 Requirements . . . . . . . 339 B.6 Lab: Bitmapped Graphics and User C B.7 Lab: Functions . . . . . . . . . . 342 B.8 Lab: Webkinz . . . . . . . . . . . 347 B.8.1 Description . . . . . . . . 348 B.8.2 Desired Output . . . . . . 350 B.8.3 Instructions . . . . . . . . 351 B.9 Lab: Sprite Collecting . . . . . . 354
- 11. B.10 Lab: Spell Check . . . . . . . . . 356 B.10.1 Requirements . . . . . . . 356 B.10.2 Steps to complete: . . . . 357 B.10.3 Example Run . . . . . . . 361
- 13. Listings 1.1 Hello world program . . . . . . . 11 1.2 Assigning and using variables . . 14 1.3 Program to calculate MPG . . . . 25 2.1 Example if statements less than greater 2.2 Example if statements less than or equal 2.3 Example if statements equal not equal 3 2.4 Example if statements using “and” and “ 2.5 If statements and Boolean data types 34 2.6 Assigning values to Boolean data types 3 2.7 Example if/else statement . . . . 37 2.8 Example if/elif/else statement . . 38 2.9 Example of improper ordering if/elif/else
- 14. 2.10 Case sensitive text comparison . . 39 2.11 Case-insensitive text comparison . 40 3.1 Print the numbers 0 to 9 . . . . . 43 3.2 Print the numbers 1 to 10 version 1 4 3.3 Print the numbers 1 to 10 version 2 4 3.4 Two ways to print the even numbers 2 3.5 Count down from 10 to 1 . . . . . 45 3.6 Print numbers out of a list . . . . 45 3.7 Using a while loop to print the numbe 3.8 Example infinite loop . . . . . . . 49 3.9 Looping until the user wants to quit 5 3.10 Looping until the game is over or the u 4.1 Importing and initializing pygame 63 4.2 Defining colors . . . . . . . . . . 64 4.3 Opening and setting the window size 6 4.4 Setting the window title . . . . . 66 4.5 Setting up the main program loop 67 4.6 Drawing a single line . . . . . . . 69 4.7 Drawing a series of lines . . . . . 71 4.8 Drawing text on the screen . . . . 72 4.9 Drawing a rectangle . . . . . . . . 74
- 15. 4.10 Drawing an ellipse . . . . . . . . 74 4.11 Drawing arcs . . . . . . . . . . . 75 4.12 Drawing a polygon . . . . . . . . 77 4.13 Flipping the Pygame display . . . 78 4.14 Proper shutdown of a Pygame program 7 4.15 Simple Graphics Demo . . . . . . 81 6.1 Creating a list of numbers from user inpu 6.2 Summing the values in a list . . . 105 6.3 Doubling all the numbers in a list 105 6.4 Accessing a string as a list . . . . 106 6.5 Adding and multiplying strings . 107 6.6 Getting the length of a string or list108 7.1 Random number from 0 to 49 . . 118 7.2 Random number from 100 to 200 118 7.3 Picking a random item out of a list119 7.4 Random floating point number from 0 to 7.5 Random floating point number between 1 8.1 Animating Snow . . . . . . . . . 132 8.2 Example Blender Python Program137 9.1 Function that prints the volume of a sphe 9.2 Function that prints the volume of a cylin
- 16. 9.3 Function that returns the volume of a 11.1 Controlling an object via the mouse17 11.2 Controlling an object via the keyboard 11.3 Initializing the game controller for use 11.4 Controlling an object via a game contr 15.1 test.py with everything in it . . . 253 15.2 my functions.py . . . . . . . . . . 253 15.3 test.py that doesn’t work . . . . . 254 15.4 test.py that imports but still doesn’t w 15.5 test.py that finally works. . . . . 254 15.6 student functions.py . . . . . . . 255 15.7 financial functions.py . . . . . . . 255 15.8 test.py that calls different print report 15.9 test.py . . . . . . . . . . . . . . . 257 16.1 Read in a file from disk and put it in a 16.2 Linear search . . . . . . . . . . . 264 16.3 Binary search . . . . . . . . . . . 272 17.1 Create a 10x10 array of numbers 281 17.2 Creating an array backed grid . . 285 18.1 Swapping two values in an array . 292 18.2 Selection sort . . . . . . . . . . . 295
- 17. 18.3 Insertion sort . . . . . . . . . . . 300 19.1 Handling division by zero . . . . . 308 19.2 Handling number conversion errors309 19.3 Better handling of number conversion err
- 18. 0.1 Forward This book covers the material convered in CmSc 150 Foundations of Computing I. The companion web site to this book con- tains the examples discussed in the text. It also contains supporting files. That web site is avail- able at: http://cs.simpson.edu/?q=python_pygame_exam Labs are in the appendix. These labs are important to apply the concepts talked about in the book. Questions, comments, or errors regarding the material contained in this book should be sent to [email protected].
- 19. Chapter 1 Python Calculator 1.1 Introduction One of the simplist things that can be done with Python is to use it as a fancy calculator. A sim- ple program can be used to ask the user for in- formation, and then calculate things like mort- gage payments, horsepower, or cost estimates for constructing a house.
- 20. The best thing about doing this as a pro- gram is the ability to hide the complexities of an equation. All the user needs to do is supply the information and he or she can get the result in an easy to understand format. Mobile com- puting allows a person does run the calculation in the field. 1.2 Installing and Starting Python To get started, two programs need to be in- stalled. Installing Python will enable the com- puter to run Python programs. To create graph- ics and games, the Pygame library must be in- stalled afterwards. It can be confusing trying to find the correct version of both Python and Pygame. Start by looking at the Pygame download page to see what the most recent version of Pygame is. This
- 21. Figure 1.1: Pygame Versions page is located at: http://www.pygame.org/download.shtml On the download page, find the most recent version of Python that Pygame is available for. It is not unusual for Pygame to not be avail- able for the most recent version of Python. In Figure 1.1, one can see that the most recent ver- sion of Python that Pygame is available for is Python 3.1. Python can be downloaded and installed for free from: http://www.python.org/download/releases/
- 22. Figure 1.2: Python Versions Figure 1.2 shows the download page for Pytho One can see the most recent version of Python is 3.2. Unfortunately we just noted that Pygame is available for 3.1, not 3.2. Therefore, down- load the 3.1.3 version. Depending on the up- dates after this book has been written, the reader may note very different versions of Python and Pygame than what is stated here. Once Python has been installed, start it up by selecting the IDLE shell as shown in Fig- ure 1.3.
- 23. Figure 1.3: Starting Python 1.3 Printing One of the simplist programs that can be run in a language is the “Hello World” program. This program simply prints out the words “Hello World.” In Python this program looks like: Listing 1.1: Hello world program print ( " Hello World . " ) The command for printing is easy to remem- ber, just use print. After the print command is a set of parenthesis. Inside these parenthesis
- 24. is what should be printed to the screen. Notice that there are quotes around the text to be printed. If a print statement has quotes around text, the computer will print it out just as it is written. For example, this program will print 2+3: print ( " 2+3 " ) This next program does not have quotes arou 2 + 3, and the computer will evaluate it as a mathematical expression. It will print 5 rather than 2+3. print (2+3) The code below will generate an error be- cause the computer will try to evaluate Hello World as a mathematical expression, and that doesn’t work at all. print ( Hello World ) A print statement can output multiple things at once, each item separated by a comma. For example:
- 25. # This code prints : The answer to 10+10 is 20 print ( " The answer to 10+10 is " ,10+10) # This code prints : The answer to 10+10 is 10+10 print ( " The answer to 10+10 is " ," 10+10 ") # This code does not work because the comma is inside # the quotation marks , and not outside : print ( " The answer to 10+10 is , " 10+10) 1.4 Assignment Operators One of the most basic operators is the assign- ment operator. This stores a value into a vari- able to be used later on. For, the code below will assign 10 to the variable x, and then print the value stored in x.
- 26. Listing 1.2: Assigning and using variables 1 # Create a variable x and store the value 10 into it . 2 x = 10 3 4 # This prints the value stored in x . 5 print ( x ) 6 7 # This prints the letter x , but not the value in x 8 print ( " x " ) 9 10 # This prints " x = 10" 11 print ( " x = " ,x ) The listing above also demonstrates the dif- ference between printing an x inside quotes and an x outside quotes. If an x is inside quotation marks, then the computer prints x. If an x is outside the quotation marks then the computer will print the value of x. An assignment statement is different than an algebraric equation. Do not think of them as the same. With an assignment statement, on
- 27. the left of the equals sign is a variable. Nothing else may be there. On the right of the equals sign is an expres- sion. An expression is anything that evaluates to a value. Examine the code below. This is valid even though it does not make a mathe- matical equation. Mathematical equations are different even if they have variables, numbers, and an equals sign. This statement takes the current value of x, adds one to it, and stores the result back into x. x = x + 1 So the statement below will print the num- ber 6. x =5 x = x + 1 print ( x ) The next statement is valid and will run, but it is pointless. The computer will add one to x, but the result is never stored or printed. x + 1
- 28. The code below will print 5 rather than 6 be- cause the programmer forgot to store the result of x + 1 back into the variable x. x =5 x + 1 print ( x ) The statement below is not valid because on the left of the equals sign is more than just a variable: x + 1 = x Python also has assignment operators. This allows a programmer to modify a variable easily. For example: x += 1 The above statement is equivilant to writing the code below: x = x + 1 There are also assignment operators for ad- dition, subtraction, multiplication and division.
- 29. 1.5 Variables Variables should start with a lower case letter. Variables can start with an upper case letter or an underscore, but those are special cases and should not be done on a normal basis. Af- ter the first lower case letter, the variable may include uppercase and lowercase letters, along with numbers and underscores. Variables may not include spaces. Variables are case sensitive. This can be confusing if a programmer is not expecting it. In the code below, the output will be 6 rather than 5 because there are two different variables. x =6 X =5 print ( x )
- 30. 1.6 Operators For more complex mathematical operations, com mon mathematical operators are available. Alon with some not-so-common ones: operator operation example equatio + addition 3+2 - subtraction 3−2 * multiplication 3 · 2 10 / division 2 // floor division N/A ** power 23 % modulus N/A Python will evaluate expressions using the same order of operations that are expected in standard mathematical expressions. For exam- ple this equation does not correctly calculate the average: average =90+86+71+100+98/5 The first operation done is 98/5. The ad- dition is done next which yields an incorrect
- 31. answer. By using parenthesis this problem can be fixed: average =(90+86+71+100+98) /5 Trigonometric functions to calculate sine and cosine can be used in equations. By default, Python does not know how to calculate sine and cosine, but it can once the proper library has been imported. Units are in radians. # Import the math library # This line is done only once , and at the very top # of the program . from math import * # Calculate x using sine and cosine x = sin (0) + cos (0) For an example, use Python to calculate the milage of a car that drove 294 miles on 10.5 gallons of gas. m =294/10.5 print ( m )
- 32. This program can be improved by using varar ables. This allows the values to easily be changed in the code without modifying the equation. m =294 g =10.5 m2 = m / g print ( m2 ) By itself, this program is actually difficult to understand. It can be made easier to under- stand by using appropriately named variables: milesDriven =294 gallonsUsed =10.5 mpg = milesDriven / gallonsUsed print ( mpg ) Another example good verses bad variable naming: # Hard to understand ir =0.12 b =12123.34 i = ir * b # Easy to understand
- 33. interestRate =0.12 accountBalance =12123.34 interestAmount = interestRate * accountBalance In the IDLE editor it is possible to edit a prior line without retyping it. Do this by mov- ing the cursor to that line and hitting ’enter’. It will be copied to the current line. Entering Python code at the >>> prompt is slow and can only be done one line at a time. It is also not possible to save code so that another person can run it. Thankfully, there is an even better way to enter Python code. Python code can be entered using a script. A script is a series of lines of Python code that will be executed all at once. To create a script open up a new window as shown in Figure 1.4. Enter the Python program for calculating gas milage, and then save the file. Save the file to a flash drive, network drive, or some other lo- cation of your choice. Python programs should
- 34. Figure 1.4: Entering a script always end .py. See Figure 1.5. Run the program typed in by clicking on the “Run” menu and selecting “Run Module”. Try updating the program to different values for miles driven and gallons used. This program would be even more useful if it would interact iwth the user and ask the user for the miles driven and gallons used. This can be done with the input statement. See the code below: # This code almost works milesDriven = input ( " Enter miles driven : ") gallonsUsed = input ( " Enter gallons used : ")
- 35. Figure 1.5: Saving a script mpg = milesDriven / gallonsUsed print ( " Miles per gallon : " , mpg ) Running this program will ask the user for miles and gallons, but it generates a strange er- ror as shown in Figure 1.6. The reason for this error can be demonstrated by changing the program a bit: milesDriven = input ( " Enter miles driven : ") gallonsUsed = input ( " Enter gallons used : ") x = milesDriven + gallonsUsed
- 36. Figure 1.6: Error running MPG program Figure 1.7: Incorrect Addition print ( " Sum of m + g : " ,x ) Running the program above results in the output shown in Figure 1.7. The program doesn’t add the two numbers together, it just puts one right after the other. This is because the program does not know the user will be entering numbers. The user might enter “Bob” and “Mary”, and adding those two
- 37. variables together would be “BobMary” which would make more sense. To tell the computer these are numbers, it is necessary to surround the input function with an int( ) or a float( ). Use the former for integers, and the latter for floating point num- bers. The final working program: Listing 1.3: Program to calculate MPG milesDriven = float ( input ( " Enter miles driven : " ) ) gallonsUsed = float ( input ( " Enter gallons used : " ) ) mpg = milesDriven / gallonsUsed print ( " Miles per gallon : " , mpg ) 1.7 Review 1. Write a line of code that will print your name.
- 38. 2. How do you enter a comment in a pro- gram? 3. What does the following line of code out- put? print (2/3) 4. Write a line of code that creates a variable called “pi” and sets it to an appropriate value. 5. Write a line of code that will ask the user for the length of square’s side and store the result in a variable. Make sure to con- vert the value to an integer. 6. Write a line of code that prints the area of the square, using the number the user typed in that you stored in question 5. 7. Do the same as in questions 5 and 6, but with the formula for the area of an ellipse.
- 39. s = πab where a and b are the lengths of the major radii. 8. Do the same as in questions 5 and 6, but with a formula to find the pressure of a gas. nRT P = V where n is the number of mols, T is the ab- solute temperature, V is the volume, and R is the gas constant 8.3144. See http://en.wikipedia.org/wiki/Gas_cons for more information on the gas constant.
- 41. Chapter 2 If Statements Central to any computer program is the “if” statement, also known as the conditional state- ment. This is key to having the computer make any sort of decision.
- 42. 2.1 Basic Comparisons Here are a few examples of if statements. The first section sets up three variables for use in the if statements. Then two if statments show how to compare the variables to see if one is greater than the other. Listing 2.1: Example if statements less than greater than 1 # Variables used in the example if statements 2 a =4 3 b =5 4 c =6 5 6 # Basic comparisons 7 if a < b : 8 print ( " a is less than b " ) 9 10 if a > b : 11 print ( " a is greater than than b " ) Since a is less than b, the first statement will print out if this code is run. If the variables a
- 43. and b were both equal to 4, then neither of the two if statements above would print anything out. The number 4 is not greater than 4, so the if statement would fail. To check for a values greater than or equal, the following examples show how to do this: Listing 2.2: Example if statements less than or equal greater than or equal if a <= b : print ( " a is less than or equal to b") if a >= b : print ( " a is greater than or equal to b " ) The <= and >= symbols must placed in that order, and there may not be a space be- tween them. Listing 2.3: Example if statements equal not equal # Equal
- 44. 2 if a == b : 3 print ( " a is equal to b " ) 4 5 # Not equal 6 if a != b : 7 print ( " a and b are not equal " ) NOTE: It is very easy to mix when to use == and =. Use == if you are asking if they are equal, use = if you are assigning a value. The two most common mistakes in mixing the = and == operators is demonstrated below: # This is wrong a ==1 # This is also wrong if a =1: print ( " A is one " ) 2.2 Using And/Or An if statement can check multiple conditions by chaining together comparisons with and and
- 45. or. Listing 2.4: Example if statements using “and” and “or” # And if a < b and a < c : print ( " a is less than b and c " ) # Non - exclusive or if a < b or a < c : print ( " a is less than either a or b ( or both ) " ) A common mistake is to omit a variable when checking it against multiple conditions. The code below does not work because the computer does not know what to check against the vari- able c. It will not assume to check it against a. # This is not correct if a < b or < c : print ( " a is less than b and c " )
- 46. 2.3 Boolean Variables Python supports Boolean variables. Boolean variables can store either a True or a value of False. An if statement needs an expression to evaluate to True or False. It does not actually need to do any comparisons if a variable already evaluates to True or False. Listing 2.5: If statements and Boolean data types 1 # Boolean data type . This is legal ! 2 a = True 3 if a : 4 print ( " a is true " ) 5 6 if not ( a ) : 7 print ( " a is false " ) 8 9 a = True 10 b = False 11 12 if a and b : 13 print ( " a and b are both true " )
- 47. It is also possible to assign a variable to the result of a comparison. In the code below, the variables a and b are compared. If they are equal, c will be True, otherwise c will be False. Listing 2.6: Assigning values to Boolean data types a =3 b =3 c = a == b print ( c ) It is possible to create an if statement with a condition that does not evaluate to true or false. This is not usually desired, but it is important to understand how the computer handles these values when searching for problems. The statement below is legal and will cause the text to be printed out because the values in the if statement are non-zero: if 1: print ( " 1 " ) if " A " :
- 48. print ( " A " ) The code below will not print out anything because the value in the if statement is zero which is treated as False. Any value other than zero is considered true. if 0: print ( " Zero " ) In the code below, the first if statement ap- pears to work. The problem is that it will al- ways trigger as true even if the variable a is not equal to b. This is because ”b” by itself is con- sidered true. a="c" if a == " B " or " b " : print ( " a is equal to b . Maybe . " ) # This is a better way to do the if statement . if a == " B " or a == " b " : print ( " a is equal to b . " )
- 49. 2.4 Else and Else If Below is code that will get the temperature from the user and print if it is hot. temperature = int ( input ( " What is the temperature in Fahrenheit ? " ) ) if temperature > 90: print ( " It is hot outside " ) print ( " Done " ) If the programmer wants code to be exe- cuted if it is not hot, she can use the else state- ment. Notice how the else is lined up with the “i” in the if statement, and how it is followed by a colon justl like the if statement. In the case of an if...else statement, one block of code will always be executed. The first block if the statement evaluates to True, the second block if it evaluates to False. Listing 2.7: Example if/else statement temperature = int ( input ( " What is the temperature in Fahrenheit ? " ) )
- 50. 2 if temperature > 90: 3 print ( " It is hot outside " ) 4 else : 5 print ( " It is not hot outside " ) 6 print ( " Done " ) It is possible to chain several if statements together using the else if statement. Python abbreviates this as elif. Listing 2.8: Example if/elif/else statement 1 temperature = int ( input ( " What is the temperature in Fahrenheit ? " ) ) 2 if temperature > 90: 3 print ( " It is hot outside " ) 4 elif temperature < 30: 5 print ( " It is cold outside " ) 6 else : 7 print ( " It is not hot outside " ) 8 print ( " Done " ) In the code below, the program will output “It is hot outside” even if the user types in 120 degrees. Why? How can the code be fixed?
- 51. Listing 2.9: Example of improper ordering if/elif/else temperature = int ( input ( " What is the temperature in Fahrenheit ? " ) ) if temperature > 90: print ( " It is hot outside " ) elif temperature > 110: print ( " Oh man , you could fry eggs on the pavement ! " ) elif temperature < 30: print ( " It is cold outside " ) else : print ( " It is ok outside " ) print ( " Done " ) 2.5 Text Comparisons Comparisons using string/text. Note, this ex- ample does not work when running under Eclipse because the input will contain an extra carriage return at the end. It works fine under IDLE. Listing 2.10: Case sensitive text comparison
- 52. 1 userName = input ( " What is your name ? " ) 2 if userName == " Paul " : 3 print ( " You have a nice name . " ) 4 else : 5 print ( " Your name is ok . " ) 6 7 # Do something with . upper () This converts what the user entered to all lower case so that the comparison will not be case sensitive. Listing 2.11: Case-insensitive text compari- son 1 userName = input ( " What is your name ? " ) 2 if userName . lower () == " paul " : 3 print ( " You have a nice name . " ) 4 else : 5 print ( " Your name is ok . " ) 6 7 # Do something with . upper ()
- 53. Chapter 3 Looping 3.1 For loops This code uses a for loop to print “Hi” 10 times. for i in range (10) : print ( " Hi " ) This code will print “Hello” 5 times and “There” once. “There” is not indented so it is not part of the for loop and will not print until
- 54. the for loop completes. for i in range (5) : print ( " Hello " ) print ( " There " ) This code takes the prior example and in- dents line 3. This change will cause the program to print “Hello” and “There” 5 times. Since the statement has been indented “There” is now part of the while loop and will repeat 5 times just line the word Hello. for i in range (5) : print ( " Hello " ) print ( " There " ) The code below will print the numbers 0 to 9. Notice that the loop starts at 0 and does not include the number 10. It is natural to assume that range(10) would include 10, but it stops just short of it. The variable i could be named something else. For example a programmer might use lineN if she was processing a text file.
- 55. Listing 3.1: Print the numbers 0 to 9 for i in range (10) : print ( i ) If a programmer actually wants to go from 1 to 10, there are a couple ways to do it. The first way is to send the range function two numbers. One for the number to start at. The second number the programmer just increases from 10 to 11. It does take some practice to get used to the idea that the for loop will include the first number, but not the second number listed. Listing 3.2: Print the numbers 1 to 10 version 1 for i in range (1 ,11) : print ( i ) The code below still has the variable i go from 0 to 9. But just before printing out the variable the programmer adds one to it.
- 56. Listing 3.3: Print the numbers 1 to 10 version 2 1 # Print the numbers 1 to 10. 2 for i in range (10) : 3 print ( i +1) If the program needs to count by 2’s or use some other increment, that is easy. There are two ways to do it. The easiest is to supply a third number to the range function that tells it to count by 2’s. The second way to do it is to go ahead and count by 1’s, but multiply the variable by 2. Listing 3.4: Two ways to print the even num- bers 2 to 10 1 # Two ways to print the even numbers 2 to 10 2 for i in range (2 ,12 ,2) : 3 print ( i ) 4 5 for i in range (5) : 6 print (( i +1) *2)
- 57. It is also possible to count backwards down towards zero. Listing 3.5: Count down from 10 to 1 for i in range (10 ,0 , -1) : print ( i ) If the numbers that a program needs to it- erate through don’t form an easy pattern, it is possible to pull numbers out of a list: Listing 3.6: Print numbers out of a list for i in [2 ,6 ,4 ,2 ,4 ,6 ,7 ,4]: print ( i ) Try to predict what the code below will print. Then enter the code and see if you are correct. # What does this print ? Why ? for i in range (3) : print ( " a " ) for j in range (3) : print ( " b " ) This next block of code is almost identical to the one above. The second for loop has been
- 58. indented one tab stop so that it is now nested inside of the first for loop. This changes how the code runs significantly. Try it and see. # What does this print ? Why ? for i in range (3) : print ( " a " ) for j in range (3) : print ( " b " ) A programmer that understands the nested for loops above should be able to predict the output of the code below. # What is the value of a ? a =0 for i in range (10) : a = a +1 print ( a ) # What is the value of a ? a =0 for i in range (10) : a = a +1 for j in range (10) : a = a +1 print ( a )
- 59. # What is the value of a ? a =0 for i in range (10) : a = a +1 for j in range (10) : a = a +1 print ( a ) The code below adds all the numbers from 1 to 100. It demonstrates a common pattern where a running total is kept inside of a loop. This requires a new variable to track the run- ning total. # What is the value of sum ? sum =0 for i in range (1 ,101) : sum = sum + i 3.2 While loops For loops are used when a program knows it needs to repeat a block of code for a certain
- 60. number of times, or if the code needs to process a list of values. A while loop can be used anywhere a for loop is used. It can also be used when a pro- gram needs to loop until a particular condition occurs. For example, a program will check what the mouse is doing until it clicks the “close” but- ton. A for loop like this: for i in range (10) : print ( i ) Can be done with a while loop that looks like this: Listing 3.7: Using a while loop to print the numbers 0 to 9 1 i =0 2 while i < 10: 3 print ( i ) 4 i = i + 1 As one can see from the code, the for loop is more compact than a while loop and is easier to
- 61. read. Otherwise programs would do everything with a while loop. Line 1 of the while loop sets up a “sentinel” variable that will be used to count the number of times the loop has been executed. Line 2 contains the actual while loop. The format of the while loop is very similar to the if statement. If the condition holds, the code in the loop will repeat. A common mistake is to confuse the for loop and the while loop. The code below shows a programmer that can’t quite make up his/her mind between a for loop or a while loop. Listing 3.8: Example infinite loop while range (10) : print ( i ) It is possible to short hand the code: i = i +1 With the following: i += 1
- 62. This can be done with subtraction and mul- tiplication as well. For example: i =0 while i < 10: print ( i ) i += 1 What would this print? i =1 while i <= 2**32: print ( i ) i *= 2 A very common operation is to loop until the user performs a request to quit Listing 3.9: Looping until the user wants to quit 1 quit = " n " 2 while quit == " n " : 3 quit = input ( " Do you want to quit ? ") There may be several ways for a loop to quit. Using a Boolean to trigger the event is a way of
- 63. handling that. Listing 3.10: Looping until the game is over or the user wants to quit done = False while not ( done ) : quit = input ( " Do you want to quit ? ") if quit == " y " : done = True ; attack = input ( " Does your elf attach the dragon ? " ) if attack == " y " : print ( " Bad choice , you died . " ) done = True ; Here is example of using a while loop where the code repeats until the value gets close enough to zero: value =0 increment =.5 while value < 0.999: value += increment
- 64. increment *= 0.5 print ( value ) 3.2.1 Common problems with whi loops The programmer wants to count down from 10. What is wrong and how can it be fixed? i = 10 while i == 0: print ( i ) i -= 1 What is wrong with this loop that tries to count to 10? What will happen when it is run? How should it be fixed? i =1 while i < 10: print ( i )
- 65. 3.3 Review Questions 1. Cross out the variable names that are not legal in Python. Circle variable names that might be legal, but would not be proper. x pi PI fred greatBigVariable great_big_variable x2 2x x2x area of circle total % # left 2. Give an example of a Python expression: 3. What is an “operator” in Python? 4. What does the following program print out?
- 66. x =3 x +1 print ( x ) 5. Correct the following code: user_name = input ( " Enter your name : )" 6. Correct the following code: value = int ( input ( print ( " Enter your age " ) ) ) 7. Correct the following code: temperature = float ( input ( " Temperature " ) if temperature > 90: print ( " It is hot outside . " ) 8. Correct the following code: userInput = input ( " A cherry is a : ")
- 67. print ( " A . Dessert topping " ) print ( " B . Desert topping " ) if userInput == " A " : print ( " Correct ! " ) 9. What 2 things are wrong with the follow- ing code? x = input ( " Enter a number : " ) if x =3 print ( " You entered 3 " ) 10. Write a program that asks the user how many quarters and nickels they have, then prints the total amount of money those coins are worth. 11. Write a Python program that will take in a number from the user and print if it is positive, negative, or zero. 12. There are 3 things wrong with this pro- gram. Find and correct them.
- 68. print ( " This program takes 3 numbers and returns the sum . " ) total =0 for i in range (3) : x = input ( " Enter a number : " ) total = total + i print ( " The total is : " ,x ) 13. Write a Python program that asks the user for 7 numbers. Then print the total, the number of positive entries, the num- ber entries equal to zero, and the number of negative entries.
- 70. Chapter 4 Introduction to Graphics 4.1 Computer coordinate sy tems The Cartesian coordinate system, shown in Fig- ure 4.1 1 , is what most people are used to when 1 Graphic from Wikimedia Commons
- 71. Figure 4.1: Cartesian coordinate system plotting graphics. The computer uses a differ- ent coordinate system. Understanding why it is different requires a bit of computer history. During the early 80’s, most computer sys- tems were text based and did not support graph- ics. Figure 4.2 2 shows a early spreadsheet pro- gram run on an Apple ][. When positioning text on the screen, programmers started at the top calling it line 1. The screen continued down for 2 Graphic from Wikimedia Commons http://en.wikipedia.org/wiki/File:Visicalc.pn
- 72. Figure 4.2: Early Apple text screen 24 lines and across for 40 characters. Even with plain text, it was possible to make rudimentary graphics by using just characters on the keyboard as shown in Figure 4.3. Char- acters were still positioned starting with line 1 at the top. The character set was expanded to include boxes and other primitive drawing shapes. Char- acters could be drawn in different colors. As shown in Figure 4.4 the graphics got more ad- vanced. Search the web for “ASCII art” and many more examples can be found. Once computers moved to being able to con-
- 73. Figure 4.3: Text screen Figure 4.4: Text screen
- 74. Figure 4.5: Computer coordinate system trol individual pixels for graphics, the text-based coordinate system stuck. 4.2 Pygame Library Pygame is a library that allows programmers to: • Draw graphics • Load bitmaps • Animate
- 75. • Interact with keyboard, mouse, and gamepad • Play sound Pygame can be downloaded and installed from: http://www.pygame.org/download.shtml It is important to select the correct version of Pygame for the version of Python that is in- stalled on the machine. For example, at the time of this writing, the correct version would be pygame-1.9.1.win32-py3.1.msi because it is for the 3.x version of Python. The first thing to be put in our example Pygame program is code to load and initialize the Pygame library. Every program that uses Pygame should start with these lines: Listing 4.1: Importing and initializing pygame # Import a library of functions called ’ pygame ’ import pygame
- 76. 3 # Initialize the game engine 4 pygame . init () 4.3 Colors The next thing code to be added to the program will be a set of variables that define the colors to be used. Colors are defined in a list of 3 colors, red, green, and blue. The numbers range from 0 to 255. Zero means there is none of the color, and 255 tells the monitor to display as much of the color as possible. The colors combine, so if all three colors are specified the color on the monitor appears white. Lists in java are surrounded by square brack- ets. Individual numbers are separated by com- mas. Below is an example that creates variables and sets them equal to lists of three numbers. These lists will be used later to specify colors. Listing 4.2: Defining colors
- 77. black = [ 0 , 0 , 0] white = [255 ,255 ,255] blue = [ 0 , 0 ,255] green = [ 0 ,255 , 0] red = [255 , 0 , 0] Using the interactive shell in IDLE, try defin- ing these variables and printing them out. If the five colors above aren’t the colors you are look- ing for, you can define your own. To pick a color, find an on-line color picker, like: http://www.switchonthecode.com/tutorials/java Extra: Some color pickers specify colors in hexadecimal. You can enter hexadecimal num- bers if you start them with 0x. For example: white =[0 xFF , 0 xFF , 0 xFF ] Eventually the program will need to use the value of π when drawing arcs, so this is a good time in our program to define a variable that contains the value of π. pi =3.141592653
- 78. 4.4 Open a window So far the programs we have created only printed text. The programs did not open any windows like most modern programs do in Windows or Macs. The code to open a window is not com- plex. Below is the required code, which creates a window sized to 400 x 400 pixels: Listing 4.3: Opening and setting the window size # Set the height and width of the screen size =[400 ,400] screen = pygame . display . set_mode ( size ) To set the title of the window in its title bar and the title shown when it is minimized, use the following line of code: Listing 4.4: Setting the window title pygame . display . set_caption ( " Professor Craven ’s Cool Game " )
- 79. 4.5 Interacting with the user With just the code written so far, the program would create a window and immediately after it would reach the end of the program. So the pro- gram would quit and the window would go away before the user gets a chance to see anything. The program needs to wait in a loop until the user clicks “exit.” This is the most complex part of the pro- gram, and a complete understanding of it isn’t needed yet. It is necessary to have an idea of what it does, so spend some time studying it and asking questions. Listing 4.5: Setting up the main program loop # Loop until the user clicks the close button . done = False # Create a timer used to control how often the screen updates clock = pygame . time . Clock ()
- 80. while done == False : # This limits the while loop to a max of 10 times per second . # Leave this out and we will use all CPU we can . clock . tick (10) for event in pygame . event . get () : # User did something if event . type == pygame . QUIT : # If user clicked close done = True # Flag that we are done so we exit this loop # All drawing code happens after the for loop and but # inside the main while done == False loop . Code for drawing the image to the screen happens inside the while loop. With the clock tick set at 10, the contents of the window will be drawn 10 times per second. If it happens too
- 81. fast the computer is sluggish because all of its time is spent updating the screen. If it isn’t in the loop at all, the screen won’t redraw when other windows overlap it, and then move away. 4.6 Drawing Here is a list of things that you can draw: http://www.pygame.org/docs/ref/draw.html The following code clears whatever might be in the window with a white background. Re- member that the variable white was defined earlier as a list of 3 RGB values. # Clear the screen and set the screen background screen . fill ( white ) This code shows how to draw a line on the screen. It will draw on the screen a green line from (0,0) to (100,100) that is 5 pixels wide. Listing 4.6: Drawing a single line
- 82. # Draw on the screen a green line from (0 ,0) to (100 ,100) # that is 5 pixels wide . pygame . draw . line ( screen , green ,[0 ,0] ,[100 ,100] ,5) 4.7 Loops and offsets Programs can repeat things over and over. The code below draws a line over and over. You can do multiple lines, and even draw an entire car. This will be discussed in greater detail later. Simply putting a line drawing command in- side a loop will cause multiple lines being drawn to the screen. But if each line has the same starting and ending coordinates, then each line will draw on top of the other line and it will look like only one line was drawn. To get around this, it is necessary to off- set the coordinates each time through the loop. So the first time through the loop the variable
- 83. y offset is zero. The line in the code below is drawn from (0,10) to (100,110). The next time through the loop y offset increased by 10. This causes the next line to be drawn to have new coordinates of (0,20) and (100,120). This continues each time through the loop shift- ing the coordinates of each line down by 10 pix- els. Listing 4.7: Drawing a series of lines # Draw on the screen several green lines from (0 ,10) to (100 ,110) 5 pixels wide # using a loop y_offset =0 while y_offset < 100: pygame . draw . line ( screen , red ,[0 ,10+ y_offset ] ,[100 ,110+ y_offset ] ,5) y_offset = y_offset +10
- 84. 4.8 Text Text is slightly more complex. There are three things that need to be done. First, the program creates a variable that holds information about the font to be used, such as what typeface and how big. Second, the program creates an image of the text. One way to think of it is that the program carves out a “stamp” with the required letters that is ready to be dipped in ink and stamped on the paper. The third thing that is done is the program tells where this image of the text should be stamped (or “blit’ed”) to the screen. Here’s an example: Listing 4.8: Drawing text on the screen # Select the font to use . Default font , 25 pt size . font = pygame . font . Font ( None , 25)
- 85. # Render the text . " True " means anti - aliased text . # Black is the color . The variable black was defined # above as a list of [0 ,0 ,0] # Note : This line creates an image of the letters , # but does not put it on the screen yet . text = font . render ( " My text " , True , black ) # Put the image of the text on the screen at 250 x250 screen . blit ( text , [250 ,250]) Figure 4.6 shows a rectangle with the ori- gin at (20,20), a width of 250 and a height of 100. When specifying a rectangle the computer needs a list of these four numbers in the order of (x,y,width,height). The next line of code draws this rectangle. The first two numbers in the list define the up- per left corner at (20,20). The next two num-
- 86. bers specify first the width of 250 pixels, and then the height of 100 pixels. The two at the end specifies a line width of 2 pixels. Listing 4.9: Drawing a rectangle # Draw a rectangle pygame . draw . rect ( screen , black ,[20 ,20 ,250 ,100] ,2) The ellipse is 250 pixels wide and 100 pixels tall. The upper left corner of a 250x100 rect- angle that contains it is at (20,20). Note that nothing is actually drawn at (20,20). Figure 4.6 shows both the ellipse and rect- angle. With both drawn on top of each other it is easier to see how the ellipse is specified. Listing 4.10: Drawing an ellipse # Draw an ellipse , using a rectangle as the outside boundaries pygame . draw . ellipse ( screen , black ,[20 ,20 ,250 ,100] ,2)
- 87. Figure 4.6: Drawing an ellipse What if a program only needs to draw part of an ellipse? That can be done with the arc command. This command is similar to the el- lipse command, but it includes start and end angles for the arc to be drawn. The angles are in radians. The code below draws 4 arcs showing 4 dif- ference quadrants of the circle. The result of this code is shown in Figure 4.7 Listing 4.11: Drawing arcs # Draw an arc as part of an ellipse .
- 88. Figure 4.7: Arcs Use radians to determine what # angle to draw . pygame . draw . arc ( screen , black ,[20 ,220 ,250 ,200] , 0 , pi /2 , 2) pygame . draw . arc ( screen , green ,[20 ,220 ,250 ,200] , pi /2 , pi , 2) pygame . draw . arc ( screen , blue , [20 ,220 ,250 ,200] , pi ,3* pi /2 , 2) pygame . draw . arc ( screen , red , [20 ,220 ,250 ,200] ,3* pi /2 , 2* pi , 2) The next line of code draws a polygon. The triangle shape is defined with three points at (100,100) (0,200) and (200,200). It is possible
- 89. Figure 4.8: Polygon to list as many points as desired. Note how the points are listed. Each point is a list of two numbers, and the points themselves are nested in another list that holds all the points. This code draws what can be seen in Figure 4.8. Listing 4.12: Drawing a polygon # This draws a triangle using the
- 90. polygon command pygame . draw . polygon ( screen , black ,[[100 ,100] ,[0 ,200] ,[200 ,200]] ,5) 4.9 Flipping the screen Very important! You must flip the display af- ter you draw. The computer will not display the graphics as you draw them because it would cause the screen to flicker. This waits to display the screen until the program has finished draw- ing. The command below “flips” the graphics to the screen. Failure to include this command will mean the program just shows a blank screen. Any drawing code after this flip will not display. Listing 4.13: Flipping the Pygame display # Go ahead and update the screen with what we ’ ve drawn . pygame . display . flip ()
- 91. 4.10 Ending the program Right now, clicking the “close” button of a win- dow while running this Pygame program in IDLE will cause the program to crash. This is a has- sle because it requires a lot of clicking to close a crashed program. By calling the command below, the program will exit as desired. This command closes and cleans up the resources used by creating the window. Listing 4.14: Proper shutdown of a Pygame program # Be IDLE friendly . If you forget this line , the program will # hang and not exit properly . pygame . quit ()
- 92. Figure 4.9: Result of example program
- 93. 4.11 Full Listing This is a full listing of the program discussed in this chapter. This program, along with other programs, may be downloaded from: http://cs.simpson.edu/?q=python_pygame_exampl Listing 4.15: Simple Graphics Demo # Sample Python / Pygame Programs # Simpson College Computer Science # http :// cs . simpson . edu # Import a library of functions called ’ pygame ’ import pygame # Initialize the game engine pygame . init () # Define the colors we will use in RGB format black = [ 0 , 0 , 0] white = [255 ,255 ,255] blue = [ 0 , 0 ,255]
- 94. 15 green = [ 0 ,255 , 0] 16 red = [255 , 0 , 0] 17 18 pi =3.141592653 19 20 # Set the height and width of the screen 21 size =[400 ,500] 22 screen = pygame . display . set_mode ( size ) 23 24 pygame . display . set_caption ( " Professor Craven ’s Cool Game " ) 25 26 # Loop until the user clicks the close button . 27 done = False 28 clock = pygame . time . Clock () 29 30 while done == False : 31 32 # This limits the while loop to a max of 10 times per second . 33 # Leave this out and we will use all CPU we can . 34 clock . tick (10) 35
- 95. for event in pygame . event . get () : # User did something if event . type == pygame . QUIT : # If user clicked close done = True # Flag that we are done so we exit this loop # All drawing code happens after the for loop and but # inside the main while done == False loop . # Clear the screen and set the screen background screen . fill ( white ) # Draw on the screen a green line from (0 ,0) to (100 ,100) # 5 pixels wide . pygame . draw . line ( screen , green ,[0 ,0] ,[100 ,100] ,5) # Draw on the screen several green lines from (0 ,10) to (100 ,110) # 5 pixels wide using a loop
- 96. 52 y_offset =0 53 while y_offset < 100: 54 pygame . draw . line ( screen , red ,[0 ,10+ y_offset ] ,[100 ,110+ y_offset ] ,5) 55 y_offset = y_offset +10 56 57 # Select the font to use . Default font , 25 pt size . 58 font = pygame . font . Font ( None , 25) 59 60 # Render the text . " True " means anti - aliased text . 61 # Black is the color . This creates an image of the 62 # letters , but does not put it on the screen 63 text = font . render ( " My text " , True , black ) 64 65 # Put the image of the text on the screen at 250 x250 66 screen . blit ( text , [250 ,250]) 67 68 # Draw a rectangle
- 97. pygame . draw . rect ( screen , black ,[20 ,20 ,250 ,100] ,2) # Draw an ellipse , using a rectangle as the outside boundaries pygame . draw . ellipse ( screen , black ,[20 ,20 ,250 ,100] ,2) # Draw an arc as part of an ellipse . # Use radians to determine what angle to draw . pygame . draw . arc ( screen , black ,[20 ,220 ,250 ,200] , 0 , pi /2 , 2) pygame . draw . arc ( screen , green ,[20 ,220 ,250 ,200] , pi /2 , pi , 2) pygame . draw . arc ( screen , blue , [20 ,220 ,250 ,200] , pi ,3* pi /2 , 2) pygame . draw . arc ( screen , red , [20 ,220 ,250 ,200] ,3* pi /2 , 2* pi , 2) # This draws a triangle using the polygon command
- 98. 82 pygame . draw . polygon ( screen , black ,[[100 ,100] ,[0 ,200] ,[200 ,200]] ,5 83 84 # Go ahead and update the screen with what we ’ ve drawn . 85 # This MUST happen after all the other drawing commands . 86 pygame . display . flip () 87 88 # Be IDLE friendly 89 pygame . quit ()
- 99. Chapter 5 Back to Looping 5.1 Basic Review 1. What does this program print out? x =0 while x < 10: print ( x ) x = x +2 2. What does this program print out?
- 100. x =1 while x < 64: print ( x ) x = x *2 3. What does this program print out? x =5 while x >= 0: print ( x ) if x == " 1 " : print ( " Blast off ! " ) x =x -1 4. Fix the following code: x = input ( " Enter a number greater than zero : " ) while x <= 0: print " That number is too small . Enter a number greater than zero : " 5. Fix the following code:
- 101. x =10 while x < 0: print ( x ) x -1 print ( " Blast - off " ) 6. What does this program print out? print (3==1+2) x =5 print ( x ==5) print (3 <4) print (4 <4) print ( " Hi " == " Hi " ) print ( " hi " == " Hi " ) print ( " a " < " b " ) t =5==5 print ( t ) done = False if done : print ( " I am done . " ) else : print ( " I am not done . " )
- 102. 5.2 Advanced looping prob- lems Tip: Remember, you can continue to print char- acters on the same line if you change the default line ending. Instead of going to a new line, tell the computer to use a space: i =0 print (i , end = " " ) i =1 print (i , end = " " ) This will print: 0 1 The solutions to these problems will usually involve nested loops. That is, one for loop inside of another for loop.
- 103. 1. Write code that will print the following: 0 1 2 3 4 5 6 7 8 9 0 1 2 3 4 5 6 7 8 9 0 1 2 3 4 5 6 7 8 9 0 1 2 3 4 5 6 7 8 9 0 1 2 3 4 5 6 7 8 9 0 1 2 3 4 5 6 7 8 9 0 1 2 3 4 5 6 7 8 9 0 1 2 3 4 5 6 7 8 9 0 1 2 3 4 5 6 7 8 9 Tip: First, create a 0 1 2 3 4 5 6 7 8 9 loop that prints the first line. Then en- close it in another loop that repeats the line 10 times.
- 104. 2. Write code that will print the following: 0 0 1 Tip: This is 0 1 2 problem 1, but 0 1 2 3 inside loop no lon 0 1 2 3 4 loops a fixed num 0 1 2 3 4 5 of times. 0 1 2 3 4 5 6 0 1 2 3 4 5 6 7 0 1 2 3 4 5 6 7 8 0 1 2 3 4 5 6 7 8 9
- 105. 3. Write code that will print the following: 0 1 2 3 4 5 6 7 8 9 0 1 2 3 4 5 6 7 8 Tip: This on 0 1 2 3 4 5 6 7 is difficult. Two 0 1 2 3 4 5 6 inside loops are 0 1 2 3 4 5 needed. First, a loop 0 1 2 3 4 prints spaces, then 0 1 2 3 numbers. 0 1 2 0 1 0
- 106. 4. Write code that will print the fol- lowing (Getting the alignment is hard, at least get the numbers): 0 0 0 0 0 0 0 0 0 0 1 2 3 4 5 6 7 8 0 2 4 6 8 10 12 14 16 0 3 6 9 12 15 18 21 24 0 4 8 12 16 20 24 28 32 0 5 10 15 20 25 30 35 40 0 6 12 18 24 30 36 42 48 0 7 14 21 28 35 42 49 56 0 8 16 24 32 40 48 56 64 0 9 18 27 36 45 54 63 72
- 107. 5. Write code that will print the fol- lowing: 1 1 2 1 1 2 3 2 1 1 2 3 4 3 2 1 1 2 3 4 5 4 3 2 1 1 2 3 4 5 6 5 4 3 2 1 1 2 3 4 5 6 7 6 5 4 3 2 1 1 2 3 4 5 6 7 8 7 6 5 4 3 2 1 1 2 3 4 5 6 7 8 9 8 7 6 5 4 3 2 1
- 108. 6. Write code that will print the fol- lowing: 1 1 2 1 1 2 3 2 1 1 2 3 4 3 2 1 1 2 3 4 5 4 3 2 1 1 2 3 4 5 6 5 4 3 2 1 1 2 3 4 5 6 7 6 5 4 3 2 1 1 2 3 4 5 6 7 8 7 6 5 4 3 2 1 1 2 3 4 5 6 7 8 9 8 7 6 5 4 3 2 1 1 2 3 4 5 6 7 8 1 2 3 4 5 6 7 1 2 3 4 5 6 1 2 3 4 5 1 2 3 4 1 2 3 1 2 1
- 109. 7. Write code that will print the fol- lowing: 1 1 2 1 1 2 3 2 1 1 2 3 4 3 2 1 1 2 3 4 5 4 3 2 1 1 2 3 4 5 6 5 4 3 2 1 1 2 3 4 5 6 7 6 5 4 3 2 1 1 2 3 4 5 6 7 8 7 6 5 4 3 2 1 1 2 3 4 5 6 7 8 9 8 7 6 5 4 3 2 1 1 2 3 4 5 6 7 8 7 6 5 4 3 2 1 1 2 3 4 5 6 7 6 5 4 3 2 1 1 2 3 4 5 6 5 4 3 2 1 1 2 3 4 5 4 3 2 1 1 2 3 4 3 2 1 1 2 3 2 1 1 2 1 1
- 111. Chapter 6 Introduction to Lists 6.1 Data Types So far this book has shown 4 types of data: • String (a string is short for “String of char- acters”, which normal people think of it as text.)
- 112. • Integer • Floating point • Boolean Python can display what type of data a value is with the type function. Admittedly, this isn’t terribly useful for the programming we will do, but it is good to use the function just this once to demonstrate the types of data introduced so far. Type the following into the interactive IDLE shell. (Don’t create a new window and type this in as a program, it won’t work.) type (3) type (3.145) type ( " Hi there " ) type ( True ) It is also possible to use the type function on a variable to see what kind of data is in it. x =3 type ( x ) The two new types of data introduced in this chapter: Lists and Tuples. Try running the
- 113. following commands in the interactive Python shell and see what is displayed: type ( (2 ,3 ,4 ,5) ) type ( [2 ,3 ,4 ,5] ) 6.2 Working with lists Try these examples using IDLE’s command line. To create a list and print it out, try the follow- ing: >>> x=[1,2] >>> print (x) [1, 2] To print an individual element in an array: >>> print (x[0]) 1 Note that list locations start at zero! So a list with 10 elements does not have an element
- 114. in spot [10]. Just spots [0] through [9]. It can be very confusing create an array of 10 items and not be able to access item 10. A program can assign new values to an indi- vidual element in a list. In the case below, the first spot at location zero (not one) is assigned the number 22. >>> x[0]=22 >>> print (x) [22, 2] Also, a program can create a “tuple”. This data type works just like a list, but with two exceptions. First, it is created with parenthesis rather than square brackets. Second, it is not possible to change the tuple once created. See below: >>> x=(1,2) >>> print (x) (1, 2)
- 115. >>> print (x[0]) 1 >>> x[0]=22 Traceback (most recent call last): File "<pyshell#18>", line 1, in <module> x[0]=22 TypeError: ’tuple’ object does not support >>> As can be seen from the output of the code above, the assignment that could be done with the list was not able to be done with the tuple. An array is a list of objects. It a type of data structure that is very important in computer science. The “list” data type in Python is very similar to an array data structure. For items stored in lists, it is possible to it- erate through each item. For example: my_list =[101 ,20 ,10 ,50 ,60] for item in my_list : print ( item ) Programs can store strings in lists:
- 116. my_list =[ " Spoon " , " Fork " , " Knife " ] for item in my_list : print ( item ) Lists can even contain other lists. my_list =[ [2 ,3] , [4 ,3] , [6 ,7] ] for item in my_list : print ( item ) To add to a list, it is necessary to create a blank list and then use the append function. Listing 6.1: Creating a list of numbers from user input 1 my_list =[] # Empty list 2 for i in range (5) : 3 userInput = int ( input ( " Enter an integer : " ) ) 4 my_list . append ( userInput ) 5 6 print ( " You entered these values : " , my_list ) Creating a running total of an array is a common operation. Here’s how it is done:
- 117. Listing 6.2: Summing the values in a list # Copy of the array to sum myArray = [5 ,76 ,8 ,5 ,3 ,3 ,56 ,5 ,23] # Initial sum should be zero arrayTotal = 0 # Loop from 0 up to the number of elements # in the array : for i in range ( len ( myArray ) ) : # Add element 0 , next 1 , then 2 , etc . sum += myArray [ i ] # Print the result print ( sum ) Numbers in an array can also be changed by using a for loop: Listing 6.3: Doubling all the numbers in a list # Copy of the array to modify myArray = [5 ,76 ,8 ,5 ,3 ,3 ,56 ,5 ,23]
- 118. 4 # Loop from 0 up to the number of elements 5 # in the array : 6 for i in range ( len ( myArray ) ) : 7 # Modify the element by doubling it 8 myArray [ i ] = myArray [ i ] * 2 9 10 # Print the result 11 print ( myArray ) 6.3 Slicing strings Lists are also strings. Run the following code with both versions of x: Listing 6.4: Accessing a string as a list 1 x = " This is a sample string " 2 # x ="0123456789" 3 4 print ( " x = " ,x ) 5 6 # Accessing a single character 7 print ( " x [0]= " ,x [0])
- 119. print ( " x [1]= " ,x [1]) # Accessing from the right side print ( " x [ -1]= " ,x [ -1]) # Access 0 -5 print ( " x [:6]= " ,x [:6]) # Access 6 print ( " x [6:]= " ,x [6:]) # Access 6 -8 print ( " x [6:9]= " ,x [6:9]) Strings in Python be used with some of the mathematical operators. Try the following code and see what Python does: Listing 6.5: Adding and multiplying strings a = " Hi " b = " There " c="!" print ( a + b ) print ( a + b + c ) print (3* a ) print ( a *3) print (( a *2) +( b *2) )
- 120. It is possible to get a length of a string. It is also possible to do this with any type of array. Listing 6.6: Getting the length of a string or list 1 a = " Hi There " 2 b =[3 ,4 ,5 ,6 ,76 ,4 ,3 ,3] 3 print ( len ( a ) ) 4 print ( len ( a + b ) ) Since a string is an array, a program can iterate through each character element just like an array: for character in b : print ( character ) Start, have students finish: months = " JanFebMarAprMayJunJulAugSepOctNovDec " n = int ( input ( " Enter a month number : " ) ) pos =( n -1) *3
- 121. monthAbv = months [ pos : pos +3] print ( monthAbv ) 6.4 Secret Codes This code prints out every letter of a string in- dividually: plain = " This is a test . ABC abc " for c in plain : print (c , end = " " ) This next set of code converts each of the letters in the prior example to its ordinal value. The numbers follow the ASCII chart. For more information about ASCII see: http://en.wikipedia.org/wiki/ASCII plain = " This is a test . ABC abc " for c in plain :
- 122. print ( ord ( c ) , end = " " ) This next program takes each ASCII value and adds one to it. Then it prints the new ASCII value. Then converts the value back to a letter. plain = " This is a test . ABC abc " for c in plain : x = ord ( c ) x = x +1 c2 = chr ( x ) print ( c2 , end = " " ) The next code listing takes each ASCII value and adds one to it. Then converts the value back to a letter. plain = " This is a test . ABC abc " result = " " for c in plain : x = ord ( c ) x = x +1 c2 = chr ( x ) result = result + c2
- 123. print ( result ) Finally, the last code takes each ASCII value and subtracts one from it. Then converts the value back to a letter. By feeding this program the output of the previous program, it serves as a decoder for text encoded by the prior example. plain = " Uijt ! jt ! b ! uftu /! BCD ! bcd " result = " " for c in plain : x = ord ( c ) x =x -1 c2 = chr ( x ) result = result + c2 print ( result ) 6.5 Associative arrays TODO: Brief introduction to associative arrays.
- 124. 6.6 Review 1. List the 4 types of data we’ve covered, and give an example of each: 2. What does this code print out? my_list =[5 ,2 ,6 ,8 ,101] for my_item in my_list : print ( my_item ) 3. What does this code print out? for i in range (5) : print ( i ) 4. What does this code print out? word = " Simpson " for letter in word : print ( letter ) 5. What does this code print out? my_text = " The quick brown fox jumped over the lazy dogs . "
- 125. print ( " The 3 rd spot is : " + my_text [3]) print ( " The -1 spot is : " + my_text [ -1]) 6. What does the following program print out? s = " 0123456789 " print ( s [1]) print ( s [:3]) print ( s [3:]) 7. Write code that will take a string from the user. Print the length of the string. Print first letter of the string. 8. Write a Python program that asks the user for the radius of a circle and prints the area. (a = πr2 ) 9. Write a “for” loop that will print “I will not chew gum in class” one hundred times.
- 126. 10. Write a for loop that prints the numbers 1 to 5: 11. Write a for loop that prints all even num- bers from 2 to 1000: 12. Explain each of the parameters in the func- tion call below: pygame . draw . line ( screen , green ,[0 ,0] ,[100 ,100] ,5) 13. What does this line of code do? Where should it be placed? pygame . display . flip () 14. Give an example of a “comment” in code: 15. What does this program print? x = " 34 " print ( x +1)
- 127. 16. Write a program that takes a number from the user, and prints if it is positive, nega- tive, or zero.
- 129. Chapter 7 Random Numbers 7.1 The randrange function Random numbers are heavily used in Computer Science for programs that involve games or sim- ulations. By default, Python does not know how to make random numbers. It is necessary to have Python import a code library that can create
- 130. random numbers. So to use random numbers, the first thing that should appear at the top of the program is an import statement: import random After this, random numbers can be created with the randrange funtion. For example, this code creates random numbers from 0 to 49. By default the lower bound is 0. Listing 7.1: Random number from 0 to 49 my_number = random . randrange (50) This code generates random numbers from 100 to 200. The second parameter specifies an upper-bound that is not inclusive. (If you want random numbers up to and including 200, then specify 201.) Listing 7.2: Random number from 100 to 200 my_number = random . randrange (100 ,201) If a program needs to select a random item from a list, that is easy:
- 131. Listing 7.3: Picking a random item out of a list my_list =[ " rock " ," paper " ," scissors " ] random_index = random . randrange (3) print ( my_list [ random_index ]) 7.2 The random function All of the prior code generates integer numbers. If a floating point number is desired, a program- mer may use the random function. The code below generates a random number from 0 to 1 such as 0.4355991106620656. Listing 7.4: Random floating point number from 0 to 1 my_number = random . random () With some simple math, this number can be adjusted. For example, the code below gener- ates a random floating point number between 10 and 15:
- 132. Listing 7.5: Random floating point number between 10 and 15 my_number = random . random () *5+10
- 133. Chapter 8 Introduction to Animation 8.1 The bouncing rectangle To start working with animation, start with the a base pygame program that opens up a blank screen. Source for pygame base template.py can be found here:
- 134. http://cs.simpson.edu/?q=python_pygame_exam Code that is copy/pasted from this site will generate indentation errors if it is run. The best way to get the blank template file is to download the zip file on the page and then pull out the source code. The first step in animation is to get an ob- ject to animate. A simple rectangle will suffice. This code should be placed after clearing the screen, and before flipping it. pygame . draw . rect ( screen , white ,[50 ,50 ,50 ,50]) This code will draw the rectangle each time through the loop at exactly (50,50). Until this number changes, the square will not move. The way to have a value that changes is to use a variable. The code below is a first step towards that: rect_x = 50 pygame . draw . rect ( screen , white ,[ rect_x ,50 ,50 ,50])
- 135. To move the rectangle to the right, x can be increased by one each frame. This code is close, but it does quite do it: rect_x = 50 pygame . draw . rect ( screen , white ,[ rect_x ,50 ,50 ,50]) rect_x += 1 The problem with the above code is that rect x is reset back to 50 each time through the loop. To fix this problem, move the initial- ization of rect x to 50 up outside of the loop. This next section of code will successfully slide the rectangle to the right. # Starting position of the rectangle rect_x = 50 # -------- Main Program Loop ----------- while done == False : for event in pygame . event . get () : # User did something if event . type == pygame . QUIT : # If user clicked close
- 136. done = True # Flag that we are done so we exit this loop # Set the screen background screen . fill ( black ) pygame . draw . rect ( screen , white ,[ rect_x ,50 ,50 ,50]) rect_x += 1 To move the box faster, increase the amount rect x is increased by: rect_x += 5 Having both the x and y position increase causes the square to move down and to the right: # Starting position of the rectangle rect_x = 50 rect_y = 50 # -------- Main Program Loop ----------- while done == False : for event in pygame . event . get () :
- 137. if event . type == pygame . QUIT : done = True # Set the screen background screen . fill ( black ) # Draw the rectangle pygame . draw . rect ( screen , white ,[ rect_x , rect_y ,50 ,50]) # Move the rectangle starting point rect_x += 5 rect_y += 5 The direction and speed of the boxes move- ment can be stored in a vector. This makes it easy for the direction and speed of a moving ob- ject to be changed. The next bit of code shows using variables to store the x and y change of (5, 5). # Speed and direction of rectangle rect_change_x = 5 rect_change_y = 5 # -------- Main Program Loop
- 138. ----------- while done == False : for event in pygame . event . get () : # User did something if event . type == pygame . QUIT : # If user clicked close done = True # Flag that we are done so we exit this loop # Set the screen background screen . fill ( black ) # Draw the rectangle pygame . draw . rect ( screen , white ,[ rect_x , rect_y ,50 ,50]) # Move the rectangle starting point rect_x += rect_change_x rect_y += rect_change_y Once the box hits the edge of the screen it will keep going. Nothing makes the rectan- gle bounce off the edge of the screen. To re- verse the direction so the ball travels towards the right, rect change y needs to change from
- 139. 5 to -5 once the ball gets to the bottom side of the screen. The ball is at the bottom when rect y is greater than the height of the screen. The code below can do the check and reverse the direction: # Bounce the ball if needed if rect_y > 450: rect_change_y = rect_change_y * -1 Why check rect y against 450? If the screen is 500 pixels high, then checking against 500 be a logical first guess. But the rectangle is drawn starting from the upper left of the rectangle.So the rectangle would slide completely off-screen before bouncing. Taking into account that the rectangle is 50 pixels high, 500 − 50 = 450. The code below will bounce the rectangle off all four sides of a 700x400 window: # Bounce the ball if needed if rect_y > 450 or rect_y < 0: rect_change_y = rect_change_y * -1 if rect_x > 650 or rect_x < 0: rect_change_x = rect_change_x * -1
- 140. Several drawing commands can be used to animate more complex shapes. The code below draws a red rectangle inside the white rectan- gle. The red rectangle is offset 10 pixels in the x,y directions from the upper left corner of the white rectangle. It also is 20 pixels smaller in both dimensions, resulting in 10 pixes of white surrounding the red rectangle. # Draw a red rectangle inside the white one pygame . draw . rect ( screen , red ,[ rect_x +10 , rect_y +10 ,30 ,30]) 8.2 Animating Snow 8.2.1 Code explanation To start working with chapter, start with the a base pygame program that opens up a blank screen. Source for pygame base template.py can be found here:
- 141. http://cs.simpson.edu/?q=python_pygame_exampl It is possible to create stars, snow, or rain by using random numbers. The simplist way to try start is to use a for loop to draw circles in random x,y positions. Try the following code inside of the main while loop. for i in range (50) : x = random . randrange (0 ,400) y = random . randrange (0 ,400) pygame . draw . circle ( screen , white ,[ x , y ] ,2) Running the program demonstrates a prob- lem. Each time through the loop, we draw the stars in new random locations. The program draws stars in new locations 20 times per sec- ond! To keep the stars in the same location, it is necessary to keep a list of where they are. The program can use a python list to do this. This should be done before the main loop, otherwise the program will add 50 new stars to the list every 1/20th of a second.
- 142. for i in range (50) : x = random . randrange (0 ,400) y = random . randrange (0 ,400) star_list . append ([ x , y ]) Once the star locations have been added, they can be accessed like a normal list. The following code would print the x and y coordi- nates of the first location: print ( star_list [0] ) This would print the y value of the first lo- cation because a coordinate is a list, and the y value is in the second location: print ( star_list [0][1] ) Inside of the main while loop, a program may use a for loop to draw each of the items in the star list. Remember, len(star list) will return the number of elements in the star list. # Process each star in the list for i in range ( len ( star_list ) ) : # Draw the star
- 143. pygame . draw . circle ( screen , white , star_list [ i ] ,2) If the program is to have all the objects in the array move down, like snow, then adding the following line in the for loop created above will cause the y coordinate to increase: # Move the star down one pixel star_list [ i ][1]+=1 This moves the snow downwards, but once off the screen nothing new appears. By adding the code below, the snow will reset to the top of the screen in a random location: # If the star has moved off the bottom of the screen if star_list [ i ][1] > 400: # Reset it just above the top y = random . randrange ( -50 , -10) star_list [ i ][1]= y # Give it a new x position x = random . randrange (0 ,400) star_list [ i ][0]= x
- 144. 8.2.2 Full listing Listing 8.1: Animating Snow 1 # Sample Python / Pygame Programs 2 # Simpson College Computer Science 3 # http :// cs . simpson . edu 4 5 # Import a library of functions called ’ pygame ’ 6 import pygame 7 import random 8 9 # Initialize the game engine 10 pygame . init () 11 12 black = [ 0 , 0 , 0] 13 white = [255 ,255 ,255] 14 15 # Set the height and width of the screen 16 size =[400 ,400] 17 screen = pygame . display . set_mode ( size ) 18 pygame . display . set_caption ( " Snow Animation " ) 19
- 145. # Create an empty array star_list =[] # Loop 50 times and add a star in a random x , y position for i in range (50) : x = random . randrange (0 ,400) y = random . randrange (0 ,400) star_list . append ([ x , y ]) clock = pygame . time . Clock () # Loop until the user clicks the close button . done = False while done == False : for event in pygame . event . get () : # User did something if event . type == pygame . QUIT : # If user clicked close done = True # Flag that we are done so we exit this loop # Set the screen background
- 146. 40 screen . fill ( black ) 41 42 # Process each star in the list 43 for i in range ( len ( star_list ) ) : 44 # Draw the star 45 pygame . draw . circle ( screen , white , star_list [ i ] ,2) 46 47 # Move the star down one pixel 48 star_list [ i ][1]+=1 49 50 # If the star has moved off the bottom of the screen 51 if star_list [ i ][1] > 400: 52 # Reset it just above the top 53 y = random . randrange ( -50 , -10) 54 star_list [ i ][1]= y 55 # Give it a new x position 56 x = random . randrange (0 ,400) 57 star_list [ i ][0]= x 58 59 # Go ahead and update the screen with what we ’ ve drawn . 60 pygame . display . flip () 61 clock . tick (20) 62
- 147. # Be IDLE friendly . If you forget this line , the program will ’ hang ’ # on exit . pygame . quit () 8.3 3D Animation Extending from a 2D environment into a 3D environment complete with game physics isn’t as hard as it would seem. While it is beyond the scope of this class, it is worth-while to see how it is done. There is a freely available 3D program called Blender which has a “game engine” that al- lows programmers to create 3D games. The 3D objects in the game can have Python code at- tached to them that control their actions in the game. Look at the Figure 8.1. This shows a green tray with several objects in it. The blue object is controlled by a Python script that moves it around the tray bumping into the other objects.
- 148. Figure 8.1: Example Blender File The script, shown below, has many of the same features that the 2D programs have. There is a main loop, there is a list for x,y locations, and there are variables controlling the vector. The main program loop is controlled by Blend The python code shown in the listing is called each time through the program loop automat- ically. This is why the Python code does not show a main program loop. It does exist how- ever. The blue object has a location held in x,y,z format. It can be accessed and changed by us-
- 149. ing the blueobject.position variable. Array location [0] holds x, [1] holds y, and [2] holds the z location. Rather than the change x and change y vari- ables used in the 2D examples in this changer, this Blender example uses blueObject["x change" and blueObject["x change"]. The if statements check to see if the blue object has reached the borders of the screen and the direction needs to reverse. Unlike pixels used in the 2D games, locations of objects may be floating point. To position an item between 5 and 6, setting its location to 5.5 is permissable. Extending this to allow interaction with a joystick is easy and will by shown later in the book. Listing 8.2: Example Blender Python Pro- gram import bge # Get a reference to the blue object
- 150. 4 cont = bge . logic . g e t C u r r e n t C o n t r o l l e r () 5 blueObject = cont . owner 6 7 # Print the x , y coordinates where the blue object is 8 print ( blueObject . position [0] , blueObject . position [1] ) 9 10 # Change x , y coordinates according to x_change and 11 # y_change . x_change and y_change are game properties 12 # associated with the blue object . 13 blueObject . position [0]+= blueObject [ " x_change " ] 14 blueObject . position [1]+= blueObject [ " y_change " ] 15 16 # Check to see of the object has gone to the edge . 17 # If so reverse direction . Do so with all 4 edges . 18 if blueObject . position [0] > 6 and blueObject [ " x_change " ] > 0: 19 blueObject [ " x_change " ] *= -1
- 151. if blueObject . position [0] < -6 and blueObject [ " x_change " ] < 0: blueObject [ " x_change " ] *= -1 if blueObject . position [1] > 6 and blueObject [ " y_change " ] > 0: blueObject [ " y_change " ] *= -1 if blueObject . position [1] < -6 and blueObject [ " y_change " ] < 0: blueObject [ " y_change " ] *= -1 Blender may be downloaded from: http://www.blender.org/ Video of the examples and source files may be downloaded from: http://cs.simpson.edu/?q=blender_game_engine
- 153. Chapter 9 Functions 9.1 Introduction to functions Functions are used in computer languages for two primary reasons. First, they make code eas- ier to read and understand. Second, they allow code to be used more than once. Imagine a set of code that might control a toy car. In fact, exactly such a toy was the
- 154. author’s introduction to programming back in 1979: http://en.wikipedia.org/wiki/Big_Trak Suppose the programmer wishes to make the car move forwards. To do this, the programmer might execute the following commands: turnOnMotor () pauseOneSecond () turnOffMotor () The code is not that easy to understand. By defining a function, the program can improve readability and reuse code multiple times. A function definition in Python looks like this: def moveForward () : turnOnMotor () pauseOneSecond () turnOffMotor () This code by itself does nothing. Running it will not cause the car move forward. It does tell the computer how to do this. So after defining the jump function, a program only needs to do the following to make the car go:
- 155. moveForward () With a whole library of functions defining what the car can do, a final program might look like: moveForward () turnLeft () moveForward () moveForward () turnRight () moveForward () Functions can also take parameters. These can be used to increase the flexibility of a func- tion by altering what it does based on parame- ters passed to it. For example, a function called jump() may cause a robot to jump. But the function could be changed to take a parameter that specifies how high the robot should jump. For example jump(3) would jump three inches and jump(6) would jump six inches. Adjusting the function for the robot might look like:
- 156. def moveForward ( time ) : turnOnMotor () for i in range ( time ) : pauseOneSecond () turnOffMotor () An example of such a function that could be run without a robot car would be: Listing 9.1: Function that prints the volume of a sphere 1 def volumeSphere ( radius ) : 2 pi =3.141592653589 3 volume =4* pi * radius **2 4 print ( " The volume is " , volume ) In the function above, the programmer called the function volumeSphere. The data going into the functions will be stored in a new variable called radius. The resulting volume is printed to the screen. To call this function, follow it with: volumeSphere (22)
- 157. Multiple parameters can be passed in, sepa- rated by a comma: Listing 9.2: Function that prints the volume of a cylinder def volumeCylinder ( radius , height ) : pi =3.141592653589 volume =2* pi * r *( r + h ) print ( " The volume is " , volume ) That function may be called by: volumeCylinder (12 ,3) These functions have limited use however. What if a person wanted to use the volume- Cylinder function to calculate the volume in a six-pack, it wouldn’t work. It only prints out the volume. It is not possible to use that result in and equation and multiply it by six. This can be solved by using a return state- ment. For example: Listing 9.3: Function that returns the volume of a cylinder
- 158. 1 def volumeCylinder ( radius , height ) : 2 pi =3.141592653589 3 volume =2* pi * r *( r + h ) 4 return volume This could be used in later code like the fol- lowing: sixPackVolume = volumeCylinder (2.5 ,5) * 6 There is a big difference between a function that prints a value and a function that returns a value. Look at the code below and try it out. # Function that prints the result def sum1 (a , b ) : result = a + b print ( result ) # Function that returns the results def sum2 (a , b ) : result = a + b return ( result ) # This prints the sum of 4+4 sum1 (4 ,4)
- 159. # This does not sum2 (4 ,4) # This will not set x1 to the sum x1 = sum1 (4 ,4) # This will x2 = sum2 (4 ,4) 9.2 Variable scope The use of functions introduces the concept of scope. Scope is where in the code a variable is “alive” and can be accessed. For example, look at the code below: # Define a simple function that sets # x equal to 22 def f () : x =22 # Call the function f ()
- 160. # This fails , x only exists in f () print ( x ) The last line will generate an error because x only exists inside of the f() function. The variable is created when f() is called and the memory it uses is freed as soon as f() finishes. A more confusing rule is accessing variables created outside of the f() function. In the fol- lowing code, x is created before the f() func- tion, and thus can be read from inside the f() function. # Create the x variable and set to 44 x =44 # Define a simple function that prints x def f () : print ( x ) # Call the function f ()
- 161. Variables created ahead of a function may be read inside of the function only if the function does not change the value. This code, very sim- ilar to the code above, will fail. The computer will claim it doesn’t know what x is. # Create the x variable and set to 44 x =44 # Define a simple function that prints x def f () : x += 1 print ( x ) # Call the function f () Other languages have more complex rules around the creation of variables and scope than Python does. Because Python is straight-forward it is a good introductory language.
- 162. 9.3 Pass-by-copy Functions pass their values by creating a copy of the original. For example: # Define a simple function that prints x def f ( x ) : x += 1 print ( x ) # Set y y =10 # Call the function f () # Print y to see if it changed print ( y ) The value of y does not change, even though the f() function increases the value passed to it. Each of the variables listed as a parameter in a function is a brand new variable. The value of that variable is copied from where it is called. This is reasonably straight forward in the prior example. Where it gets confusing is if both
- 163. the code that calls the function and the function itself have variables named the same. The code below is identical to the prior listing, but rather than use y it uses x. # Define a simple function that prints x def f ( x ) : x += 1 print ( x ) # Set x x =10 # Call the function f () # Print y to see if it changed print ( x ) The output is the same as the program that uses y. Even though both the function and the surrounding code use x for a variable name, there are actually two different variables. There is the variable x that exists inside of the func- tion, and a different variable x that exists out- side the function.
- 164. 9.4 Functions calling func- tions It is entirely possible for a function to call an- other function. For example, say the functions like the following were defined: def armOut ( whichArm , palmUpOrDown ) : # code would go here def handGrab ( what ) : # code goes here Then another function could be created that calls the other functions: def macarena () : armOut ( " right " ," down " ) armOut ( " left " ," down " ) armOut ( " right " ," up " ) armOut ( " left " ," up " ) handGrab ( " right " ," left arm " ) handGrab ( " left " ," right arm " ) # etc
- 165. 9.5 Review 9.5.1 Predicting output Predict what each block of code will print out: • Block 1 for i in range (5) : print ( i +1) • Block 2 for i in range (5) : print ( i ) i = i +1 • Block 3 x =0 for i in range (5) : x +=1 print ( x ) • Block 4
- 166. x =0 for i in range (5) : for j in range (5) : x +=1 print ( x ) • Block 5 for i in range (5) : for j in range (5) : print (i , j ) • Block 6 for i in range (5) : for j in range (5) : print ( " * " , end = " " ) print () • Block 7 for i in range (5) : for j in range (5) : print ( " * " , end = " " ) print ()
- 167. • Block 8 for i in range (5) : for j in range (5) : print ( " * " , end = " " ) print () • Block 9 # What is the mistake here ? array =[5 ,8 ,10 ,4 ,5] i =0 for i in array : i = i + array [ i ] print ( array ) • Block 10 for i in range (5) : x =0 for j in range (5) : x +=1 print ( x ) • Block 11
- 168. import random play_again = " y " while play_again == " y " : for i in range (5) : print ( random . randrange (2) , end = " " ) print () play_again = input ( " Play again ? ") print ( " Bye ! " ) • Block 12 def f1 ( x ) : print ( x ) y =3 f1 ( y ) • Block 13 def f2 ( x ) : x = x +1 print x y =3 f2 ( y ) print ( y )
- 169. • Block 14 def f3 ( x ) : x = x +1 print ( x ) x =3 f3 ( x ) print ( x ) • Block 15 def f4 ( x ) : z = x +1 print ( z ) x =3 f4 ( x ) print ( z ) • Block 16 def foo ( x ) : x = x +1 print ( " x = " ,x ) x =10 print ( " x = " ,x )
- 170. foo ( x ) print ( " x = " ,x ) • Block 17 def f () : print ( " f start " ) g () h () print ( " f end " ) def g () : print ( " g start " ) h () print ( " g end " ) def h () : print ( " h " ) f () • Block 18 def foo () : x =3 print ( " foo has been called " )
- 171. x =10 print ( " x = " ,x ) foo () print ( " x = " ,x ) • Block 19 def a ( x ) : print ( " a " ,x ) x = x +1 print ( " a " ,x ) x =1 print ( " main " ,x ) a(x) print ( " main " ,x ) def b ( y ) : print ( " b " ,y [1]) y [1]= y [1]+1 print ( " b " ,y [1]) y =[123 ,5] print ( " main " ,y [1]) b(y)
- 172. print ( " main " ,y [1]) def c ( y ) : print ( " c " ,y [1]) y =[101 ,102] print ( " c " ,y [1]) y =[123 ,5] print ( " main " ,y [1]) c(y) print ( " main " ,y [1]) 9.5.2 Correcting code 1. Correct the following code: def sum (a ,b , c ) : print ( a + b + c ) print ( sum (10 ,11 ,12) ) 2. Correct the following code: def increase ( x ) : return x +1
- 173. x =10 print ( " X is " ,x , " I will now increase x . " ) increase ( x ) print ( " X is now " ,x ) 3. Correct the following code: def print_hello : print ( " Hello " ) print_hello () 4. Correct the following code: def count_to_ten () : for i in range [10]: print ( i ) count_to_ten () 5. Correct the following code: def sum_list ( list ) : for i in list :
- 174. sum = i return sum list =[45 ,2 ,10 , -5 ,100] print ( sum_list ( list ) ) 6. Correct the following code: def reverse ( text ) : result = " " text_length = len ( text ) for i in range ( text_length ) : result = result + text [ i * -1] return result text = " Programming is the coolest thing ever . " print ( reverse ( text ) ) 7. Correct the following code: def get_user_choice () : while True : command = input ( " Command : " )
- 175. if command = f or command = m or command = s or command = d or command = q : return command print ( " Hey , that ’s not a command . Here are your options : " ) print ( " f - Full speed ahead " ) print ( " m - Moderate speed " ) print ( " s - Status " ) print ( " d - Drink " ) print ( " q - Quit " ) user_command = get_user_choice () print ( " You entered : " , user_command )
- 176. 9.5.3 Writing code 1. Write a function that prints out “Hello World.” 2. Write code that will call the function in problem 1. 3. Write a function that prints out “Hello Bob”, and will take a parameter to let the caller specify the name. 4. Write code that will call the function in problem 3. 5. Write a function that will take two num- bers as parameters (not as input from the user) and print their product (i.e. multi- ply them). 6. Write code that will call the prior func- tion.
- 177. 7. Write a function that takes a string, phrase, and a number, count. Print phrase, to the screen count times. 8. Write code to call the previous function. 9. Write code for a function that takes in a number, and returns the square of that number. Note, this function should return the answer, not print it out. 10. Write code to call the function above. 11. Write a function that takes three numbers as parameters, and returns the centrifugal force. The formula for centrifugal force is: F = mrω 2 F is force, r is radius, ω is angular veloc- ity. 12. Write code to call the function above. 13. Write a program that takes a list of num- bers as a parameter, and prints out each
- 178. number.
- 179. Chapter 10 Excel Macro Demonstration • We are starting our work life as a peon. Here is our job – We have to import data from the web – We have to chart the data – We’ll have to create 10 of these chart every day, for different data sets.
- 180. – Now just about any job could need to do this. That data could be any- thing. In this case, we’ll use stock data. • Great, our job is boring. Error prone. And takes way too long. Particularly if you want to make the charts look fancy. – But wait, we took professor craven’s programming class. Let’s try that. – Create an excel program that creates new stock charts from internet data • Outline of what we want our program to do – Open a new file – Import data from web – Create chart • Steps to program Excel – Open Excel – Type in first cell ’This spreadsheet has our program’. – Save as ’chart maker’ (Macro work-
- 181. book!) – Click ’view’ tab – Click the down arrow on marcos, then select ’record macro’ – Name the macro CreateChart ∗ Can’t use a space, this is a func- tion name
- 182. – File tab...New...Blank workbook – Data tab...From web (Don’t resize the window, it shows a bug in Excel) – Use yahoo: http://finance.yahoo.com – Select the table we are interested in, and import
- 183. – Select the cells we want to chart (ctrl- shift-left, then ctrl-shift-down, then up one) – Insert tab...Line Chart – Move to new sheet – Right click on chart, ”select data”
- 184. – Only graph adjusted close – Select Layout tab ∗ Set axis labels ∗ Remove legend ∗ Change title – Stop recorder (view tab, macros but- ton, stop recording)
- 185. – Close the new spreadsheet we cre- ated. (Not chart maker) • Try it out – Run chart maker macro – Cool, but what does this have to do with what we studied? – Glad you asked. Rather than play the macro, click edit. – Note first line. ’Sub’ is short for sub- routine. Which is another name for function/method. – Look, Workbooks.Add, a function to add a workbook! Look at the param- eters! Booleans! Objects! – What happens if we change the Ticker? – Cool! What if we could have a vari- able represent the ticker? – Ok, so what if we could make this into a function where we pass in the URL? – And then we can create a new func-
- 186. tion that calls this with a whole batch of ticker symbols Sub CreateCharts () CreateChart ( " XOM " ) CreateChart ( " INTC " ) CreateChart ( " GM " ) End Sub
- 187. Chapter 11 Controllers and Graphics 11.1 Introduction This chapter covers moving a graphics object with a mouse, a keyboard, or a game controller. A program may even combine these and move multiple objects with different keyboard map-
- 188. pings, and the mouse, and multiple game con- trollers. Code for these examples named move - mouse.py, move keyboard.py, and move game - controller.py may be obtained from: http://cs.simpson.edu/?q=python_pygame_exam To begin with, it is necessary to have an object that can be moved around the screen. The best way to do this is to have a function that takes in an x and y coordinate, then draws an object at that location. It is also necessary to pass a reference to the screen that the function should draw the object onto. The following code draws a green rectangle with a black circle in the middle of it. def draw_item ( screen ,x , y ) : pygame . draw . rect ( screen , green ,[0+ x ,0+ y ,30 ,10] ,0) pygame . draw . circle ( screen , black ,[15+ x ,5+ y ] ,7 ,0)
- 189. 11.2 Mouse Moving an object with the mouse is easy. It takes one line of code to get a list with the co- ordinates of the mouse. pos = pygame . mouse . get_pos () The variable pos is a list of two numbers. The x coordinate is in position 0 of array and the y coordinate is in the position 1. These can easily be fetched out and passed to the function that draws the item: Listing 11.1: Controlling an object via the mouse pos = pygame . mouse . get_pos () x = pos [0] y = pos [1] draw_item ( screen ,x , y )
- 190. 11.3 Keyboard Controlling with the keyboard is a bit more complex. The object needs an x and y loca- tion. It also needs a vector with the speed the object moves in the x and y directions. This is just like the bouncing object done before, with the exception that the speed is controlled by the keyboard. To start with, before the main loop the lo- cation and speed vector are set: # Speed in pixels per frame x_speed =0 y_speed =0 # Current position x_coord =10 y_coord =10 Inside the main while loop of the program, the processing of events is modified. In addition to looking for a quit event, the program needs to look for keyboard events. An event is generated
- 191. each time the user presses a key. Another event is generated when the user lets up on a key. When the user presses a key, the speed vector is set to 3 or -3. When the user lets up on a key the speed vector is reset back to zero. Finally, the coordinates of the object are ad- justed by the vector, and then the object is drawn. See the code below: Listing 11.2: Controlling an object via the keyboard for event in pygame . event . get () : if event . type == pygame . QUIT : done = True # User pressed down on a key if event . type == pygame . KEYDOWN : # Figure out if it was an arrow key . If so # adjust speed . if event . key == pygame . K_LEFT : x_speed = -3 if event . key == pygame . K_RIGHT : x_speed =3
- 192. if event . key == pygame . K_UP : y_speed = -3 if event . key == pygame . K_DOWN : y_speed =3 # User let up on a key if event . type == pygame . KEYUP : # If it is an arrow key , reset vector back to zero if event . key == pygame . K_LEFT : x_speed =0 if event . key == pygame . K_RIGHT : x_speed =0 if event . key == pygame . K_UP : y_speed =0 if event . key == pygame . K_DOWN : y_speed =0 # Move the object according to the speed vector . x_coord = x_coord + x_speed y_coord = y_coord + y_speed draw_background ( screen ) # Draw the item where the mouse is .
- 193. draw_item ( screen , x_coord , y_coord ) 11.4 Game Controller Game controllers require even more complex code, but the idea is still simple. A joystick will re- turn two floating point values. If the joystick is perfectly centered it will return (0,0). If the joystick is fully up and to the left it will return (-1,-1). If the joystick is down and to the right it will return (1,1). If the joystick is somewhere in between, values are scaled accordingly. It is necessary to see if the computer has a joystick, and initialize it before use. This should only be done once, ahead of the main program loop: Listing 11.3: Initializing the game controller for use # Current position x_coord =10
- 194. y_coord =10 # Count the joysticks the computer has joystick_count = pygame . joystick . get_count () if joystick_count == 0: # No joysticks ! print ( " Error , I didn ’t find any joysticks . " ) else : # Use joystick #0 and initialize it my_joystick = pygame . joystick . Joystick (0) my_joystick . init () Inside the main program loop, the values of the joystick returns may be multiplied accord- ing to how far an object should move. In the case of the code below, moving the joystick fully in a direction will move it 10 pixels per frame because the joystick values are multiplied by zero. Listing 11.4: Controlling an object via a game controller
- 195. # As long as there is a joystick if joystick_count != 0: # This gets the position of the axis on the game controller # It returns a number between -1.0 and +1.0 horiz_axis_pos = my_joystick . get_axis (0) vert_axis_pos = my_joystick . get_axis (1) # Move x according to the axis . We multiply by 10 to speed up the movement . x_coord = int ( x_coord + horiz_axis_pos *10) y_coord = int ( y_coord + vert_axis_pos *10) draw_background ( screen ) # Draw the item at the proper coordinates draw_item ( screen , x_coord , y_coord )
- 197. Chapter 12 Bitmapped Graphics and Sound 12.1 Introduction This section shows how to write a program that displays a background image loaded from a jpeg
- 198. or similar. It also shows how to load and move an image around the screen and set a transpar- ent background. Games are enriched with the use of sound. This chapter introduces how to play a sound based on when the user clicks the mouse button. Full code for this example named bitmapped - graphics, along with the image files, may be obtained at: http://cs.simpson.edu/?q=python_pygame_exam 12.2 Setting a Background Image Loading an image is a simple process and in- volves only one line of code. There is a lot go- ing on in that line, so the explanation of the line will be broken into three parts. The fol- lowing version of the line will load a file called saturn family1.jpg. This file must be located
- 199. in the same directory that the python program is in, or the computer will not find it. pygame . image . load ( " saturn_family1 . jpg " ) Loading an image does not display it. To be able to use this image later we need to set a variable equal to what the load() command returns. In this case, a new variable named background image is created. See below for version two of the line: background_image = pygame . image . load ( " saturn_family1 . jpg " ) Finally, the image needs to be converted to a format Pygame can more easily work with. To do that, we append .convert() to the com- mand to call the convert function. All images should be loaded using this pattern, changing only the variable name and file name as needed. background_image = pygame . image . load ( " saturn_family1 . jpg " ) . convert ()
- 200. Loading the image should be done before the main program loop. While it would be possible to load it in the main program loop, this would cause the program to fetch the image from the disk 20 or so times per second. This is com- pletely unnecessary. It is only necessary to do it once at program start-up. To display the image, a program uses the blit() command. This “blits” the bits to the screen. This command is called with the im- age, and the upper left coordinate of where the image starts. This command should be done inside the loop so the image gets drawn each frame. See below: screen . blit ( background_image , [0 ,0]) 12.3 Moving an Image To create an image that can move around the screen with the mouse, it is loaded with the
- 201. same type of command as before: player_image = pygame . image . load ( " player . png " ) . convert () Inside the main program loop, the mouse coordinates are retrieved, and passed to as the coordinates to draw the image: # Get the current mouse position . This returns the position # as a list of two numbers . player_position = pygame . mouse . get_pos () x = player_position [0] y = player_position [1] # Copy image to screen : screen . blit ( player_image , [x , y ]) This demonstrates a problem. The image is a red X, with a white background. So when the image is drawn the program shows:
- 202. Only the red X is desired. But images are rectangles and sometimes some other shape is desired. The way to get around this is to tell the program to make one color “transparent” and not display. This can be done immediately after loading. The following makes the color white (assuming white is already defined as a variable) transparent: player_image . set_colorkey ( white ) This will work for most files ending in .gif and .png. This does not work well for most .jpg files. The jpeg image format is great for hold- ing photographs, but it does subtly change the image as part of the algorithm that makes the
- 203. image smaller. This means that not all of the background color will be the same. In the im- age below, the X has been saved as a jpeg. The white around the X is not exactly (255,255,255), but just really close to white. 12.4 Sounds Like images, sounds must be loaded before they are used. This should be done once sometime before the main program loop. The following command loads a sound file and creates a vari- able named click sound to reference it.: click_sound = pygame . mixer . Sound ( " click . wav " )
- 204. This sound can be played when the user hits the mouse button with the following code: for event in pygame . event . get () : if event . type == pygame . QUIT : done = True if event . type == pygame . MOUSEBUTTONDOWN : click_sound . play () Pygame does not play all wav files. If VLC Media Player can’t play it, neither can Pygame. 12.5 Full Listing import pygame # Define some colors white =[255 ,255 ,255] black =[0 ,0 ,0] # Call this function so the Pygame library can initialize itself pygame . init ()
- 205. # Create an 800 x600 sized screen screen = pygame . display . set_mode ([800 , 600]) # This sets the name of the window pygame . display . set_caption ( ’ CMSC 150 is cool ’) # Create a surface we can draw on background = pygame . Surface ( screen . get_size () ) # Fill the screen with a black background background . fill ( black ) clock = pygame . time . Clock () # Before the loop , load the sounds : click_sound = pygame . mixer . Sound ( " click . wav " ) # Set positions of graphics background_position =[0 ,0]
- 206. # Load and set up graphics . background_image = pygame . image . load ( " saturn_family1 . jpg " ) . convert () player_image = pygame . image . load ( " player . png " ) . convert () player_image . set_colorkey ( white ) done = False while done == False : clock . tick (10) for event in pygame . event . get () : if event . type == pygame . QUIT : done = True if event . type == pygame . MOUSEBUTTONDOWN : click_sound . play () # Copy image to screen : screen . blit ( background_image , background_position ) # Get the current mouse position . This returns the position # as a list of two numbers .
- 207. player_position = pygame . mouse . get_pos () x = player_position [0] y = player_position [1] # Copy image to screen : screen . blit ( player_image , [x , y ]) pygame . display . flip () pygame . quit () 12.6 Review What do the following Python programs print? 1. def f () : return 10 x = f () print ( x ) 2. def f ( x ) : x = x +10 return x
- 208. x =10 f(x) print ( x ) 3. def f ( x ) : x = x +10 return x def g ( x ) : return x *2 print ( f ( g (10) ) ) 4. def f ( x ) : x = x +10 return x def g ( x ) : return x *2 print ( g ( f (10) ) ) 5. def f (x , y ) : return x / y
- 209. x =20 y =5 print ( f (y , x ) ) 6. def f ( x ) : return x *2 def g ( x ) : return x -2 def h ( x ) : return x +10 print ( f (5) + g ( f (5) ) + h ( g (10) ) ) print ( h ( g ( f (10) ) ) ) 7. x = len ( [2 ,3 ,[5 ,6] ,[7 ,9]] print ( x ) 8. Write a function that prints “Hello”. 9. Call the function in the prior problem.
- 210. 10. Write a function that takes in a string and counts the number of spaces in it. 11. Write a function that takes in an array and prints each element individually. 12. Write a function that takes in an array and returns the sum.
- 211. Chapter 13 Introduction to Classes 13.1 Defining and Creating Simple Classes If a programmer needs to pass many related pieces of data to a function it can be difficult using just variables. For example, every time
- 212. there is an address it would be tedious to pass the name, street, city, state, and zip to every function that needed it. A better way to do this is to define a data structure that has all of the information put together, and then give the information a name, like Address. This can be easily done in Python and any other modern language by using a class. The code for our example address class looks like the following: 1 class Address () : 2 name = " " 3 line1 = " " 4 line2 = " " 5 city = " " 6 state = " " 7 zip = " " In the code above, Address is the class name. The variables in the class, such as name and city are called attributes or fields. Note the similarities to creating a function definition. The code defines a class but it does
- 213. not actually create an instance of one. The code told the computer what fields an address has, and what the initial default values will be. Unlike functions and variables, class names should begin with an upper case letter. While it is possible to begin a class with a lower case letter it is not considered good practice. Programmers often diagram classes, and the diagram for this class would look like the follow- ing: Address name:String line1:String line2:String city:String state:String zip:String The class name is on top with the name of each attribute listed below it. To the right of each attribute is the data type, such as string or integer. Note that even though the code defined an
- 214. address, no address has been created. Just like with a function, defining a function does not mean it will be called. To create a class and set the fields, look at the example below: 8 # Create an address 9 homeAddress = Address () 10 11 # Set the fields in the address 12 homeAddress . name = " John Smith " 13 homeAddress . line1 = " 701 N . C Street " 14 homeAddress . line2 = " Carver Science Building " 15 homeAddress . city = " Indianola " 16 homeAddress . state = " IA " 17 homeAddress . zip = " 50125 " An instance of the address class is created in line 9. Note that the class name is used, followed by parenthesis. The variable name can be anything that follows normal naming rules. To set the fields in the class, a program must use the dot operator. This operator is the pe- riod that is between the homeAddress and the field. The left side of the assignment appears as
- 215. normal. Lines 12-17 set each field value. A very common mistake when working with classes is to forget to specify the variable. If only one address is created, it is natural to as- sume the computer will know to use that ad- dress when setting the city to “Indianola.” This is not the case however. A second address can be created, and fields from both may be used. Continuing the prior examples, see the code below: # Create another address vacationHomeAddress = Address () # Set the fields in the address vacationHomeAddress . name = " John Smith " vacationHomeAddress . line1 = " 1122 Main Street " vacationHomeAddress . line2 = " " vacationHomeAddress . city = " Panama City Beach " vacationHomeAddress . state = " FL " vacationHomeAddress . zip = " 32407 "
- 216. 29 print ( " The client ’s main home is in " + homeAddress . city ) 30 print ( " His vacation home is in " + vacationHomeAddress . city ) Line 19 creates a second address assigned to a new variable name. Lines 22-27 set the fields in this new class instance. Line 29 prints the city for the home address, because it homeAddres appears before the dot operator. Line 30 prints the vacation address because vacationHomeAddr appears before the dot operator. In the examples above Address is called the class because it defines a new classification for a data object. The variables homeAddress and vacationHomeAddress refer to objects because they refer to actual instances of the class Address A simple definition of an object is that it is an instance of a class. Putting lots of data fields into a class makes it easy to pass data in and out of a function. In the code below, the function takes in an address
- 217. as a parameter and prints it out the the screen. It is not necessary to pass parameters for each field of the address. # Print an address to the screen def printAddress ( address ) : print ( address . name ) # If there is a line1 in the address , print it if ( len ( address . line1 ) > 0 ) : print ( address . line1 ) # If there is a line2 in the address , print it if ( len ( address . line2 ) > 0 ) : print ( address . line2 ) print ( address . city + " , " + address . state + " " + address . zip ) printAddress ( homeAddress ) print () printAddress ( vacationHomeAddress )
- 218. 13.1.1 Review 1. Write code to create an instance of this class and set its attributes: Dog name:String age:int weight:float class Dog () : age =0 name = " " weight =0 2. Write code to create two different instances of this class and set attributes for both ob- jects: class Person () : name = " " cellPhone = " " email = " " 3. For the code below, write a class that has the appropriate class name and attributes
- 219. that will allow the code to work. myBird = Bird () myBird . color = " green " myBird . name = " Sunny " myBird . breed = " Sun Conure " 4. Create a class that would represent a char- acter in a simple 2D game. Include at- tributes for the position, name, and strength. 5. The following code runs, but it is not cor- rect. What did the programmer do wrong? class Person : name = " " money =0 nancy = Person () name = " Nancy " money =100 6. Take a look at the code. It does not run. Can you spot the error?
- 220. class Person : name = " " money =0 bob = Person () print ( bob . name , " has " , money , " dollars . " ) 7. Even with the error fixed, the program will not print out the desired output: Bob has 0 dollars. Why is this the case? 13.2 Methods In addition to attributes, classes may have meth- ods. A method is a function that exists inside of a class. Expanding the earlier example of a Dog class from the review problem 1 above, the code below adds a method for a dog barking. 1 class Dog () : 2 age =0
- 221. name = " " weight =0 def bark ( self ) : print ( " Woof " ) The method definition is contained in lines 6-7 above. Method definitions in a class look almost exactly like function definitions. The big difference is the addition of a parameter self on line 6. The first parameter of any method in a class must be self. This parameter is required even if the function does not use it. Here are the important items to keep in mind when creating methods for classes: • Attributes should be listed first, methods after. • The first parameter of any method must be self. • Method definitions are indented exactly one tab stop. Methods may be called in a manner similar to referencing attributes from an object. See
- 222. the example code below. 9 myDog = Dog () 10 11 myDog . name = " Spot " 12 myDog . weight =20 13 myDog . age =3 14 15 myDog . bark () Line 9 creates the dog. Lines 11-13 set the attributes of the object. Line 14 calls the bark function. Note that even through the bark func- tion has one parameter, self, the call does not pass in anything. This is because the first pa- rameter is assumed to be a reference to the dog object itself. Behind the scenes, Python makes a call that looks like: # Example , not actually legal Dog . bark ( myDog ) If the bark function needs to make reference to any of the attributes, then it does so using the self reference variable. For example, we can change the Dog class so that when the dog
- 223. barks, it also prints out the dog’s name. In the code below, the name attribute is accessed using a dot operator and the self reference. def bark ( self ) : print ( " Woof says " , self . name ) Attributes are adjectives, and methods are verbs. The drawing for the class would look like the following: Dog name:String age:int weight:float bark():void 13.2.1 Example: Ball class This is example code that could be used in Python/ to draw a ball. Having all the parameters con- tained in the class makes data management eas- ier.
- 224. Ball x:int y:int change_x:int change_y:int size:int color:[int,int,int] move():void draw(screen):void 1 class Ball () : 2 # --- Class Attributes --- 3 # Ball position 4 x =0 5 y =0 6 7 # Ball ’s vector 8 change_x =0 9 change_y =0 10 11 # Ball size 12 size =10 13 14 # Ball color 15 color =[255 ,255 ,255] 16
- 225. # --- Class Methods --- def move ( self ) : x += change_x y += change_y def draw ( self , screen ) : pygame . draw . circle ( screen , self . color , [ self .x , self . y ] , self . size ) Below is the code that would go ahead of the main program loop to create a ball and set its attributes: theBall = Ball () theBall . x = 100 theBall . y = 100 theBall . change_x = 2 theBall . change_y = 1 theBall . color = [255 ,0 ,0] This code would go inside the main loop to move and draw the ball: theBall . move () theBall . draw ( screen )
- 226. 13.3 References Take a look at the following code: 1 class Person : 2 name = " " 3 money =0 4 5 bob = Person () 6 bob . name = " Bob " 7 bob . money =100 A common misconception when working with objects is to assume that the variable bob is the Person object. This is not the case. The vari- able bob is a reference to the Person object. This can be shown by completing our example code and running it: 9 nancy = bob 10 nancy . name = " Nancy " 11 12 print ( bob . name , " has " , bob . money , " dollars . " ) 13 print ( nancy . name , " has " , nancy . money , " dollars . " )
- 227. If bob actually was the object, then line 9 could create a copy of the object and there would be two objects in existance. The out- put of the program would show both Bob and Nancy having 100 dollars. But when run, the program outputs the following instead: Nancy has 100 dollars. Nancy has 100 dollars. What bob stores is a reference to the object. bob nancy Besides reference, one may 0x1e504 0x1e504 call this address, pointer, or handle. A reference 0x1e504 Nancy is an address in computer 100 memory for where the ob- ject is stored. This address is a hexidecimal number which, if printed out, might look some- thing like 0x1e504. When line 9 is run the ad- dress is copied rather than the entire object the address points to.
- 228. 13.3.1 Functions and References The code below is similar to other examples shown before. The code one line 1 creates a function that takes in a number. The variable money is a copy of what was passed in. Adding 100 to that number does not change the number that was stored in bob.money on line 10. Thus, the print statement on line 13 prints out 100, and not 200. 1 def giveMoney1 ( money ) : 2 money += 100 3 4 class Person : 5 name = " " 6 money =0 7 8 bob = Person () 9 bob . name = " Bob " 10 bob . money =100 11 12 giveMoney1 ( bob . money ) 13 print ( bob . money )
- 229. Look at the additional code below. This code does cause bob.money to increase and the print statement to print 200. def giveMoney2 ( person ) : person . money += 100 giveMoney2 ( bob ) print ( bob . money ) Why is this? Because person contains a memory address of the object, not the actual object itself. One can think of it as a bank ac- count number. The function has a copy of the bank account number, not a copy of the whole bank account. So using the copy of the bank account number to deposit 100 dollars causes Bob’s bank account balance to go up. Arrays work the same way. A function that takes in an array (list) as a parameter and mod- ifies values in that array will be modifying the same array that the calling code created. The address of the array is copied, not the entire array.
- 230. 13.3.2 Review 1. Create a class called Cat. Give it attributes for name, color, and weight. Give it a method called meow. 2. Create an instance of the cat class, set the attributes, and call the meow method. 3. Create a class called Monster. Give it an attribute for name and an integer at- tribute for health. Create a method called decreaseHealth that takes in a param- eter amount and decreases the health by that much. Inside that method, print that the animal died if health goes below zero. 13.4 Constructors Python classes have a special function that is called any time an instance of that class is cre- ated. For example, in the code below there is
- 231. a class Dog, followed by code that creates an instance of that class: class Dog () name = " " myDog = Dog () By adding a function called a constructor, a programmer can add code that is automatically run each time an instance of the class is created. See the example constructor code below: class Dog () : name = " " # Constructor # Called when creating an object of this type def __init__ ( self ) : print ( " A new dog is born ! " ) # This creates the dog myDog = Dog () The constructor starts on line 6. It must be named init . It must take in self as
- 232. the first parameter. Optionally the constructor may have more parameters. When the program is run, it will print: A new dog is born! When a Dog object is created on line 10, the - init function is automatically called and the message is printed to the screen. A constructor can be used for initializing and setting data for the object. For example, in the example code the name attribute is left blank after the creation of the dog object. What if a programmer wishes to keep an object from being left with a default value? Some objects need to have values right when they are created. The constructor function can be used to make this happen. See the code below: 1 class Dog () : 2 name = " " 3 4 # Constructor 5 # Called when creating an object of this type
- 233. def __init__ ( self , newName ) : self . name = newName # This creates the dog myDog = Dog ( " Spot " ) # Print the name to verify it was set print ( myDog . name ) # This line will give an error because # a name is not passed in . herDog = Dog () On line 6 the program has an additional pa- rameter named newName. The value of this pa- rameter is used to set the name attribute in the Dog class. A common mistake is to name the param- eter of the init function the same as the attribute and assume that the values will auto- matically synchronize. This does not happen. class Dog () : name = " Rover "
- 234. 4 # Constructor 5 # Called when creating an object of this type 6 def __init__ ( self , name ) : 7 # This will print " Rover " 8 print ( self . name ) 9 # This will print " Spot " 10 print ( name ) 11 12 # This creates the dog 13 myDog = Dog ( " Spot " ) In the prior example, there are two differ- ent variables that are printed out. The vari- able name was created as a method parameter on line 6. That method variable goes away as soon as the method is done. While it shares the same name as the name attribute (also known as instance variable), it is a completely different variable. The variable self.name refers to the name attribute of this particular instance of the Dog class. It will exist as long as this instance of the Dog class does.
- 235. 13.4.1 Review 1. Should class names begin with an upper or lower case letter? 2. Should method names begin with an up- per or lower case letter? 3. Should attribute names begin with an up- per or lower case letter? 4. Which should be listed first in a class, at- tributes or methods? 5. What are other names for a reference? 6. What is another name for instance vari- able? 7. What is the name for an instance of a class? 8. Create a class called Star that will print out “A star is born!” every time it is cre- ated.
- 236. 9. Create a class called Monster with attribut for health and a name. Add a construc- tor to the class that sets the health and name of the object with data passed in as parameters. 13.5 Inheritance Another powerful feature of using classes and objects is the ability to make use of inheritance. It is possible to create a class and inherite all of the attributes and methods of a parent class. For example, a program may create a class called Person which has all the attributes needed for a person. The program might then create child classes that inherit these fields. The child classes may then add fields and methods that corre- spond to their needs. A parent class should be a more general, ab- stract version of the child class. For example, a parent class could be Animal, with a child class
- 237. of Dog, and that could have a child class of Poo- dle. This type of child to parent relationship is called an is a relationship. For example, a dol- phin is a mammal. It does not work the other way, a mammal is not necessarily a dolphin. So the class Dolphin should never be a parent to a class Mammal. Likewise a class Table should not be a parent to a class Chair because a chair is not a table. Person name:String Employee Customer job_title:String email:String class Person () : name = " " class Employee ( Person ) : job_title = " "
- 238. 7 class Customer ( Person ) : 8 email = " " 9 10 johnSmith = Person () 11 johnSmith . name = " John Smith " 12 13 janeEmployee = Employee () 14 janeEmployee . name = " Jane Employee " 15 janeEmployee . job_title = " Web Developer " 16 17 bobCustomer = Customer () 18 bobCustomer . name = " Bob Customer " 19 bobCustomer . email = " send_me@spam . com " By placing Person between the parenthesis on lines 4 and 7, the programmer has told the computer that Person is a parent class to both Employee and Customer. This allows the pro- gram to set the name attribute on lines 14 and 18. Methods are also inherited. The code below will print out “Person created” three times be- cause the employee and customer classes inherit
- 239. the constructor from the parent class: class Person () : name = " " def __init__ ( self ) : print ( " Person created " ) class Employee ( Person ) : job_title = " " class Customer ( Person ) : email = " " johnSmith = Person () janeEmployee = Employee () bobCustomer = Customer () Methods may be overridden by a child class to provide different functionality. In the code below, the child classes have their own construc- tors, so the parent’s class will not be run: class Person () : name = " " def __init__ ( self ) :
- 240. print ( " Person created " ) class Employee ( Person ) : job_title = " " def __init__ ( self ) : print ( " Employee created " ) class Customer ( Person ) : email = " " def __init__ ( self ) : print ( " Customer created " ) johnSmith = Person () janeEmployee = Employee () bobCustomer = Customer () If the programmer desires to run both the parent and the child class’s method, the child may explicitly call the parent’s method: class Person () : name = " " def __init__ ( self ) :
- 241. print ( " Person created " ) class Employee ( Person ) : job_title = " " def __init__ ( self ) : Person . __init__ ( self ) print ( " Employee created " ) class Customer ( Person ) : email = " " def __init__ ( self ) : Person . __init__ ( self ) print ( " Customer created " ) johnSmith = Person () janeEmployee = Employee () bobCustomer = Customer () 13.5.1 Review Create a program that has: 1. A class named Animal
- 242. 2. A class named Cat that has Animal as the parent. 3. A class named Dog that has Animal as the parent. 4. A constructor for the Animal class that prints “An animal has been born.” 5. An eat method for Animal that prints “Munch munch”. 6. An makeNoise method for Animal that prints “Grrr”. 7. An makeNoise method for Cat that prints “Meow”. 8. An makeNoise method for Dog that prints “Bark”. 9. A constructor for Dog that prints “A dog has been born.” and it calls the parent constructor.
- 243. 10. Code that creates a cat, dog, and animal. 11. Code that calls eat and makeNoise for each animal.
- 245. Chapter 14 Introduction to Sprites A sprite is a two dimensional image that is part of a larger graphical scene. Typically a sprite will be some kind of object in the scene that will be interacted with. Originally, sprites were specifically sup-
- 246. ported by the hard- ware of early game consoles. This spe- cialized hardware sup- port is no longer needed, but the vo- cabulary remains. The Pygame li- brary has support for sprites. This code helps manage animation, collision detection, and management of sprite groups. 14.1 Basic Sprites and Col- lisions This example shows how to create a screen of black blocks, and collect them using a red block controlled by the mouse. The program keeps “score” on how many blocks have been collected. The code for this example may be found at:
- 247. http://cs.simpson.edu/?q=python_pygame_exampl # Sample Python / Pygame Programs # Simpson College Computer Science # http :// cs . simpson . edu import pygame import random # Define some colors black = ( 0, 0, 0) white = ( 255 , 255 , 255) red = ( 255 , 0, 0) The pygame libary is imported for sprite support. The random library is imported for the random placement of blocks. The definition of colors is standard, there is nothing new in this example yet. # This class represents the ball # It derives from the " Sprite " class in Pygame class Block ( pygame . sprite . Sprite ) :
- 248. This code starts the definition of the Block class. Note that on line 15 this class is a child class of the Sprite class. The pygame.sprite. specifies the library and package, which will be discussed later in class. All the default func- tionality of the Sprite class will now be a part of the Block class. 16 17 # Constructor . Pass in the color of the block , 18 # and its x and y position 19 def __init__ ( self , color , width , height ) : 20 # Call the parent class ( Sprite ) constructor 21 pygame . sprite . Sprite . __init__ ( self ) The constructor for the Block class takes in a parameter for self just like any other con- structor. It also takes in parameters that define the object’s color, height, and width.
- 249. It is important to call the parent class con- structor in Sprite to allow sprites to initialize. This is done on line 21. # Create an image of the block , and fill it with a color . # This could also be an image loaded from the disk . self . image = pygame . Surface ([ width , height ]) self . image . fill ( color ) This code actually creates the image that will eventually appear on the screen. Line 25 creates a blank image. Line 26 fills it with black. If the program needs something other than a black square, these are the lines of code to modify. For example, look at the code below: self . image = pygame . Surface ([ width , height ]) self . image . fill ( white ) self . image . set_colorkey ( white )
- 250. 25 pygame . draw . ellipse ( self . image , color ,[0 ,0 , width , height ]) If this code was substituted in instead, then everything would be in the form of ellipses. Line 25 draws the ellipse, and like 26 makes white a transparent color . 22 self . image = pygame . image . load ( " player . png " ) . convert () 23 self . image . set_colorkey ( white ) If instead a bitmapped graphic is desired, substituting the lines of code in above will load a graphic and set white to the transparent back- ground color. In this case, the dimensions of the sprite will automatically be set to the graphic dimensions, and it would no longer be necessary to pass them in. 22 23 # Fetch the rectangle object that has the dimensions of the 24 # image
- 251. # Update the position of this object by setting the values # of rect . x and rect . y self . rect = self . image . get_rect () The attribute rect is a variable that is an in- stance of the Rect class that Pygame provides. The rectangle represents the dimensions of the sprite. This rectangle class has attributes for x and y that may be set. Pygame will draw the sprite where the x and y attributes are. So to move this sprite, a programmer needs to set mySpriteRef.rect.x and mySpriteRef.rect.y where mySpriteRef is the variable that points to the sprite. # Initialize Pygame pygame . init () # Set the height and width of the screen screen_width =700
- 252. 34 screen_height =400 35 screen = pygame . display . set_mode ([ screen_width , screen_height ]) This code initializes pygame and creates a window for the game. There is nothing new here from other pygame programs. 36 37 # This is a list of ’ sprites . ’ Each block in the program is 38 # added to this list . 39 # The list is managed by a class called ’ RenderPlain . ’ 40 block_list = pygame . sprite . RenderPlain () 41 42 # This is a list of every sprite . 43 # All blocks and the player block as well . 44 all_sprites_list = pygame . sprite . RenderPlain () A major advantage of working with sprites is the ability to work with items in a list. Rather than check each individual object to see if there
- 253. is a collision, the program may simply check against an entire list of objects. Likewise, entire groups of sprites may have their position updated and be drawn by simply telling the list to update or draw. This will automatically update or draw each element in the list. The above code creates two lists. The vari- able all sprites list will contain every sprite in the game. This list will be used to draw all the sprites. The variable ball list holds each object that the player can collide with. In this example it will include every object in the game but the player. Obviously it is not desirable to see if the player object does not overlap the player object, so the program needs a list that does not include the player. for i in range (50) : # This represents a block block = Block ( black , 20 , 15)
- 254. 50 # Set a random location for the block 51 block . rect . x = random . randrange ( screen_width ) 52 block . rect . y = random . randrange ( screen_height ) 53 54 # Add the block to the list of objects 55 block_list . add ( block ) 56 all_sprites_list . add ( block ) The loop starting on line 51 adds 50 black sprite blocks to the screen. Line 53 creates a new block, sets the color, the width, and the height. Lines 56 and 57 set the coordinates for where this object will appear. Line 60 adds the block to the list of blocks the player can collide with. Line 61 adds it to the list of all blocks. 57 58 # Create a red player block 59 player = Block ( red , 20 , 15) 60 all_sprites_list . add ( player )
- 255. Line 64 creates a red block that will eventu- ally function as the player. This block is added to the all sprites list so it can be drawn. # Loop until the user clicks the close button . done = False # Used to manage how fast the screen updates clock = pygame . time . Clock () score = 0 # -------- Main Program Loop ----------- while done == False : for event in pygame . event . get () : # User did something if event . type == pygame . QUIT : # If user clicked close done = True # Flag that we are done so we exit this loop
- 256. 76 # Clear the screen 77 screen . fill ( white ) This is a standard program loop. Line 73 initializes the score to 0. 78 79 # Get the current mouse position . This returns the position 80 # as a list of two numbers . 81 pos = pygame . mouse . get_pos () 82 83 # Fetch the x and y out of the list , 84 # just like we ’d fetch letters out of a string . 85 # Set the player object to the mouse location 86 player . rect . x = pos [0] 87 player . rect . y = pos [1] Line 86 fetches the mouse position similar to other Pygame programs discussed before. The important new part is contained in lines 91- 92 where the rectangle containing the sprite is moved to a new location. Remember this rect
- 257. was created back on line 32 and this code wont work without that line. # See if the player block has collided with anything . blocks_hit_list = pygame . sprite . spritecollide ( player , block_list , True ) This line of code takes the sprite referenced by player and checks it against all sprites in block list. The code returns a list of sprites that overlap. If there are no overlapping sprites, it returns an empty list. The boolean True will remove the colliding sprites from the list. If it is set to False the sprites will not be removed. # Check the list of collisions . if len ( blocks_hit_list ) > 0: score += len ( blocks_hit_list ) print ( score ) This checks to see if there are any sprites in the collision list. If there are, increase the score
- 258. by the number of sprites that have been collided with. Then print the score to the screen. Note that the print on line 100 will not print it to the main window with the sprites, but the console window instead. 96 97 # Draw all the spites 98 all_sprites_list . draw ( screen ) This causes every sprite in the all sprites - list to draw. 99 00 # Limit to 20 frames per second 01 clock . tick (20) 02 03 # Go ahead and update the screen with what we ’ ve drawn . 04 pygame . display . flip () 05 06 pygame . quit () This flips the screen, and calls the quit metho when the for loop is done.
- 259. 14.2 Moving Sprites In the example so far, only the player sprite moves. How could a program cause all the sprites to move? This can be done easily, just two steps are required. The first step is to add a new method to the Block class. This new method is called update. The update function will be called automati- cally when update is called for the endire list. Put this in the sprite: def update ( self ) : # Move the block down one pixel self . rect . y += 1 Put this in the main program loop: # Call the update () method all all blocks in the block_list block_list . update () The code isn’t perfect because the blocks fall off the screen and do not reappear. This code
- 260. will improve the update function so that the blocks will reappear up top. def update ( self ) : # Move the block down one pixel self . rect . y += 1 if self . rect . y > screen_height : self . rect . y = random . randrange ( -100 , -10) self . rect . x = random . randrange (0 , screen_width ) If the program should reset blocks that are collected to the top of the screen, the sprite can be changed with the following code: def reset_pos ( self ) : self . rect . y = random . randrange ( -100 , -10) self . rect . x = random . randrange (0 , screen_width ) def update ( self ) : # Move the block down one pixel
- 261. self . rect . y += self . change_y if self . rect . y > screen_height : self . reset_pos () self . game . score -= 1 Rather than destroying the blocks when the collision occurs, the program may instead call the reset pos function and the block will move to the top of the screen ready to be collected. # See if the player block has collided with anything . blocks_hit_list = pygame . sprite . spritecollide ( player , block_list , True ) # Check the list of collisions . if len ( blocks_hit_list ) > 0: score += len ( blocks_hit_list ) print ( score ) Find the code above. Change the True to a False so the blocks are not destroyed. Change the if statement to a for loop that loops through each block the player has collided with. Call
- 262. block.reset pos() on that block.
- 263. Chapter 15 Libraries and Modules A library is a collection of code for functions and classes. Often, these libraries are written by someone else and brought into the project so that the programmer does not have to “reinvent the wheel.” In Python the term used to describe a library of code is module.
- 264. Modules are often organized into groups of similar functionality. In this class programs have already used functions from the math module, the random module, and the pygame library. Modules can be organized so that individual modules contain other modules. For example, the pygame module contains submodules for pyga pygame.image, and pygame.mouse. Modules are not loaded unless the program asks them to. This saves time and computer memory. This chapter shows how to create a module, and how to import and use that mod- ule. 15.1 Creating your own mod ule/library file: Some programs can get too long to manage in one file. One way to keep programs manageable is to break them into different files. Take the
- 265. following example: Listing 15.1: test.py with everything in it # Foo function def foo () : print ( " foo ! " ) # Foo call foo () We can move the foo function out of this file. Then this file would be left with only the main program code. (In this example there is no reason to do separate them, aside from learning how to do so.) To do this, create a new file and copy the foo function into it. Save the new file with the name my functions.py. Listing 15.2: my functions.py # Foo function def foo () : print ( " foo ! " )
- 266. Listing 15.3: test.py that doesn’t work # Foo call that doesn ’t work foo () Unfortunately it isn’t as simple as this. Test.p does not know to go and look at the my func- tions.py file and import it. We have to import it: Listing 15.4: test.py that imports but still doesn’t work # Import the my_functions . py file import my_functions # Foo call that still doesn ’t work foo () That still doesn’t work. What are we miss- ing? Just like when we import pygame, we have to put the package name in front of the function. Like this: Listing 15.5: test.py that finally works. # Import the my_functions . py file
- 267. import my_functions # Foo call that does work my_functions . foo () This works because my functions. is prepende to the function call. 15.2 Namespace: A program might have two library files that need to be used. What if libraries had func- tions that were named the same? For instance: Listing 15.6: student functions.py def print_report () : print ( " Student Grade Report : " ) Listing 15.7: financial functions.py def print_report () : print ( " Financial Report : " )
- 268. How do you get a program to specify which function to call? Well, that is pretty easy. You specify the “namespace.” The namespace is the work that appears before the function name in the code below: Listing 15.8: test.py that calls different print report functions import student_functions import financial_functions student_functions . print_report () financial_functions . print_report () So now we can see why this might be needed. But what if you don’t have name collisions? Typing in a namespace each and every time can be tiresome. You can get around this by import- ing the library into the “local namespace.” The local namespace is a list of functions, variables, and classes that you dont have to prepend with a namespace. Going back to the foo example, let’s remove the original import and replace it
- 269. with a new type of import: Listing 15.9: test.py # import foo from my_functions import * foo () This works even without my functions. prepended to the function call. The asterisk is a wild- card that will import all functions from my - functions. A programmer could import individ- ual ones if desired by specifying the function name. 15.3 Third Party Libraries When working with Python, it is possible to use many libraries that are built into Python. Take a look at all the libraries that are available here: http://docs.python.org/modindex.html It is possible to download and install other li-
- 270. braries. There are libraries that work with the web, complex numbers, databases, and more. • Pygame: The library used to create games. http://www.pygame.org/docs/ • wxPython: Create GUI programs, with windows, menus, and more. http://www.wx • pydot: Generate complex directed and non directed graphs http://code.google.com/ • NumPy: Sophisticated library for working with matrices. http://numpy.scipy.org/ 15.4 Review Take the program from a prior lab. Make a copy of it. Separate the classes and functions into a separate file.
- 271. Chapter 16 Searching 16.1 Reading From a File Before discussing how to search, it is useful to know how to read data from a file. This allows a program to search large sample data sets easily. To download a sample data set, go to http://cs and download the file example sorted names.txt. These are random names generated by http://nine
- 272. Save this file and note which directory you saved it to. In the same directory, create, save, and run the following python program: 1 file = open ( " e x a m p l e _ s o r t e d _ n a m e s . txt " ) 2 3 for line in file : 4 print ( line ) This program has two problems with it, but it is a provides a simple example of reading in a file. Line 1 opens a file and gets it ready to be read. The name of the file is in between the quotes. The new variable file is an object that represents the file being read. Line 3 shows how a normal for loop may be used to read through a file line by line. One of the problems with the file is that the text is printed double-spaced. The reason for this is that each line pulled out of the file and stored in the variable line includes the carriage return as part of the string. The print state-
- 273. ment also adds yet another carriage return, so the result is double-spaced output. The second problem is that the file is opened, but not closed. Once opened, the Windows op- erating system will limit what other programs can do with the file. It is necessary to close the file to let Windows know the program is no longer working with that file. In this case it is not too important because once any program is done running, the Windows will automatically close any files left open. But since it is a bad habit to do so, the code should be updated. file = open ( " e x a m p l e _ s o r t e d _ n a m e s . txt " ) for line in file : line = line . strip () print ( line ) file . close () The listing above works better. It has two new additions. On line 4 the strip method
- 274. built into every string that will remove trailing spaces and carriage returns. The method does not alter the original string but instead creates a new one. This line of code would not work: line . strip () If the programmer wants the original variable to reference the new string, she must assign it to the new returned string. The second addition is on line 7. this closes the file so that the operating system doesn’t have to go around later and clean up open files after the program ends. 16.2 Reading Into an Array It is useful to read in the contents of a file to an array so that the program can do processing on it later. This can easily be done in python with the following code:
- 275. Listing 16.1: Read in a file from disk and put it in an array # Read in a file from disk and put it in an array . file = open ( " e x a m p l e _ s o r t e d _ n a m e s . txt " ) name_list = [] for line in file : line = line . strip () name_list . append ( line ) file . close () This combines the new pattern of how to read a file, along with the previously learned pattern of how to create and empty list and ap- pend to it as new data comes in. To verify the file was read in correctly a programmer could print the length of the array: print ( " There were " , len ( name_list ) ," names in the file . " )
- 276. Or the programmer could pring the entire con- tents of the array: for line in name_list : print ( name ) 16.3 Linear Search If a program has a set of data in the array, how can it go about finding a specific element? This can be done one of two ways. The first method is to use a linear search. This starts at the first element, and keeps comparing elements until it finds the desired element or runs out of elements to check. Listing 16.2: Linear search 1 # Linear search 2 i =0 3 while i < len ( name_list ) and name_list [ i ] != " Morgiana the Shrew " : 4 i += 1
- 277. if i == len ( name_list ) : print ( " The name was not in the list ." ) else : print ( " The name is at position " ,i ) The linear search is rather simple. Line 2 sets up a increment variable that will keep track of exactly where in the list the program needs to check next. The first element that needs to be checked is zero, so i is set to zero. The next line is more a bit complex. The computer needs to keep looping until one of two things happens. It finds the element, or it runs out of elements. The first comparison sees if the current element we are checking is less than the length of the list. If so, we can keep looping. The second comparison sees if the current ele- ment in the name list is equal to the name we are searching for. This check to see if the program has run out of elements must occur first. Otherwise the pro-
- 278. gram will check against a non-existant element which will cause an error. Line 4 simply moves to the next element if the conditions to keep searching are met in line 3. At the end of the loop, the program checks to see if the end of the list was reached on line 6. Remember, a list of n elements is numbered 0 to n-1. Therefore if i is set to look at posi- tion n (the length of the list), the end has been reached. 16.3.1 Review Answer the following, assuming a program uses the linear search: 1. If a list has n elements, in the best case how many elements would the computer need to check before it found the desired element?
- 279. 2. If a list has n elements, in the worst case how many elements would the computer need to check before it found the desired element? 3. If a list has n elements, how many ele- ments need to be checked to determine that the desired element does not exist in the list? 4. If a list has n elements, what would the average number of elements be that the computer would need to check before it found the desired element? 5. Take the example linear search code and put it in a function. Take in the list along with the desired element. Return the po- sition of the element, or -1 if it was not found.
- 280. 16.4 Binary Search A faster way to search a list is possible with the binary search. The process of a binary search can be described by using the classic number guessing game “guess a number between 1 and 100” as an example. To make it easier to un- derstand the process, let’s modify the game to be “guess a number between 1 and 128.” The number range is inclusive, meaning both 1 and 128 are possibilities. If a person were to use the linear search as a method to guess the secret number, the game would be rather long and boring. Guess a number 1 to 128: 1 Too low. Guess a number 1 to 128: 2 Too low. Guess a number 1 to 128: 3 Too low. ....
- 281. Guess a number 1 to 128: 93 Too low. Guess a number 1 to 128: 94 Correct! Most people will use a binary search to find the number. Here is an example of playing the game using a binary search: Guess a number 1 to 128: 64 Too low. Guess a number 1 to 128: 96 Too high. Guess a number 1 to 128: 80 Too low. Guess a number 1 to 128: 88 Too low. Guess a number 1 to 128: 92 Too low. Guess a number 1 to 128: 94 Correct!
- 282. Each time through the rounds of the num- ber guessing game, the guesser is able to elimi- nate one half of the problem space by getting a “high” or “low” as a result of the guess. In a binary search, it is necessary to track an upper and a lower bound of the list that the answer can be in. The computer or number- guessing human picks the midpoint of those el- ements. Revisiting the example: A lower bound of 1, upper bound of 128, mid point of (1 + 128)/2 = 64.5. Guess a number 1 to 128: 64 Too low. A lower bound of 65, upper bound of 128, mid point of (65 + 128)/2 = 96.5. Guess a number 1 to 128: 96 Too high. A lower bound of 65, upper bound of 95, mid point of (65 + 95)/2 = 80.
- 283. Guess a number 1 to 128: 80 Too low. A lower bound of 81, upper bound of 95, mid point of (81 + 95)/2 = 88. Guess a number 1 to 128: 88 Too low. A lower bound of 89, upper bound of 95, mid point of (89 + 95)/2 = 92. Guess a number 1 to 128: 92 Too low. A lower bound of 93, upper bound of 95, mid point of (93 + 95)/2 = 94. Guess a number 1 to 128: 94 Correct!
- 284. A binary search requires significantly fewer guesses. Worst case, it can guess a number be- tween 1 and 128 in 7 guesses. One more guess raises the limit to 256. 9 guesses can get a num- ber between 1 and 512. With just 32 guesses, a person can get a number between 1 and 4.2 billion. Code to do a binary search is more complex than a linear search: Listing 16.3: Binary search 1 # Binary search 2 desired_element = " Morgiana the Shrew " ; 3 lower_bound = 0 4 upper_bound = len ( name_list ) -1 5 found = False 6 while lower_bound < upper_bound and found == False : 7 middle_pos = ( int ) (( lower_bound + upper_bound ) / 2) 8 if name_list [ middle_pos ] < desired_element : 9 lower_bound = middle_pos +1
- 285. elif name_list [ middle_pos ] > desired_element : upper_bound = middle_pos else : found = True if found : print ( " The name is at position " , middle_pos ) else : print ( " The name was not in the list . " ) Since lists start at element zero, line 3 sets the lower bound to zero. Line 4 sets the upper bound to the length of the list minus one. So for a list of 100 elements the lower bound will be 0 and the upper bound 99. The Boolean variable on line 5 will be used to let the while loop know that the element has been found. Line 6 checks to see if the element has been found, or if we’ve run out of elements. If we’ve run out of elements the lower bound will end up
- 286. equalling the upper bound. Line 7 finds the middle position. It is pos- sible to get a middle position of something like 64.5. It isn’t possible to look up position 64.5. (Although J.K. Rowling was rather clever in 3 coming up with Platform 9 4 .) Therefore it is necessary to convert the result to an integer with (int). An alternative way of doing this line would be to use the // operator. This is similar to the / operator, but will only return integer re- sults. For example, 11 // 2 would give 5 as an answer, rather than 5.5. 7 middle_pos = ( lower_bound + upper_bound ) // 2 Starting at line 8, the program checks to see if the guess is high, low, or correct. If the guess is low, the lower bound is moved up to just past the guess. If the guess is to low, the upper bound is moved just below the guess. If the answer has been found, found is set to True
- 287. ending the search. 16.4.1 Review Answer the following, assuming a program uses the linear search, and the search list is in order: 1. If a list has n elements, in the best case how many elements would the computer need to check before it found the desired element? 2. If a list has n elements, in the worst case how many elements would the computer need to check before it found the desired element? 3. If a list has n elements, how many ele- ments need to be checked to determine that the desired element does not exist in the list?
- 288. 4. If a list has n elements, what would the average number of elements be that the computer would need to check before it found the desired element? 5. Take the example linear search code and put it in a function. Take in the list along with the desired element. Return the po- sition of the element, or -1 if it was not found.
- 289. Chapter 17 Array-Backed Grids This section describes how to create an array- backed grid. This is useful when creating games like minesweeper, tic-tac-toe, or connect-four. For example, below is a tic-tac-toe board: O O X X
- 290. A two-dimensional array is used to create a matrix, or grid, of numbers. The values of the numbers in the array represent what should be displayed in each board location. The array of numbers might look like the numbers below. 0 represents a spot where no one has played, a 1 represents an X, and a 2 represents an O. 0 2 2 0 1 0 1 0 0 Go to the site for example code: http://cs.s Download the file pygame base template.py. Then follow the steps below. 17.1 Drawing the Grid 1. Adjust window size to 255x255 pixels. 2. Create variables named width, height, and margin. Set the width and height to 20. This will represent how large each grid
- 291. location is. Set the margin to 5. This rep- resents the margin between each grid loca- tion and the edges of the screen. Create these variables before the main program loop. 3. Draw a white box in the upper left corner. Draw the box drawn using the height and width variables created earlier. (Feel free to adjust the colors.) 4. Use a for loop to draw 10 boxes in a row. Use column for the variable name in the for loop. 5. Adjust the drawing of the rectangle to add in the margin variable. 6. Add the margin before drawing the rect- angles, in addition to between each rect- angle. 7. Add another for loop that also will loop
- 292. (a) Step 3 (b) Step 4 (c) Step 5 (d) Step 6 (e) Step 7 (f) Step 11 (g) Step 13 (h) Step 14 (i) Step 15
- 293. for each row. Call the variable in this for loop row. 17.2 Populating the Grid 8. Create a two-dimensional array. Creating a two-dimensional array in Python is, un- fortunately, not as easy as it is in some other languages. There are some libraries that can be downloaded for Python that make it easy, but for this example they will not be used. To create a two-dimensional array and set an example, use the code be- low. Listing 17.1: Create a 10x10 array of numb 1 # --- Create grid of numbers 2 # Create an empty list 3 grid = [] 4 # Loop for each row
- 294. 5 for row in range (10) : 6 # For each row , create a list that will 7 # represent an entire row 8 grid . append ([]) 9 # Loop for each column 10 for column in range (10) : 11 # Add a the number zero to the current row 12 grid [ row ]. append (0) Place this code somewhere ahead of your main program loop. 9. Set an example location in the array to 1. Two dimensional arrays are usually rep- resented addressed by first their row, and then the column. This is called a row- major storage. Most languages use row- major storage, with the excetption of For- tran and MATLAB. Fortran and MAT- LAB use column-major storage. # Set row 1 , column 5 to zero
- 295. grid [1][5] = 1 Place this code somewhere ahead of your main program loop. 10. Select the color of the rectangle based on the value of a variable named color. Do this by first finding the line of code where the rectangle is drawn. Ahead of it, create a variable named color and set it equal to white. Then replace the white color in the rectangle declaration with the color variable. 11. Select the color based on the value in the grid. After setting color to white, place an if statement that looks at the value in grid[row][column] and changes the color to green if the grid value is equal to 1. 12. Print “click” to the screen if the user clicks the mouse button. See bitmapped graphics.
- 296. for example code of how to detect a mouse click. 13. Print the mouse coordinates when the user clicks the mouse. See move mouse.py for an example on get- tig the position of the mouse. 14. Convert the mouse coordinates into grid coordinates. Print those instead. Remem- ber to use the width and height of each grid location combined with the margin. It will be necessary to convert the final value to an integer. This can be done by using int or by using the integer division operator // instead of the normal division operator /. 15. Set the grid location at the row/column clicked to 1.
- 297. 17.3 Final Program Listing 17.2: Creating an array backed grid import pygame # Define some colors black = ( 0, 0, 0) white = ( 255 , 255 , 255) green = ( 0 , 255 , 0) red = ( 255 , 0, 0) width =20 height =20 margin =5 # --- Create grid of numbers # Create an empty list grid = [] # Loop for each row for row in range (10) : # For each row , create a list that will # represent an entire row grid . append ([])
- 298. 21 # Loop for each column 22 for column in range (10) : 23 # Add a number to the current row 24 grid [ row ]. append (0) 25 26 # Set row 1 , column 5 to zero 27 grid [1][5] = 1 28 29 pygame . init () 30 31 screen_size =[255 ,255] 32 screen = pygame . display . set_mode ( screen_size ) 33 34 pygame . display . set_caption ( " My Game " ) 35 36 # Loop until the user clicks the close button . 37 done = False 38 39 # Used to manage how fast the screen updates 40 clock = pygame . time . Clock () 41 42 # -------- Main Program Loop
- 299. ----------- while done == False : for event in pygame . event . get () : # User did something if event . type == pygame . QUIT : # If user clicked close done = True # Flag that we are done so we exit this loop if event . type == pygame . MOUSEBUTTONDOWN : pos = pygame . mouse . get_pos () column_clicked = pos [0]//( width + margin ) row_clicked = pos [1]//( height + margin ) print ( " Row : " , row_clicked , " Column : " , column_clicked ) grid [ row_clicked ][ column_clicked ] = 1 # Set the screen background screen . fill ( black )
- 300. 57 for row in range (10) : 58 for column in range (10) : 59 if grid [ row ][ column ] == 0: 60 color = white 61 else : 62 color = green 63 pygame . draw . rect ( screen , color ,[ margin +( width + margin ) * column , margin +( height + margin ) * row , width , height ]) 64 65 # Limit to 20 frames per second 66 clock . tick (20) 67 68 # Go ahead and update the screen with what we ’ ve drawn . 69 pygame . display . flip () 70 71 # Be IDLE friendly . If you forget this line , the program will ’ hang ’ 72 # on exit . 73 pygame . quit ()
- 301. Chapter 18 Sorting Binary searches only work on lists that are in order. So how do programs get a list in order? There are several algorithms that do this. The two easiest algorithms for sorting are the selec- tion sort and the insertion sort. Other sorting algorithms exist as well, but they are not cov- ered in the next class. Each sort has advantages and disadvantages. Some sort lists quickly if the list is almost in
- 302. order to begin with. Some sort a list quickly if the list is in a completely random order. Other lists sort fast, but take more memory. To see common sorting algorithms in action, visit the website: http://www.sorting-algorithms.com/ 18.1 Swapping Values Before learning any algorithm, it is necessary to learn how to swap values in an array. Swapping two values is a common operation in many sorting algorithms. For example, sup- pose a program has a list that looks like the following: list = [15 ,57 ,14 ,33 ,72 ,79 ,26 ,56 ,42 ,40] The developer wants to swap positions 0 and 2, which contain the numbers 15 and 14 respec- tively.
- 303. 15 57 14 22 72 79 26 56 42 40 14 57 15 22 72 79 26 56 42 40 A first attempt at writing this code might look something like this: list [0] = list [2] list [2] = list [0] Graphically, this is what would happen: 15 57 14 22 72 79 26 56 42 40 list[0] = list[2] 14 57 14 22 72 79 26 56 42 40 list[2] = list[0] 14 57 14 22 72 79 26 56 42 40 This clearly does not work. The first assignment list[0] = list[2] causes the value 15 that exists in position 0 to be overwritten with the 14 in position 2 and irretrievably lost. The next line with list[2] = list[0] just copies the 14
- 304. back to cell 2 which already has a 14. To fix this problem, swapping values in an array should be done in three steps. It is nec- essary to create a temporary variable to hold a value during the swap operation. The code to do the swap looks like the following: Listing 18.1: Swapping two values in an array 1 temp = list [0] 2 list [0] = list [2] 3 list [2] = temp The first line copies the value of position 0 into the temp variable. This allows the code to write over position 0 with the value in position 2 without data being lost. The final line takes the old value of position 0, currently held in the temp variable, and places it in position 2.
- 305. 15 57 14 22 72 79 26 56 42 40 Step 2 Step 1 14 57 14 22 72 79 26 56 42 40 15 Step 3 14 57 15 22 72 79 26 56 42 40 18.2 Selection Sort The selection sort starts at the beginning of the list. It code scans the rest of the list to find the smallest number. The smallest number is swapped into location. The code then moves on to the next number. Graphically, the sort looks like the following image:
- 306. 15 57 14 22 72 79 26 56 42 40 14 57 15 22 72 79 26 56 42 40 14 15 57 22 72 79 26 56 42 40 14 15 22 57 72 79 26 56 42 40 14 15 22 26 72 79 57 56 42 40 14 15 22 26 40 79 57 56 42 72 14 15 22 26 40 42 57 56 79 72 14 15 22 26 40 42 56 57 79 72 14 15 22 26 40 42 56 57 79 72 14 15 22 26 40 42 56 57 72 79 14 15 22 26 40 42 56 57 72 79
- 307. The code for a selection sort involves two nested loops. The outside loop tracks the cur- rent position that the code wants to swap the smallest value into. The inside loop starts at the current location and scans to the right in search of the smallest value. When it finds the smallest value, the swap takes place. Listing 18.2: Selection sort # The selection sort def selection_sort ( list ) : # Loop through the entire array for curPos in range ( len ( list ) ) : # Find the position that has the smallest number # Start with the current position minPos = curPos # Scan left for scanPos in range ( curPos +1 , len ( list ) ) : # Is this position smallest ? if list [ scanPos ] < list [ minPos ]: # It is , mark this position as
- 308. the smallest 13 minPos = scanPos 14 15 # Swap the two values 16 temp = list [ minPos ] 17 list [ minPos ] = list [ curPos ] 18 list [ curPos ] = temp The outside loop will always run n times. The inside loop will run n/2 times. This will be the case regardless if the list is in order or not. The loops efficiency may be improved by checking if minPos and curPos are equal before line 16. If those variables are equal, there is no need to do the three lines of swap code. In order to test the selection sort code above, the following code may be used. The first func- tion will print out the list. The next code will create a list of random numbers, print it, sort it, and then print it again. 19 def print_list ( list ) : 20 for item in list : 21 print ( " %3 d " % item , end = " " )
- 309. print () # Create a list of random numbers list = [] for i in range (10) : list . append ( random . randrange (100) ) # Try out the sort print_list ( list ) selection_sort ( list ) print_list ( list ) 18.3 Insertion Sort The insertion sort is similar to the selection sort in how the outer loop works. The insertion sort starts and the left of the array and works to the right. The difference is that the insertion sort does not select the smallest element and put it into place, the insertion sort selects the next element to the right of what was already sorted. Then it slides up each larger selement
- 310. until it gets to the correctly location to insert. Graphically, it looks like this:
- 311. 75 53 36 2 60 18 65 64 55 82 53 75 36 2 60 18 65 64 55 82 36 53 75 2 60 18 65 64 55 82 2 36 53 75 60 18 65 64 55 82 2 36 53 60 75 18 65 64 55 82 2 18 36 53 60 75 65 64 55 82 2 18 36 53 60 65 75 64 55 82 2 18 36 53 60 64 65 75 55 82 2 18 36 53 55 60 64 65 75 82 2 18 36 53 55 60 64 65 75 82 The insertion sort breaks the list into two
- 312. sections. The “sorted” half and the “unsorted” half. Each round of the outside loop the algo- rithm will grab the next unsorted element and insert it into the list. In the code below, the keyPos marks the boundary between the sorted and unsorted por- tions of the list. The algoritm scans to the left of keyPos using the variable scanPos. Note that in the insertion short, scanPos goes down, rather than up. Each cell location that is larger than keyValue gets moved up (to the right) one location. When the loop finds a location smaller than keyValue, it stops and puts keyValue to the left of it. The outside loop with an insertion sort will run n times. The inside loop will run an average of n/2 times if the loop is randomly shuffled. If the loop is close to a sorted loop already, then the inside loop does not run very much, and the sort time is closer to n. Listing 18.3: Insertion sort
- 313. def insertion_sort ( list ) : # Start at the second element ( pos 1) . # Use this element to insert into the # list . for keyPos in range (1 , len ( list ) ) : # Get the value of the element to insert keyValue = list [ keyPos ] # Scan to the left scanPos = keyPos - 1 # Loop each element , moving them up until # we reach the position the while ( scanPos >=0) and ( list [ scanPos ] > keyValue ) : list [ scanPos +1] = list [ scanPos ] scanPos = scanPos - 1 # Everything ’s been moved out of the way , insert # the key into the correct location list [ scanPos +1] = keyValue
- 314. 18.4 Review 1. Write code to swap the values 25 and 40. list = [55 , 41 , 52 , 68 , 45 , 27 , 40 , 25 , 37 , 26] 2. Write code to swap the values 2 and 27. list = [27 , 32 , 18 , 2 , 11 , 57 , 14 , 38 , 19 , 91] 3. Why does the following code not work? list = [70 , 32 , 98 , 88 , 92 , 36 , 81 , 83 , 87 , 66] temp = list [0] list [1] = list [0] list [0] = temp 4. Show how the following list of numbers is 97 74 8 98 sorted, using the selection sort: 5. Show how the following list of numbers is 74 62 18 47 sorted, using the selection sort:
- 315. 6. Show how the following list of numbers is 50 71 70 14 68 sorted, using the insertion sort: 7. Show how the following list of numbers is 37 11 14 50 2 sorted, using the insertion sort: 8. Explain what minPos does in the selection sort. 9. Explain what curPos does in the selection sort. 10. Explain what scanPos does in the selec- tion sort. 11. Explain what keyPos and keyValue are in the insertion sort. 12. Explain scanPos in the insertion sort. 13. Modify the sorts to print the number of times the inside loop is run, and the num- ber of times the outside loop is run.
- 317. Chapter 19 Exceptions 19.1 Introduction to excep- tions Exceptions are used to handle abnormal con- ditions that can occur during the execution of code. Exceptions are often used with file and network operations. This allows code to grace- fully handle running out of disk space, network
- 318. errors, or permission errors. There are several terms and phrases used while working with exceptions. Here are the most common: • Exception: This term could mean one of two things. First, the condition that re- sults in abnormal program flow. Or it could be used to refer to an object that represents the data condition. Each ex- ception has an object that holds informa- tion about it. • Exception handling: The process of han- dling an exception to normal program flow. • Catch block or exception block: Code that handles an abnormal condition is said to “catches” the exception. • Throw or raise: When an abnormal con- dition to the program flow has been de- tected, an instance of an exception object is created. It is then “thrown” or “raised” to code that will catch it.
- 319. • Unhandled exception, Uncaught exception: An exception that is thrown, but never caught. This usually results in an error and the program ending or crashing. • Try block: A set of code that might have an exception thrown in it.
- 320. 19.2 Exception handling The code for handling exceptions is simple. See the example below: Listing 19.1: Handling division by zero 1 # Divide by zero 2 try : 3 x = 5/0 4 except : 5 print ( " Error dividing by zero " ) On line two is the try statement. Every indented line below it is part of the “try block.” There may be no unindented code below it that doesn’t start with an except statement. The try statement defines a section of code that the code will attempt to execute. If there is any exception that occurs dur- ing the processing of the code the execution will immediately jump to the “catch block.” That block of code is indented under the except statement on line 4. This code is responsible for
- 321. handling the error. It is also possible to catch errors that occur during a conversion from text to a number. For example: Listing 19.2: Handling number conversion er- rors # Invalid number conversion try : x = int ( " fred " ) except : print ( " Error converting fred to a number " ) An exception will be thrown on line 3 be- cause “fred” can not be converted to an inte- ger. The code on line 63 will print out an error message. Below is an expanded version on this ex- ample. It error-checks a user’s input to make sure an integer is entered. The code uses excep- tion handling to capture a possible conversion error that can occur on line 5. If the user enters
- 322. something other than an integer, an exception is thrown when the conversion to a number oc- curs on line 5. The code on line 6 that sets numberEntered to True will not be run if there is an exception on line 5. Listing 19.3: Better handling of number con- version errors 1 numberEntered = False 2 while numberEntered == False : 3 numberString = input ( " Enter an integer : " ) 4 try : 5 n = int ( numberString ) 6 numberEntered = True 7 except : 8 print ( " Error , invalid integer ") Files are particularly prone to errors during operations with them. A disk could fill up, a user could delete a file while it is being written, it could be moved, or a USB drive could be pulled out mid-operation. These types of errors
- 323. may also be easily captured by using exception handling. # Error opening file try : f = open ( ’ myfile . txt ’) except : print ( " Error opening file " ) Multiple types of errors may be captured, and processed differently. It can be useful to provide a more exact error message to the user than a simple “an error has occured.” In the code below, different types of errors can occur from lines 5-8. By placing IOError after except on line 9, only errors regarding Input and Output (IO) will be handled by that code. Likewise line 11 only handles errors around converting values, and line 13 covers division by zero errors. The last exception handling occurs on line 15. Since line 15 does not include a par- ticular type of error, it will handle any error not covered by the except blocks above. The “catch-all” except must always be last.
- 324. Line 1 imports the sys library which is used on line 16 to print the type of error that has occured. 1 import sys 2 3 # Multiple errors 4 try : 5 f = open ( ’ myfile . txt ’) 6 s = f . readline () 7 i = int ( s . strip () ) 8 x = 101/ i 9 except IOError : 10 print ( " I / O error " ) 11 except ValueError : 12 print ( " Could not convert data to an integer . " ) 13 except ZeroDivisionError : 14 print ( " Division by zero error " ) 15 except : 16 print ( " Unexpected error : " , sys . exc_info () [0]) A list of built-in exceptions is available from this web address: http://docs.python.org/library/exceptions.h
- 325. 19.3 Example: Saving high score This shows how to save a high score between games. The score is stored in a file called high - score.txt. # Sample Python / Pygame Programs # Simpson College Computer Science # http :// cs . simpson . edu # Default high score high_score = 0 # Try to read the high score from a file try : f = open ( ’ high_score . txt ’ , ’r ’) high_score = int ( f . read () ) f . close () print ( " The high score is " , high_score ) except : # Error reading file , no high score
- 326. print ( " There is no high score yet . ") print ( sys . exc_info () [0]) # Get the score from the current game current_score =0 try : # Ask the user for his / her score current_score = int ( input ( " What is your score ? " ) ) except : # Error , can ’t turn what they typed into a number print ( " I don ’t understand what you typed . " ) # See if we have a new high score if current_score > high_score : print ( " Yea ! New high score ! " ) # We do ! Save to disk try : # Write the file to disk f = open ( ’ high_score . txt ’ , ’w ’) f . write ( str ( current_score ) ) f . close ()
- 327. except : # Hm , can ’t write it . print ( " Too bad I couldn ’t save it . " ) 19.4 Exception generating Exceptions may be generated with the raise command. For example: # Generating exceptions def getInput () : userInput = input ( " Enter something : ") if len ( userInput ) == 0: raise IOError ( " User entered nothing " ) getInput () Try taking the code above, and add excep- tion handling for the IOError raised. It is also possible to create custom excep- tions, but that is beyond the scope of this book.
- 328. Curious readers may learn more by going to: http://docs.python.org/tutorial/errors.html 19.5 Proper exception use Exceptions should not be used when if state- ments can just as easily handle the condition. Normal code should not raise exceptions when running the “happy path” scenario. Well con- structed try/catch code is easy to follow. Com- plex code involving many exceptions and jumps in code to different handlers can be a nightmare to debug.
- 329. Appendices
- 331. Appendix A Examples
- 332. A.1 Example: High Score This shows how to use files and exception han- dling in order to save a high score for a game. Run 1: There is no high score yet. What is your score? 10 Yea! New high score! Run 2: The high score is 10 What is your score? 22 Yea! New high score! Run 3: The high score is 22 What is your score? 5 Better luck next time.
- 333. # Sample Python / Pygame Programs # Simpson College Computer Science # http :// cs . simpson . edu # Default high score high_score = 0 # Try to read the high score from a file try : f = open ( ’ high_score . txt ’ , ’r ’) high_score = int ( f . read () ) f . close () print ( " The high score is " , high_score ) except : # Error reading file , no high score print ( " There is no high score yet . ") # Get the score from the current game current_score =0 try : # Ask the user for his / her score current_score = int ( input ( " What
- 334. is your score ? " ) ) except : # Error , can ’t turn what they typed into a number print ( " I don ’t understand what you typed . " ) # See if we have a new high score if current_score > high_score : print ( " Yea ! New high score ! " ) # We do ! Save to disk try : # Write the file to disk f = open ( ’ high_score . txt ’ , ’w ’) f . write ( str ( current_score ) ) f . close () except : # Hm , can ’t write it . print ( " Too bad I couldn ’t save it . " ) else : print ( " Better luck next time . " )
- 335. Appendix B Labs
- 336. B.1 Lab: Calculator Check the code in Chapter 1. The program at the end of the chapter can provide a good tem- plate for the code needed in this lab. Make sure you can write out simple pro- grams like what is assigned in this lab. Be able to do it from memory, and on paper. For this lab you will create 3 short programs. Name your programs: • lastname lab 01a.py • lastname lab 01b.py • lastname lab 01c.py Upload all three programs to this web page. Your grade will appear here as well. Labs are due on Friday. I do not count off for late labs, but I dont go back and check them very often.
- 337. B.1.1 Lab 01 a Create a program that asks the user for a tem- perature in Fahrenheit, and then prints the tem- perature in Celsius. Search the internet for the correct calculation. Look at yesterday’s class notes for the miles-per-gallon example to get an idea of what should be done. Sample run: Enter temperature in Fahrenheit:32 The temperature in Celsius: 0.0 Sample run: Enter temperature in Fahrenheit:72 The temperature in Celsius: 22.2222222222 B.1.2 Lab 01 b Create a program that will ask the user for the information needed to find the area of a trape- zoid, and then print the area. Sample run:
- 338. Area of a trapezoid Enter the height of the trapezoid:5 Enter the length of the bottom base:10 Enter the length of the top base:7 The area is: 42.5 B.1.3 Lab 01 c Create your own original problem and have the user plug in the variables. The problem should be done in the same parts (a) and (b) above. If you are not in the mood for anything original, choose an equation from: http://www.equationsheet.com/sheets/Equatio
- 339. B.2 Lab: Create-a-Quiz B.2.1 Description Your assignment is to create a quiz. Here is the list of features that your quiz needs to have: • Create your own five or more questions quiz. • If you have the user enter non-numeric an- swers, think and cover the different ways a user could enter a correct answer. For example, if the answer is “a”, would “A” also be acceptable? How about “ a”? • The program should print if the user gets the question correct or not. • You need to keep track of how many ques- tions they got correct. • At the end of the program print the per- centage of questions the user gets right.
- 340. Keep the following in mind when creating the program: • Make sure that the program works for per- centages such as 80 • Calculate the percentage by using a for- mula at the end of the game. Don’t just add 20 When you are done: • Save your program as lab 02 lastname.py and turn in by uploading the assignment to this page. B.2.2 Example Run Here’s an example from my program. Please create your own original questions, after all, pro- gramming is a creative process.
- 341. How many books are there in the Harry Pott Correct! What is 3*(2-1)? 3 Correct! What is 3*2-1? 5 Correct! Who sings Black Horse and the Cherry Tree? 1. Kelly Clarkson 2. K.T. Tunstall 3. Hillary Duff 4. Bon Jovi ? 2 Correct! Who is on the front of a one dollar bill 1. George Washington 2. Abraham Lincoln 3. John Adams
- 342. 4. Thomas Jefferson ? 2 No. Congratulations, you got 4 answers right That is a score of 80.0 percent.
- 343. B.3 Lab: Create-a-Picture B.3.1 Description Your assignment: Draw a pretty picture. The goal of this lab is to get you practice looking up documentation on Python classes, using func- tions, using for loops, and introduce computer graphics. To get full credit: • You must use multiple colors. • You must have a coherent picture. • You must use multiple types of methods (circles, rectangles, lines, etc.) • You must use a ’while’ loop to create a repeating pattern. Do not just redrawing the same thing in the same location 10 times. Actually use that index variable as an offset to displace what you are drawing. Remember that you can contain multiple drawing commands in a loop, so you can draw multiple train cars for example.
- 344. For a template program to modify, look at the pygame base template.py and simple graph- ics demo.py programs available here: http://cs. See Chapter 4 for an explanation of the tem- plate. Click here for documentation on pygame.d http://www.pygame.org/docs/ref/draw.html To select new colors, open up the Windows Paint program and click on ’Edit Colors’. Copy the values for Red, Green, and Blue. Do not worry about colors for hue, Saturation, or Bril- liance. A simple search of the web can turn up many tools for picking colors such as the one here: http://www.colorpicker.com/ Turn in your python application with the file name: lab 03 lastname.py
- 345. B.3.2 Example Runs
- 347. B.4 Lab: Looping B.4.1 Requirements Write a single program in Python that will print the following: Part 1 10 11 12 13 14 15 16 17 18 19 20 21 22 23 24 25 26 27 28 29 30 31 32 33 34 35 36 37 38 39 40 41 42 43 44 45 46 47 48 49 50 51 52 53 54 Part 2 Heads Tails Tails Heads Heads Heads Tails Heads Tails Tails Tails Tails Tails Heads Heads: 10
- 348. Tails: 10 Part 3 Enter 5 numbers: Enter a number: 4 Enter a number: 8 Enter a number: 2 Enter a number: 3 Enter a number: 5 You entered: [4, 8, 2, 3, 5] The average of those numbers is: 4.4 That same list with 1 added to each numb B.4.2 Tips: Part 1 • Generate the output for part one using two nested for loops. • Create a separate variable to store num- bers that will be printed. This code in part 1 is necessary to help under- stand nested loops, which are used in all but the
- 349. simplest programs. B.4.3 Tips: Part 2 • Use two different variables, one that keeps count for heads and one for tales. • Create a loop that will repeat 20 times. • Generate a random number from 0 to 1. • Use if statements to select and print if it is a head or tail flip based on if it is 0 or 1. • Print the heads or tales results on one line. They are word-wrapped in the example output but your program doesn’t need to word-wrap. • Add to the total count. • Once the loop is done, print how many flips came up as heads, and how many were tails. This code uses the basic pattern in doing any sort of statistical simulations, and also shows
- 350. how to conditionally total values. B.4.4 Tips: Part 3 • Allow the user to enter a number. • Add the number to a list. • At the end of the loop, print the list. • Use a loop to total of all numbers entered. • Divide the total by five to get the average. • Use a loop to add one to each number in the list • Print the resulting list (with the 1 added to each element). This part demonstrates how to create a list, how to total a list, and how to change each item in a list. What to turn in: All three parts should be in one program file. Name your file lab 04 - lastname.py and upload to Moodle.
- 351. B.5 Lab: Animation B.5.1 Requirements Modify the Create-a-Picture lab, or start a new one. Animate your lab. Try one or more of the following: • Move an item across the screen • Move an item back and forth • Move up/down/diagonally • Move in circles • Have a person wave his/her arms. • Stoplight that changes colors Remember, the more flair the better
- 352. B.6 Lab: Bitmapped Graph ics and User Control Create a graphics based program. You can start a new program, or continue with a prior lab. This program should: • Incorporate at least 1 function that draws an item on the screen. The function should take position data that specifies where to draw the item. (Note: You will also need to pass a reference to the “screen”. An- other note, this is difficult to do with im- ages loaded from a file. I recommend do- ing this only with regular drawing com- mands.) • Add the ability to control an item via mous keyboard, or game controller. • Include some kind of bit-mapped graph- ics. Do not include bit-mapped graphics as part of your “draw with a function”. That won’t work well until we’ve learned
- 353. a bit more. • Include sound. You could make a sound when the user clicks the mouse, hits a key, moves to a certain location, etc. If the sound is problematic, you may skip this part. Example code: http://cs.simpson.edu/?q=pyt It is ok to use code from prior labs. Turning in this lab does not count as points to prior labs.
- 354. B.7 Lab: Functions Create one python program that has the follow- ing: 1. Write a function called min that will take three numbers and print the minimum. With a properly constructed function, it should be possible to run the following: print ( min (4 ,7 ,5) ) print ( min ( -2 , -6 , -100) ) print ( min ( " Z " ," B " ," A " ) ) With this result: 4 -100 A 2. Write a function called box that will out- put boxes given a height and width. Call- ing the function with the following:
- 355. box (7 ,5) print () box (3 ,2) print () box (3 ,10) Should result in: ***** ***** ***** ***** ***** ***** ***** ** ** ** ********** ********** **********
- 356. 3. Write a function called find that will take a list of numbers, list, along with one other number, key. Have it search the list for the key. Each time your function finds the key, print the position of the key. Calling the function like this: list =[36 , 36 , 79 , 96 , 36 , 91 , 77 , 33 , 19 , 3 , 34 , 70 , 12 , 12 , 54 , 98 , 86 , 11 , 17 , 17] find ( list ,12) find ( list ,91) find ( list ,80) It should print out: Found 12 at position 12 Found 12 at position 13 Found 91 at position 5 4. Write one program that has the following: • Functions:
- 357. – Write a function named ‘‘create - list" that takes in a list size and return as list of random num- bers from 1-6. i.e., calling create - list(10000) should return 10,000 random numbers from 1-6. – Write a function called count - list that takes in a list and a number. Have the function re- turn the number of times the spec- ified number appears in the list. – Write a function called average - list that returns the average of the list passed into it. • Main Program: – Create a list of 10,000 numbers. – Print the count of 1 through 6. – Print the average. • Extra: – If you finish the problems above
- 358. during class, create a function to calculate standard deviation. Use the average list function you created above. Import the math library and use math.sqrt( ) http://en.wikipedia.org/wiki/
- 359. B.8 Lab: Webkinz Webkinz are stuffed animals created by the Ganz company. A primary feature of Webkinz is the ability to interact with your pet in a virtual on-line world. After getting the on-line pet, customers may spend their time buying virtual rooms, and virtual objects to go in those rooms. Players in Webkinz World may go between different “rooms”. Each room can have multi- ple objects in them. Rooms are two dimensional grids and objects are placed on these grid loca- tions. Some objects will take up more than one grid location such as the bed shown in the ex- ample below. This example shows a Webkinz room, and also how it is divided up into a grid.
- 360. B.8.1 Description Unfortunately, this lab does not involve draw- ing the graphics of a Webkinz type of game. What this lab does involve is creating some of the classes that would be involved in represent- ing the objects in such a game. To start this lab begin with the following template code: # Create a bed bed = GameObject ( " Bed " ) bed . width =2 bed . height =2 bed . direction =1 # Table table = GameObject ( " Table " ) table . width =2 table . height =1 table . direction =2 # Pet puppy = Pet ( " Puppy " ) puppy . name = " Spot "
- 361. puppy . direction = 2 puppy . state = " Standing " # Food treat = Food ( " Apple Pie " ) treat . health_value = 2 treat . happiness_value = 10 # Create a room snowRoom = Room () snowRoom . roomName = " Snow Room " # Add objects to the room snowRoom . add ( bed ,0 ,0) snowRoom . add ( table ,1 ,4) snowRoom . add ( puppy ,5 ,4) snowRoom . add ( treat ,5 ,5) # Print everything in the world snowRoom . print () The classes this code uses have not been cre- ated yet. The goal of this lab is to create a set of classes and relationships between those classes that will represent a Webkinz world.
- 362. B.8.2 Desired Output When run with the class specifications for this lab along with the example code above, the pro- gram should produce the following output: Room: Snow Room Game Object: Bed ...is at: [0, 0] Game Object: Table ...is at: [1, 4] Pet type: Puppy Name: Spot State: Standing ...is at: [5, 4] Food type: Apple Pie Health: 2 Happiness: 10 ...is at: [5, 5]
- 363. B.8.3 Instructions 1. Create classes for GameObject, Food, Pet, and Room. All classes should be created before any of the example code. 2. Create parent/child relationships where ap- propriate. Remember that parent/child relationships are is a relationships. A room may have a pet, but that does not make a room a parent class to a pet. A pet is not a room. 3. Create attributes for objectType, height, width, direction, health value, happiness value, name, state, and roomName in the appropriate objects. 4. Create a constructor for GameObject that takes in and sets the objectType. 5. Create attributes for item list, position - list, and room list in the appropriate
- 364. classes. Each of these should be set to an empty list by default. 6. Create a method for adding a room to the world. This should append the room to the list of rooms in the world. 7. Create a method for adding an object to a room in the appropriate class. This meth- ods should append both the object and position to the appropriate lists. Append each position as a two element list, such as [x,y]. 8. Create print method in the Room class that prints the room name. 9. Add to the prior method a for loop that will call the print method of each object in the room. 10. Add a print method to the GameObject class to print the object time.
- 365. 11. Add print methods to Food and Pet that also print the extra attributes in those classes. 12. Add to the for loop in the print method of Room, a print statement that will print the coordinates of the objects. 13. Run the program and make sure the out- put matches the sample output.
- 366. B.9 Lab: Sprite Collecting This lab practices using Python modules and Pygame sprites. • Create a directory lab 10 lastname, and put all of the lab-related files in this di- rectory. • Start with the sprite collect blocks.py program at http://cs.simpson.edu/?q=python_pygam • Move the Block class to a new file and im- port it as a module (library). Make sure it still works afterwards. • Modify it so the player moves with the keyboard. Take a look at the move sprite keyboard smooth.py program also avail- able at that page. • Create another list of sprites, one that de- creases the player score instead. • Color the player blue, the good sprites green, and the bad sprites red. Or use
- 367. graphics to signify good/bad sprites as shown in the sprite collect graphic.py exam- ple file. • Rather than simply use print to display the score on the console, display the score on the graphics window. Go back to simple - graphics demo.py for an example of dis- playing text. When the lab is complete, zip/compress the folder and submit it in Scholar.
- 368. B.10 Lab: Spell Check This lab shows how to create a spell checker. To prepare for the lab, go to: http://cs.simpson.edu/?q=python_pygame_exam and download the following files: • AliceInWonderLand.txt - Text of “Alice In Wonderland” • AliceInWonderLand200.txt - First chap- ter of “Alice In Wonderland” • dictionary.txt - A list of words B.10.1 Requirements Write a single program in Python that checks the spelling of the first chapter of “Alice In Wonderland”. First use a linear search, then use a binary search. Print the line number, along with the word that does not exist in the dictio- nary.
- 369. B.10.2 Steps to complete: 1. Create a file named lab 11 lastname.py 2. It is necessary to split apart the words in the story so that they may be checked in- dividually. It is also necessary to remove extra punctuation and white-space. Un- fortunately, there is not any good way of doing this with what has been taught so far. The code to do this is short, but a full explanation is beyond the scope of this class. import re # This function takes in a line of text and returns # a list of words in the line . def split_line ( line ) : return re . findall ( ’[A - Za - z ]+(?: ’[ A - Za - z ]+) ? ’ , line ) This code uses a regular expression to split the text apart. Regular expressions are
- 370. very powerful and relatively easy to learn. To learn more about regular expressions, see: http://en.wikipedia.org/wiki/Regular_ 3. Read the file dictionary.txt into an ar- ray. Go back to the chapter on Searching, or see the searching example.py for ex- ample code on how to do this. This does not have anything to do with the import command, libraries, or modules. 4. Close the file. 5. Print --- Linear Search --- 6. Open the file AliceInWonderLand200.txt 7. Start a for loop to iterate through each line. 8. Call the split line function to split apart the line of text in the story that was just read in.
- 371. 9. Start a nested for loop to iterate through each word in the line. 10. Use a linear search check the current word against the words in the dictionary. Check the chapter on searching or the searching - example.py for example code on how to do this. When comparing to the words in the dictionary, convert the word to upper- case first. For example: word.upper(). 11. If the word was not found, print the word and the line that it was on. 12. Close the file. 13. Make sure the program runs successfully before moving on to the next step. 14. Print --- Binary Search --- 15. The linear search takes quite a while to run. To temporarily disable it, it may be
- 372. commented out by using three quotes be- fore and after that block of code. Ask if you are unsure how to do this. 16. Repeat the same pattern of code as before, but this time use a binary search. Much of the code from the linear search may be copied, and it is only necessary to replace the lines of code that represent the linear search with the binary search. 17. Note the speed difference between the two searches. 18. Make sure the linear search is re-enabled, if it was disabled while working on the bi- nary search. 19. Upload the final program. No need to in- clude the dictionaries or other supporting files.
- 373. B.10.3 Example Run --- Linear Search --- Line 3 possible misspelled word: Lewis Line 3 possible misspelled word: Carroll Line 46 possible misspelled word: labelle Line 46 possible misspelled word: MARMALA Line 58 possible misspelled word: centre Line 59 possible misspelled word: learnt Line 69 possible misspelled word: Antipat Line 73 possible misspelled word: curtsey Line 73 possible misspelled word: CURTSEY Line 79 possible misspelled word: Dinah’l Line 80 possible misspelled word: Dinah Line 81 possible misspelled word: Dinah Line 89 possible misspelled word: Dinah Line 89 possible misspelled word: Dinah Line 149 possible misspelled word: flavou Line 150 possible misspelled word: toffee Line 186 possible misspelled word: croque --- Binary Search --- Line 3 possible misspelled word: Lewis
- 374. Line 3 possible misspelled word: Carrol Line 46 possible misspelled word: label Line 46 possible misspelled word: MARMA Line 58 possible misspelled word: centr Line 59 possible misspelled word: learn Line 69 possible misspelled word: Antip Line 73 possible misspelled word: curts Line 73 possible misspelled word: CURTS Line 79 possible misspelled word: Dinah Line 80 possible misspelled word: Dinah Line 81 possible misspelled word: Dinah Line 89 possible misspelled word: Dinah Line 89 possible misspelled word: Dinah Line 149 possible misspelled word: flav Line 150 possible misspelled word: toff Line 186 possible misspelled word: croq